

- Hermes FFXIV Guide - February 2, 2023
- Every Final Fantasy Game Ranked - January 28, 2023
- Hydaelyn FFXIV Guide: Facing your Maker - January 22, 2023
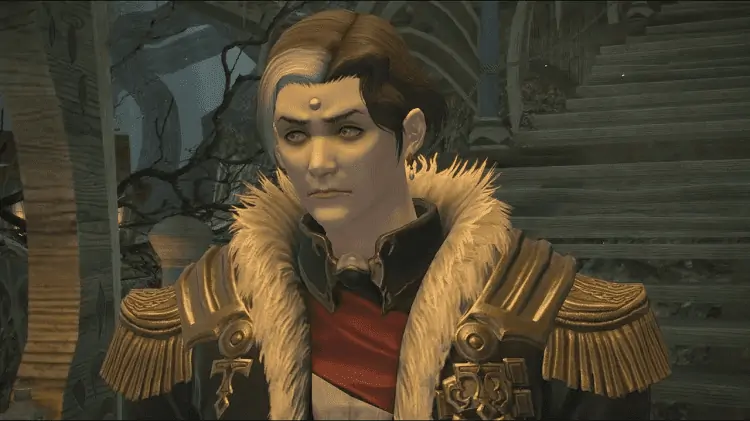
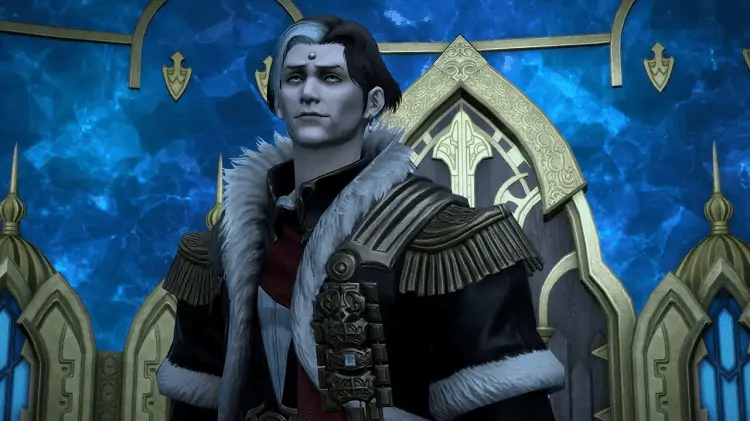
As a Final Fantasy die-hard fan, I have spent several hours pouring my heart and soul into loving and hating antagonists with names so hard to spell and pronounce that… honestly? I lost track of them. Emet-Selch, however, could not be further from that statement.
This guy’s striking visual design, fantastic voice acting, multi-faceted mannerism, and controversial yet well-founded motivations make him by far the most memorable and well-written villain of the entire franchise.
Even though Emet-Selch is first introduced in the game as the villain, you will learn his motivation during the journey through Shadowbringers.
He is one of the last beings to have seen the cruel demise of the old world without tremors. At the end of this expansion and in The Dying Gasp trial, you are tasked with the quest of going up against this character, who, besides being complex, apparently packs quite a punch.
This Emet Selch Guide will cover both the lore aspects of Emet-Selch’s backstory and motivation as a villain, as well as the moveset, mechanics, and strategies to beat him on the battlefield.
Emet-Selch, at a Glance
I teach you how to beat Hades in the arena and attempt to explain why this guy with flawless cheekbones took the Final Fantasy fanbase by storm using his sarcastic charm and questionable morals.
Emet-Selch’s Backstory
The Origins
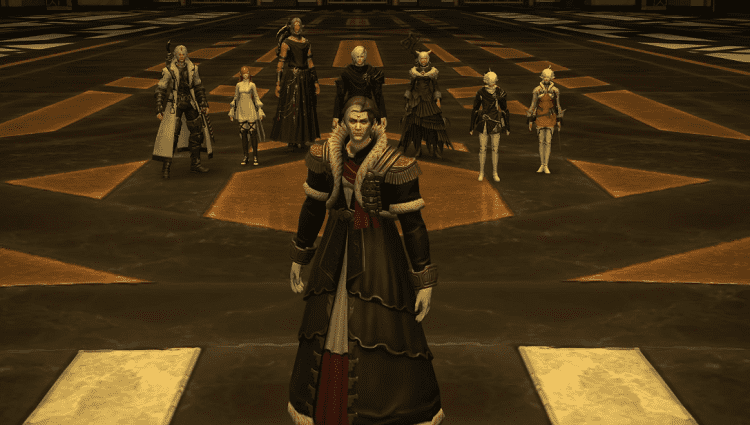
Emet-Selch is an Ascian from thousands of years ago on Atheris, the same star we’re on today. His actual name is Hades. He stood out among the Ascian for several gifts, including vast intelligence, responsibility, and soul sight.
He was chosen to fill the seat of Emet-Selch on the convocation of 14, a group of guardians that protect the city of Amaurot and the star. Emet’s best buddies were Hythlodaeus and Azem. The former was nominated to Emet’s seat first, but he declined and recommended Hades. Azem also served on the convocation.
Going Downhill
Emet-Selch and the convocation faced their most significant challenge in the final days. That’s the wave of Dynamis that twisted their creation magics into blasphemies that ravaged the star.
Another convocation member, Van Daniel theorizes that disrupting the flow of Aether currents could stop the final days from happening, so they plan to summon the dark, primal Zodiark.
His overwhelming power would shield Aetheris, but only with significant amounts of Aether. Half of the Ascianpopulation must sacrifice themselves to bring Zodiark to life. It’s a controversial decision that motivates Azem to leave the convocation. Hythlodaeus volunteers to be part of the sacrifice.
Emet-Selch tries to convince them both to reconsider, but he fails. The convocation makes their final preparations, crafting crystals imbued with their memories and abilities. Despite Azem’s defection, Emet-Selch creates a crystal for them in secret.
Zodiark is born, and the star is protected for now, but they need to repair the desolate landscape, so another half of the agents give up their lives. Their world is restored, but the people, friends, and loved ones are still lost.
So the convocation decides a third sacrifice of the lesser races of Atheris must be made to bring all of those Ascian back. Unfortunately, this third sacrifice never happens.
Dog Days are not Over Now
Vernat, a former convocation member, feels the sacrifices were too great and the world belonged to the new lives on the planet now. She and her followers summon the Primal Hydaelyn to battle Zodiark and sunder the star.
Their world and everyone in it are split into 14 pieces. Everyone except Emet-Selch, and two other convocation members, Elidibus and Lahabrea.
A Tale of Reconstruction
These three, known as the Unsundered, worked together to escape the Sundering spell, landing in the rift between dimensions. Their friends, home, and society is no more. Everything they ever loved or cared for is gone in an instant.
All the pain and sacrifice and nothing to show for it. The three Unsundered had to do something.
Unfortunately, the 14 shards didn’t sit well with them themselves. These bastardized reflections of their once-perfect world are insulting to everything the Ascian stood for, so the Unsundered hatch a plan: they become the Ascian, recruiting shards of former convocation members to rejoin the shards with the source.
This would restore their God and their home, and once Zodiark is at his full strength, they can finally make their third sacrifice and bring the Ascian back to the star.
The Battle, Explained
This is the final new trial made available by Patch 5.0 in Final Fantasy XIV Shadow Bringers.
Phase 1
Moveset
|
Attack |
Description |
|
Ravenous Assault |
Unleashes a heavy-hitting tank buster on the primary target |
|
Bad Faith |
Casts two AoE blasts in the direction of pointing arrows |
|
Double |
Causes the following action to hit twice |
|
Dark Eruption |
Casts circles on players and the platform |
|
Broken Faith |
Spawns discs that drop to the platform and explode on impact |
|
Shadowspread |
Performs two sets of AoE attacks |
Mechanics
The fight begins with Ravenous Assault, to which you should cooldown and heal as necessary. When the boss casts Bad Faith, he’ll move into the center and spawn two massive walls on either side of him.
Each wall will have several arrows pointing in a specific direction. To avoid this attack, you will need to move to the side that does not have arrows actively pointing in their direction.
The boss will then cast Double, which makes the next action initiated to be executed twice. This is followed by Dark Eruption, which will mark up players with these circle AoE markers and place a set of circles AoEs on the ground.
Affected players need to move apart to avoid overlapping damage, and everyone needs to ensure they’re not standing in any ground AoE circles. Broken faith will spawn several orange circles around the platform and call down discs in these locations.
Once a disk reaches the section of the platform, it will explode in an AoE circle much more comprehensive than the original orange circle. This explosion will deal damage and debuff anyone caught inside of it.
Since these disks are coming down at different speeds, it’s a random pattern. Players will have to stay away from the areas above to explode and dodge as necessary to avoid excess damage and debuffs.
After another Double, the boss will cast Shadow Spread, where players must dodge two sets of aliens coming out of the boss.
-10% HP
These mechanics will repeat with some overlap until you get him below 10%, and he becomes invulnerable. At this point, he’ll begin to charge up his Fervor of the Ascian’s gauge while spawning waves of adds.
Tanks will need to pick up these loose ads as soon as possible. In the waves within vulnerable Caster ads, affected players need to spread apart the circle to avoid overlapping, while the free players group up on the stack of markers to share the damage.
You’ll deal with five waves of ads and the respective area text before the boss casts Ascian Dark IV. You will die if he hits a 100 on his gauge before you destroy all of the ads. So be sure to cool down, heal, and prepare for the next phase.
Phase 2
Moveset
|
Attack |
Description |
|
Titanomachy |
Deals raid-wide damage blast |
|
Shadowstream |
Unleashes a long line blast through the center of the platform |
|
Echo of the Lost |
Swipes across the platform with one arm |
|
Polydegmon’s Predation |
Slams platform sides with both arms |
|
Hellborn Yawp |
Marks up both tanks for ranged AoE attacks |
|
Captivity |
Marks up two players with large AoE circles |
|
Aetherial Gaol |
Traps players and kills anyone inside it |
|
Dual Strike |
Deals damage to several players |
Mechanics
Luckily from here on out, if you wipe, you will restart at the beginning of this new phase. In this phase, Hades is massive and will not move from the platform’s edge. He’ll target the primary target with a constant barrage of auto-attacks, so healers and tanks beware Titanomachy will deal a high rate of damage.
Shield and heal through this as necessary. Shadow Stream will blast the platform directly in front of the boss, and all players will need to move to the sides of the platform to avoid the attack.
Dual Strike will mark players with these circle AoE markers and spread these apart to avoid overlapping that damage. When the boss casts Echo of the Last, he’ll reach out with one arm and swipe across the platform.
To avoid significant damage and debuffs, all players must quickly move to the side of the platform behind his outstretched arm Polydegmon’s predation will have the boss slamming down onto the outer edges of the platform.
Players must move into the platform’s middle to avoid getting hit. Hellborn Yawp will mark up the two tanks with these familiar or shaker markers and eventually target them for a long conal attack.
The tanks can move to the boss’s side to beat these attacks from the rest of the center. Captivity will target two players with large AoE circle markers and stun them, and anyone caught inside the attack before pulling them into an Aethereal Gaol.
The affected players will have to move away from others to avoid getting too many people caught in this trap. Then all free players will need to immediately burn down the jail to release the players before the chorus of the last cast goes off… or they will die.
The next Dual Strike attack will add thin tethers and markers to more players. Again, all affected players will need to spread apart to avoid overlap.
Next, the platform will turn black, and all players will be affected by Doom. Five white circles will form on the platform to remove every one.
To remove everyone’s Doom debuff, you must have at least one player stand in each of the five circles, or you will die. Wall of the lost will knock back all players from the center of the platform. Make sure you’re not too close to the edge during this time.
One-time Attacks
You’ll notice that mechanics begin to repeat with increased overlap. Don’t forget to stand in the white circles to remove everyone’s Doom. Eventually, the boss will cast Life in Captivity, chaining all players and beginning an active time event.
Spam those buttons to break yourself free. At this point, the boss will continuously cast The Dark Devours, dealing high raid extensive damage and slowly covering the platform in darkness.
Healers will need to be ready with those shields and heals, and using personal and raid cooldowns at this time is highly recommended.
Once the entire platform is fully engulfed in shadow, all players will be affected by a bleed, and the boss will cast one final Black Cauldron. You will die if this cast goes off, so push out that damage as fast as possible to get him down first.
FAQs
Question: What are the Rewards for Beating Emet-Selch?
Answer: After beating Hades, Emet-Selch’s real name, and the one you’ll see during the fight, you will be rewarded with Hades Card and ten poetics.
Question: What is the Recommended Level for the Trial of the Dying Gasp?
Answer: The Dying Gasp is a level 80 trial, and the player’s level will be synched upon entry.
Question: How do You Unlock the Dying Gasp?
Answer: This trial is unlocked automatically once you have progressed enough in the story. Remember that Hades’ trial is the final one from the Shadowbringer expansion, so once you have advanced up to that point, the trial will become available.
Parting Words
The battle itself should not give you too much trouble as long as you have all of Hades’ moves and mechanics. If you have already beaten him, congrats!
You have done it. You have beaten Hades, Emet-Selch, and Final Fantasy’s most likable villain all in one raid. But, fret not; the contradictory feeling of pride and pity is more than normal. It shall pass.
This final trial is, in my honest fangirl opinion, just fantastic. It lives up to all the hype it gets and gives a proper sendoff to a great character.