

- Hermes FFXIV Guide - February 2, 2023
- Every Final Fantasy Game Ranked - January 28, 2023
- Hydaelyn FFXIV Guide: Facing your Maker - January 22, 2023
There’s no shortage of plot twists in Final Fantasy XIV. Endwalker’s teasers led an entire fanbase to think Zodiark would be waiting for the Warrior of Light at the end of the road. Needless to say, we were hyped.
But then, all of Eorzea’s eyebrows rose collectively as soon as we realized that Zodiark was the first trial, not the last. Whispers and murmurs filled the community. Who could await us at the end of the line, then?
None other than your patron, Hydaelyn.
Having the goddess who had been supporting me since day 1 turn on me really took a toll on me. For over 10 years, four expansions, and countless patches, I strode confidently into battle, knowing that my patreon Hydaelyn had my back.
I know Square Enix is big on plot-twists, especially after the whole Kefka business in Final Fantasy XVI. But betrayal still gets me every time.
Facing your maker packs an emotional punch. But Hydaelyn comes ready with shape-shifting and raid-wide mechanics to wipe you out. So, you better get it together before you walk into the trial.
In this Hydaelyn FFXIV Guide, we’ll go over a bit of Lore about Hydaelyn and the whole strategy on how to beat her.
?file=Hydaelyn_Full.png)
TL; DR
This is one of Final Fantasy XIV’s final battles, so you won’t have it easy. If you want to beat a primal as brutal as Hydaelyn, you are better off reading the complete guide. Still, here is a short version for your convenience:
Movesets
Heal and Shield
These are the moves that you should heal and shield through.
- Hero’s Radiance
- Halo
- Radiant Halo
Stack Together
If you want to avoid getting wiped, you better stack together with your party for these ones.
- Shining Sabre
- Mousa’s Scorn
- Echoes
Special Mechanics
These movesets follow a special mechanic that cannot be simplified.
- Crystallize
- Weapon Switch
- Lightwave
- Aureole
Hydaelyn FFXIV Guide
?file=Hydaelyns_test_to_the_party_from_FFXIV.png)
A Realm Reborn’s Hydaelyn
Imagine that you were randomly approached by a giant talking crystal that called itself Earth. Then it gave you the power to see other people’s pasts and fight giant monsters.
I’m sure you’d be a little confused, too, right?
Hydaelyn represents all the light on the planet of Eorzea. She is the patron goddess of the warrior of light. She’s the origin of both the blessing of light and the echo. When she appears to the Warrior of Light, she appears as a giant crystal and often provides her aid in battle. What a pure source of power and energy she is.
Or is she?
Who is Hydaelyn, Really?
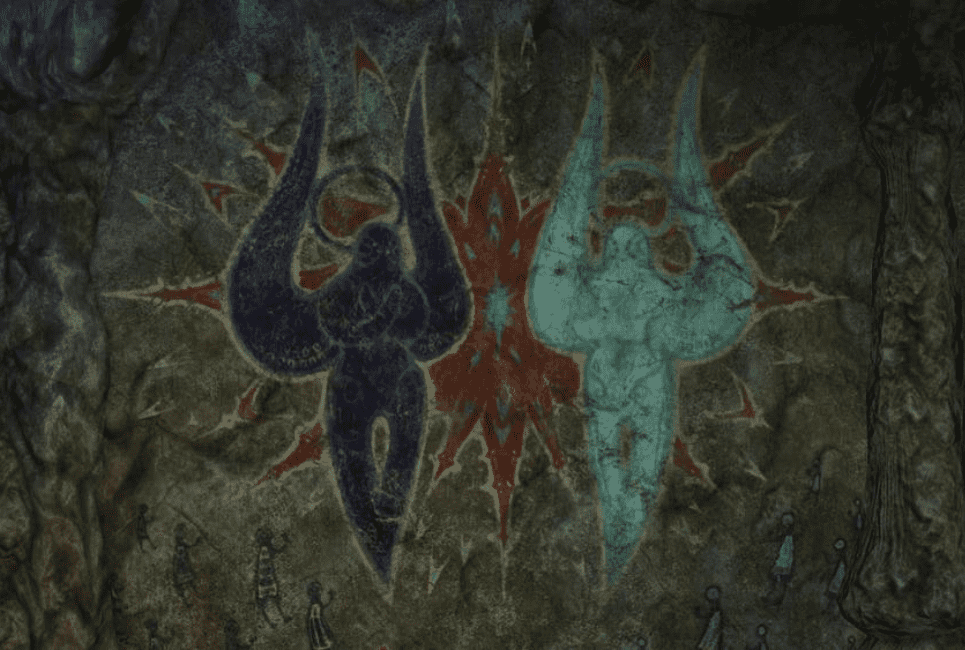
According to Emet Selch, who’d never lied to us ever because we’re besties, both Zoadiark and Hydaelyn are primals summoned by the Ancients themselves back before the world was split into the source and the 13 reflections.
According to his side of things, the original world was facing a vast calamity, so the Ancients, who were masters of creation magic, summoned Zodiark, and it apparently fixed the problem.
For a price.
Summoning Zodiark resulted in half of the Ancients losing their lives to bring him into existence, and the remaining half were sacrificed to provide them with the necessary aether to stave off the calamity.
Many of the other Ancients decided that enough had already been sacrificed to Zodiark. So instead, they planned to summon another being to destroy Zodiark before you could take more from them. That being was, of course, Hydaelyn. Hydaelyn fighting and striking down Zodiark split the world into 14 pieces. In other words, because Hydaelyn was created by Ancient creation magic, Hydaelyn and Zodiark are, in fact, technically speaking, both primals.
This raises some interesting questions about the Warrior of Light’s actions and free will since the player ultimately has complete control over their character’s actions.
Now, it’s up to you to bring down the being you once thought to be your maker.
Battle Strategy
Phase 1
| Hero’s Radiance | a heavy-hitting raid-wide blast |
Make sure you shield and heal as necessary. This attack will occur throughout the encounter, but its name will change based on what weapon she currently has active. However, the mechanic is still the same, so whenever you see a Radiance attack, be ready with those Shields and heals.
| Shining Sabre | targets a random player for a massive hit. |
Shining Sabre will target a random player for a massive hit. All players will need to stack up to share this damage.
| Crystallize | deals damage in the form of water and bubbles, ice, or earth. |
Throughout the encounter, Hydaelyn will cast Crystallize. Players will need to pay attention to the element being used, as this will determine the type of attack to occur soon. Water, indicated by the visible and audible bubbles, will require players to split into two light parties. Each healer will be targeted for massive shareable damage.
Ice indicated by the icicles and Shiva-like sound effects will require players to spread away from one another.
Earth, indicated by the brown earthy effects, will require all players to stack together to share the damage.
| Weapon Switch | switches weapons and deals damage. |
This mechanic is often, but not always, paired with hiding and swapping her weapons. There is no cast bar for this; the only indicators are the colored icons encircling the boss.
The green staff indicates that the players must move away from her to avoid the incoming point-blank AOE attack.
The red chakrams indicate that players must stand inside her hip box to avoid the incoming room-wide doughnut attack.
The blue blades indicate that the players need to move to her relative intercardinal points around the buffs to avoid the significant incoming cross-attack through her.
At the beginning of the fight, Hydaelyn will always draw from the Water Crystallize first and pair it with the green out or red in weapon mechanic. Players must be ready to move in or out and quickly stack on their assigned healer to share the crystallized water damage.
The next Crystallize will always be ice paired with the opposite weapon mechanic that did not occur in the first combo. Players must move in or out and then quickly spread to their assigned positions to avoid overlapping damage.
| Mousa’s Scorn | a double stack tank buster that can be involved by one tank or shared by both tanks with cooldowns. |
| Aureole | unleashes a massive front-back or side-to-side conal attack. |
The boss can also cast Aureole or Lateral Aureole. This is a massive front-back or side-to-side conal attack that players will need to avoid. Aureole will have players moving to her sides to avoid this.
Lateral Aureole will have players moving in front and behind her to avoid. She casts each version randomly, so be ready to look at the cast bar and move appropriately.
Phase 2: The Add Phase
| Crystal Phase | Spawns 2 ads and places several crystals in the arena. |
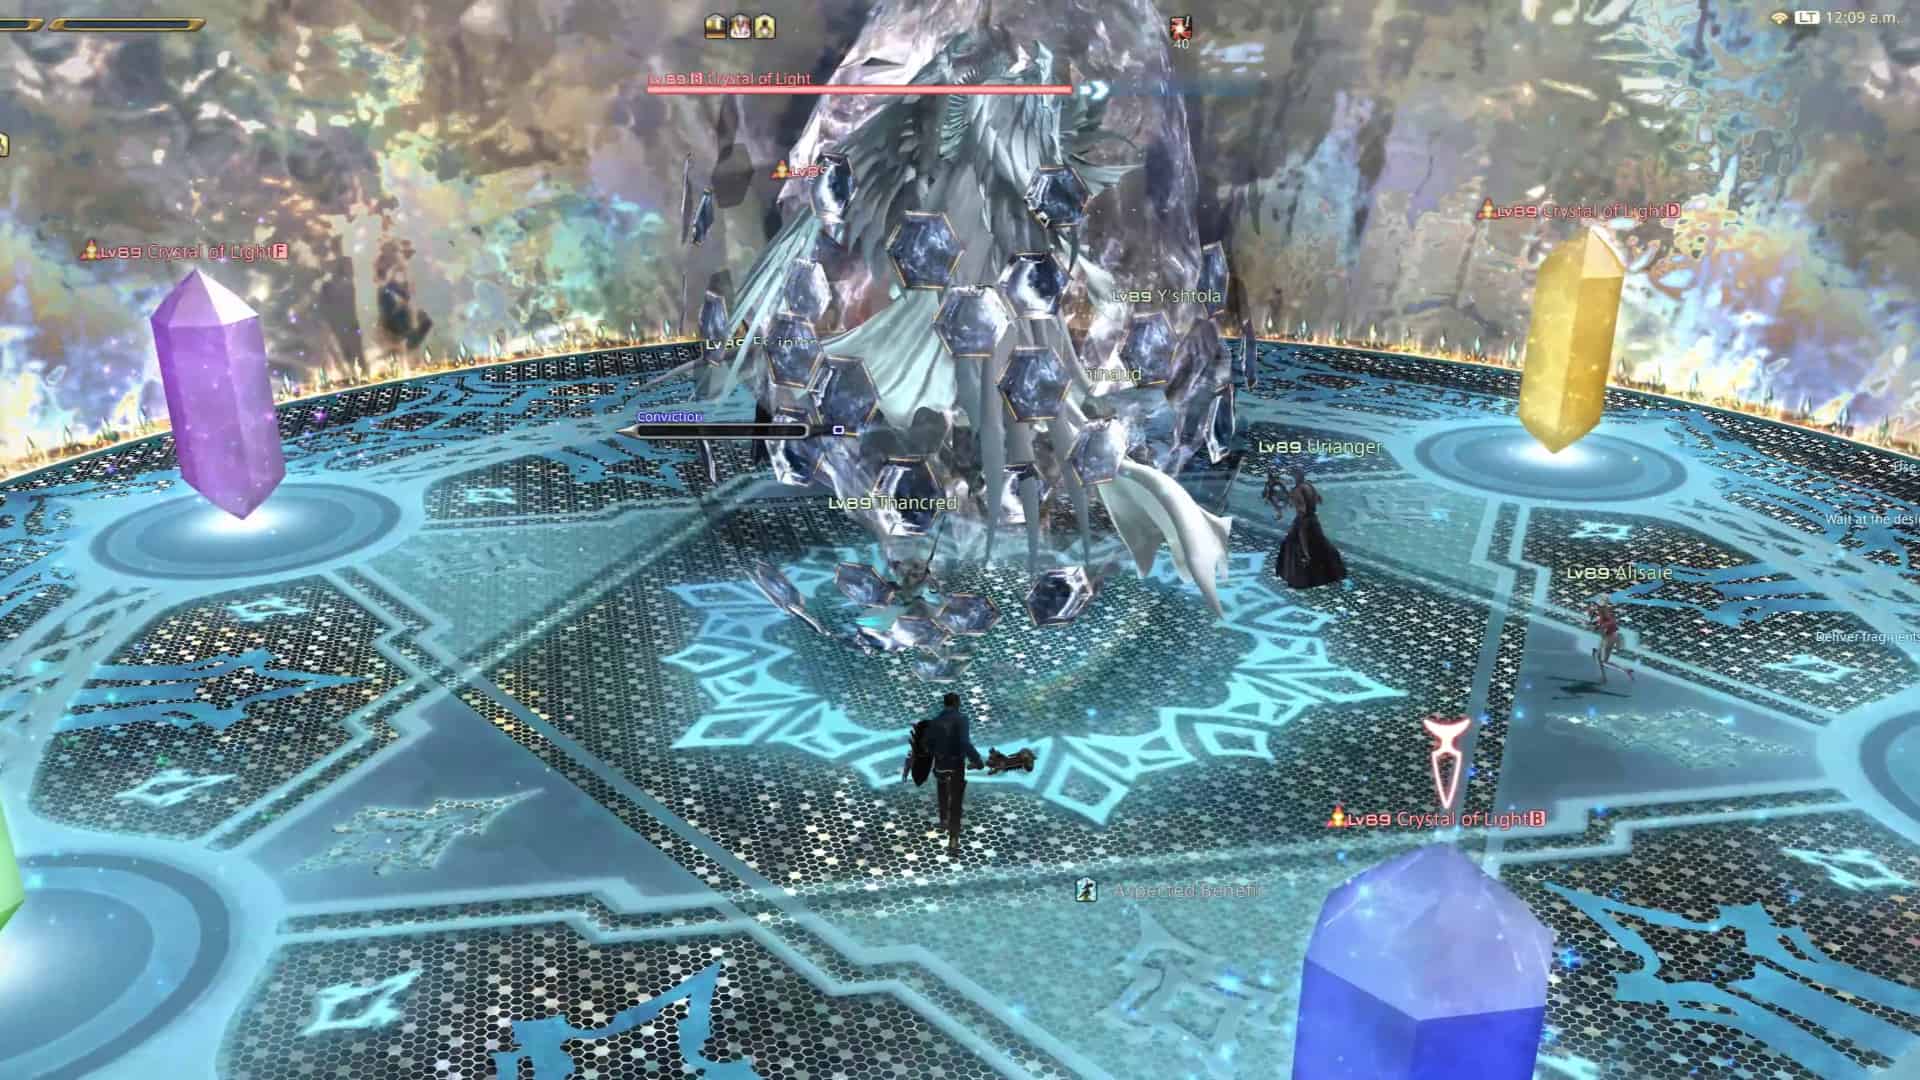
At this point in the fight, the boss will become invulnerable. Six crystals will form over the platform, and two Echoes of Hydaelyn adds they will spawn in the East and West.
One set of three crystals, either in the north or the South, will glow and cause the boss’s Conviction gauge to fill up faster. These crystals should be destroyed first. You will die if the gauge hits 100 before all the crystals are destroyed.
Each time you destroy a crystal, it will deal said damage to the ads.
The ads will buff nearby crystals and each other, increasing their damage.
To deal with this, the two tanks can pick up each ad and move them away from the glowing crystals. Then, as the group destroys each crystal, the tanks will move around the platform opposite the group.
There’s great tank damage in this phase, so be sure to pop your cooldowns and heal as necessary.
Once all crystals and adds are destroyed, Hydaelyn will cast her ultimate attack, and the encounter will continue. Again, remember to shield and heal.
Phase 3
| Halo | Deals high raid-wide damage. |
Cool down and heal through this.
| Lightwave | causes large waves of light to spawn outside of the arena, and several crystals will form around the platform |
These waves will slowly move across the platform, dealing high damage and debuffs anytime they hit a crystal.
To deal with this, the group will have to run to the crystal and then use that crystal to hide behind in line of sight the crystals about to get run over by the waves. Doing so will allow you to avoid the high damage and debuffs altogether.
| Infralateral Arc | one random tank, healer, and damage dealer will be targeted with a large conal attack and debuff |
The players must spread into role groups at each northern crystal to avoid overlapping the three targeted attacks.
They will also use the crystals to hide behind the waves, hitting the crystal in the south. Damage dealers can move to the center crystal while the tanks or healers stay or run to the far crystal, depending on your group’s preferences. As long as each role is spread to an assigned crystal, you’re good.
| Lightwave 2 | causes large waves of light to spawn outside of the arena, and several crystals will form around the platform |
Next, Hydaelyn will cast Lightwave again. This time five crystals will spawn, and two waves will spawn on the outer edge of the arena in a sequence.
| Hero’s Glory | unleashes a massive frontal attack. |
All players must move behind her to avoid this. As soon as this attack goes off, the group must run to the crystal opposite the first moving wave to hide from the first crystal wave hit.
When that attack hits, rotate to the opposite side to hide from the second wave.
Next, run through the crystal to avoid the third hit and rotate to the opposite side to avoid the final crystal.
Hydaelyn will then jump to a specific platform area and cast Hero’s glory again. All players must immediately move behind her. There will always be a crystal behind where Hydaelyn jumps, and players will use this to hide from the final crystal hit.
Shield and heal through another Halo attack.
| Hero’s Sundering | targets the primary tank with a heavy-hitting frontal cone tank buster |
Don’t forget those cooldowns, and keep her facing away from others
Another Shining Sabre attack will force the group to stack.
This is followed by a Weapon Swap, and the group will either need to move in or out based on what weapon she swaps to.
Hydaelyn will then jump to the north middle of the platform and cast Parhelic Circle.
| Parhelic Circle | several green lines will spawn that will act as indicators of where incoming AOE circles will hit. |
Players must stay away from the center of the room and any of the tips of the green lines to avoid damage.
Phase 4
Some mechanics will begin to repeat until Hydaelyn jumps to the center and begins to cast Parhelion
| Parhelion | three sets of AoEs will radiate out from her, and she’ll throw her chakrams to the edge, which will eventually fly across the platform. |

Hydaelyn jumps to the center and begins to cast Parhelion. On their way back, Hydaelyn cast Water Crystallize, and players must be ready to split into their assigned groups to handle this.
Players can identify the safe spot between the first and second Chakram AoEs and spread in their light groups here, with one group closer to the boss and one further away.
Then, as soon as the Chakram starts to blast across the platform, players can rotate around the center towards the first set of Chakrams to blast through. This will allow them to dodge the other two sets of Chakrams easily.
Immediately after, players will need to correctly position for Aureole or Lateral Aureole, watch for another Weapon Switch and dodge appropriately.
| Radiant Halo | deals high raid-wide damage. |
Healers beware.
| Lightwave 3 | causes large waves of light to spawn outside of the arena, but without crystals. |
The next set of Lightwave will spawn four waves but no crystals. It’s just a matter of dodging the waves appropriately. The wave pattern is random, but two waves will always travel directly through the center. At the same time, the other two are always off-center, leaving one comfortable, safe zone.
The group will have to identify the safe area and move into it to avoid getting hit.
| Echoes | Targets a random player for stack-up damage. |
Stand together to share the damage.
| Lightwave 4 | causes large waves of light to spawn outside of the arena, but without crystals. |
Immediately after, another four waves will spawn. The two tanks will need to stack to share a tank buster. Everyone else will be targeted with AoE circles. All players will move to spread their circles while tanks share their buster.
As soon as all of these attacks go off, every player will need to quickly move into the center of the arena to avoid the waves as they move through the outer edges of the platform.
Another Water Crystallize followed by a Shining Sabre attack will have the group stacking up before quickly spreading with their assigned healers to share the damage.
After this, there’s another Weapon Swap to dodge, and the boss will again cast Lightwave. These mechanics will now repeat and are handled in the same manner.
FAQs
Question: What does Hydaelyn Extreme Drop?
Answer: Upon defeat, Hydaelyn drops a random level 580 weapon and a level 580 weapon coffer. Shiny loot for you!
Question: How do you Unlock Hydaelyn Extreme?
Answer: To unlock the Hydaelyn encounter, you need to meet the following requirements:
• Be level 90.
• Complete the MSQ called “Endwalker.”
• Talk to the Wandering Minstrel in Old Sharlayan (X:12. 7, Y:14. 2).
Question: How Long are Queue Times for Hydaelyn Extreme?
Answer: It depends on your job type.
• If you’re a DPS, it will take around 10-20 minutes.
• If you’re a tank or healer, it will take around 5-10 minutes.
• As usual, tanks and healers are scarce and very much in need.
Parting Words
The story of the Warrior of Light, Hydaelyn, and Zodiark comes to an end with an essential battle that cements Final Fantasy XIV as one of the best installments of Square Enix’s magical saga. It’s bittersweet right to the very end, packing an emotional punch and a sudden plot twist that few could have theorized on.
Seriously, I don’t know a single player who wasn’t taken aback by Hydaelyn’s reveal.
Leaving the shock aside, this encounter is meant to be a crucial point in the Final Fantasy XIV. As such, taking down a primal being is clearly not a walk in the park. You’ll have to tackle each of Hydaelyn’s mechanics with pinpoint precision and speed. There is no room for error, and everyone in the party has a role to play.
Thankfully, if you keep this guide around when queueing up to face the Minstrel’s Ballad second EX trial, you’ll run into no trouble.