
- Hermes FFXIV Guide - February 2, 2023
- Every Final Fantasy Game Ranked - January 28, 2023
- Hydaelyn FFXIV Guide: Facing your Maker - January 22, 2023
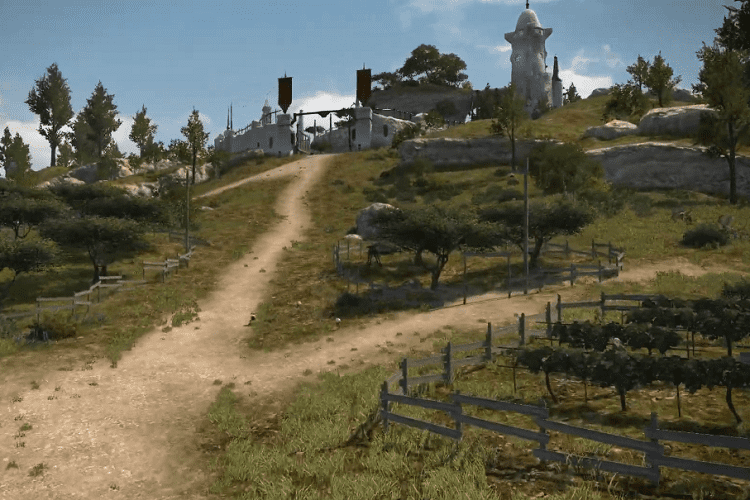
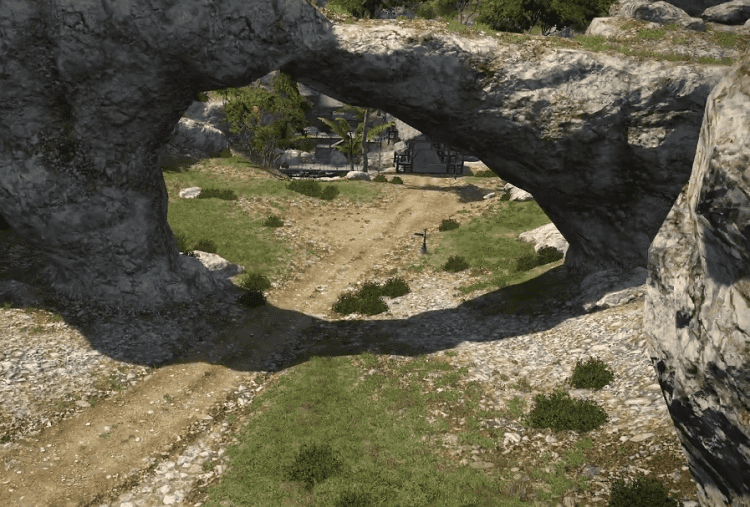
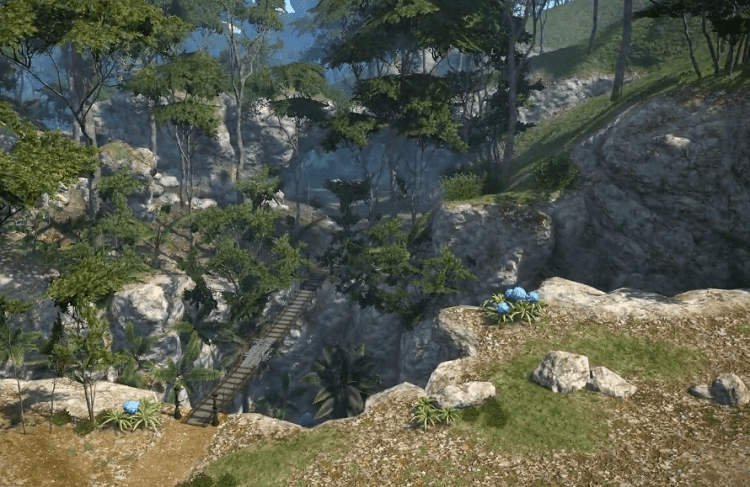
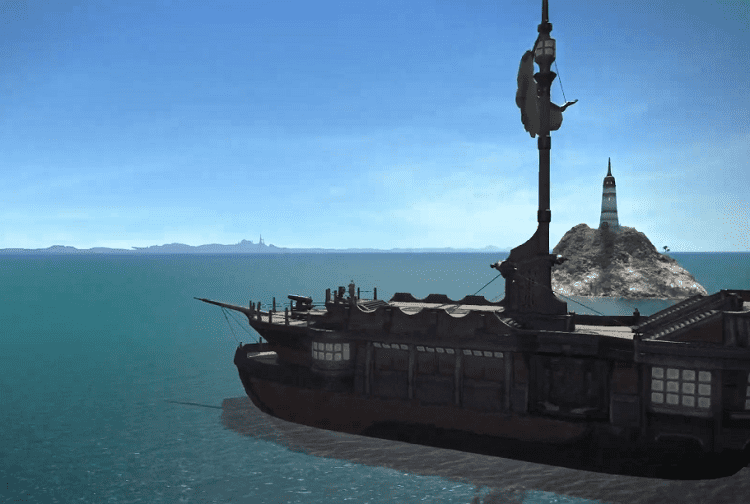
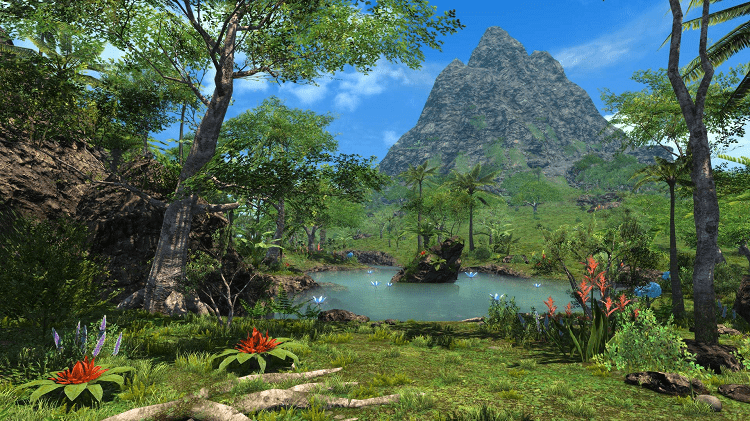
Final Fantasy XIV’s latest patch introduces Island Sanctuary to the game. This expansion adds a gorgeous, spacious island with tons of things to see for personalized space. It’s got multiple great beaches with their distinct feel, little hidden valleys and hilltops, and even little orchards.
I can see people coming here for years, explicitly for the screenshots, if nothing else. The weather changes, and the sunrises and sunsets are just stunning. And let’s not even get started on the music. The music is stellar.
The Final Fantasy XIV Island Sanctuary is primarily marketed as a casual, chill, relaxing experience to just be on an island and, well, switch off from the main plotline’s drama for a bit. I’m sure a vast portion of the fanbase is enjoying this content and getting through it in a healthy, progressive way.
Me? Oh, I devoured it from the second it was released. No chill at all.
That is why I am here, weeks after this patch’s release, to provide a thorough guide on how to unlock and master all of Island Sanctuary.
Interesting Read: Comprehensive FFXIV Main Questline Guide.
Bottom Line Up Front
This Island Sanctuary guide includes everything from general beginner tips to getting to the top rank on the Island and automating it thoroughly to make the most profit. Eager to learn? Let’s dive right in.
Unlocking Island Sanctuary

First, we want to start unlocking the Island Sanctuary. You need to complete the final quest from the Endwalker 6.0 questline. You don’t need any crafters or gatherers levels or any specific jobs. The content is entirely independent, which also includes independent bags for storage. Thank God.
So, the unlocked quest is obtained from Clueless Crier in Old Sharlayan (X:11.9 Y:11.0) . He’s right in the courtyard, right in the front. You can’t miss him. This will take you through a series of a few quests that will eventually land you at your Island Sanctuary.
Now, let’s take a moment and talk about leaving the island and getting back because this will be super important if you want to participate in the contest. So you can return to the island at any time.
By speaking with Baldin in Lower La Noscea (X:24.9 Y:34.8), you can return or even visit other players’ Island Sanctuaries, be your friend, party member, or company member. Think of it as returning to Gangos from Shadowbringers, where you’d go to the dome and enclose to get in.
Island Sanctuary Overview
Leveling Up and Completing “Visions”
The island has a leveling process where you can complete activities and gain a sanctuary rank. The more island Sanctuary rank you have, the more you can do on the island. Effectively it is a leveling system.
There’s also going to be the concept of what is called Visions, where you can follow a series of guided steps that will take you through some activities to obtain some sort of goal and fulfill that vision. You can think about it as a quest.
Islekeep’s Index, Your Isle Managing Tool
Early on, you will be given an item called the Islekeep’s Index, which will be fundamental because it will be your central hub, your primary user interface for the Island Sanctuary, and helps you keep track of everything going on on the island.
And yes, you will probably, at some point, if you get deep into the content, very much beating this; I drag it over well for my user interface, in particular to the most prominent location ever.
Modes and Actions
Let’s go over this real quick. First, you can change the mode with this top left corner element. The mode you are in gives you various actions you can execute. Depending on the mode that you’re in, you might not even see things like gathering nodes that don’t appear outside of gathering mode.
For instance, the tutorial will slowly introduce a total of like nine or ten modes. The first one will be Free mode which doesn’t activate any particular actions. Gathering mode allows you to view and gather items. Sow mode allows you to sow, or probably better known as plant seeds. Water mode allows you to water those planted seeds.
Coal mode allows you to remove those planted crops. Feed mode lets you feed your animals in your pasture pet. And the back-end mode allows you to interact with the pasture animals. It’s super cute.
Capture mode allows you to use Pokeball to capture the Pokemon out on the island to love and care for them. It’s kind of sweet, if you take away the whole capturing bit aside.
At the top right-hand corner, you can see the gear icon, which will be the sanctuary settings. You can do things like making your island private and not allow people to join. Like if you hate your free company, you should leave the free company, but you can block them from coming in, for instance.
Your New, Independent Inventory and Log
As for the other elements in this user interface is the Isleventory, aptly named because it’s precisely your Island Sanctuary bag, and it’s completely separate from your other bag, which everyone like me is so happy about that in it you can see things categorized with materials produce which has the starters and the produce.
You have the stock stores with slots for leavings, feed restraints, and tools.
Next, there will be the crafting and gathering log, which you want to check off and complete, and you will also use the crafting log to craft items. And the gathering log helps you pinpoint where there are going to be items on the map, which is enormous.
Managing Your Hideaway and Other Buildings
Hideaway management is where you have a long list of the different buildings in other areas like pastures or cropland and shows you a mini-map of all the locations you have built from here.
You can also review all the buildings you’re working on from the facility log board without being directed at the building post, which is super convenient if you’re in the middle of the island.
You don’t want to go back. You’re like, how many logs do I need for that one particular item? You can just check it through here. You don’t need to write on a piece of paper.
The Advanced Retainer System, but for Your Island
There will also be a button for material allocation, a future topic related to assigning mammets to make crafts like an advanced retainer system. That’s the best way I can think about saying it. If you know the retainer system of sending out retainers, think about a more complicated version but with a lot more convenience.
It’s like an advanced retainer system, and it just shows you everything you have assigned to be made and sent out, except that you have a button for managing your minions. There are only going to be four areas.
You can release the minions and then set them; just let them run for you. They just run around the area and even have cute little cons. It’s amazing. This is such a great feature.
Your New BFFS: the Guide Button and the Rank Bar
Then lastly, there’s a guide button that will give you a breakdown of everything going on on the island, and it is a super helpful reference. Below is a large bar with the Island Sanctuary Rank on it. And then your experience on the island will level up the Island Sanctuary Rank.
New Currencies
There’s two particular town stone-like currencies are the Seafarer’s Crowley and the Islander’s Crowley.
Traversing the Island
Now there are going to be duty actions, two of which you’re going to start with, and the first is going to be a sprint that lasts 20 seconds. With the 5 seconds cool down so you can spam it to nonstop run.
And also, I should say on the note of mobility; that you can mount as soon as you get to the island. So that’s nice too. No unlocks are needed; just ride your mount. I did it a whole lot.
Before You Get Started
Tutorial Tips
Don’t gather more than you need when you’re doing the tutorial just because you’ll get two sets of tools from that. They are going to help you gather items from the same node.
When you’re out, pick up some pumpkins because you’ll get a bed soon. You want to get those planted as soon as possible when you’re doing the tutorial.
When you’ve finished the tutorial, you’re going to wind up with an excellent base to set up, and it’ll say, create the hideaway of your dreams, which will indicate that you’re done with the tutorial, which doesn’t change from there.
Something important during this process is not to spend your Seafarer’s Crowries that you obtain because you will need that to progress through the quest.
Each quest gives you a whole bunch of the beginning and then requires those to progress and upgrade the different areas. You want to do that as soon as it pops up.
You’ll see different questions unlocked as you go through the tutorial and create your tools and whatnot. To expand the actual base camp, you need to create the essential mammet-size builder tools.
And then, when you’re level five, the better mammet-size builder tools. What those will do is unlock the actual areas in your hideaway to be able to be upgraded.
So, you want to do that as quickly as possible because you’ll have landmarks you can build in those areas, which are time restricted and take 12 hours. They don’t seem to do too much but improve efficiency and whatnot. You just want to get the stuff built as quickly as possible.
Now that you have that done, you should have your camp upgraded. And if you haven’t upgraded your cozy cabin, you’re wondering where the quests are. You can go up to the cozy cabin log board and upgrade it through that.
Always Get Your Workshops Going
Always make sure to get as many workshops as soon as you can. Go for a workshop if you can choose between it and the granary. The main takeaway is that you want to get as many Seafarers’ Crowries as possible, even for the leveling grind. That will roadblock you. So you also get a significant chunk of experience for every workshop return.
But the Seafarer’s Crowries are a noob trap and should be spent carefully to upgrade before buying any items. Yes, the Glamor does look good, but what looks even better is just like getting content set up and ready because it’s very productive on its own.
Make Sure that You’re Doing Everything Else that You Possibly Can
All landmarks have those being built; granaries have those being built. Upgrade your croplands when that’s available. Expand the land when that’s available. Build every tool and every completion of these events; you get a tremendously extensive experience.
You Do Not Want to Skip Making Landmarks
And in terms of what landmarks are, which honestly, I cannot tell you that any of it matters. I don’t know what the impacts of the different types have other than aesthetics, but whatever you choose, make them.
Fill Your Animal Pen and Get those Crops Going
These are very slow; I’m not going to lie; they are very slow in comparison, but they will give you much experience and can be used to get even more Seafarer’s Crowries.
What Can I Do on Island Sanctuary?
Gathering
The first thing that we can do is gather materials. You can’t see these nodes until the gathering mode is on. You can tell if it’s off; it’s not visible, but you can see and gather items if it’s on.
Crafting
This will be specifically from that crafting log, which will be a recipe book. It’s not just a checklist of what you’ve done these things; you actually will use the crafting log here.
You get to choose what recipe to craft, and then if you have the item, boom, you get it through the tutorial. You’re going to be making a hatchet as well as a hammer. But, as you can see through the inventory for tools, there’s a lot more that you can do.
What I’ve noticed about these tools is that they naturally passively increase the stuff you can gather. As far as I’ve gone in Island Sanctuary, I haven’t needed to equip a tool manually.
Building
To construct buildings and other structures is really where you’re going for here, and these are not going to be into your crafting log, but instead have what is called a log board that will open the construction UI, which will detail what you’re building and what you need to gather to build it.
Before anyone worries, you can move the location of a building to a different location in the future. If you don’t like where it is, there will be a specific move facility function.
The side user interface shows the vision in the coziest of cabins, which lists other items that you neto, which can lead to a ton of gathering that I didn’t need to do as I got lost on the island. No, I didn’t get lost there for like 15 minutes. You can hit the return button if you get lost and want to come back rather than explore, which I wanted to do.
But your first construct built to the point will be the so-called cozy cabin. With the materials that you can gather, you can create it. After you’ve built your cozy cabin and gone through the construction tutorial, you can invite people to your island, play music on their orchestra, and earn a currency called the Crowries mentioned before.
Spend Seafarer’s Crowries
Seafarer’s Crowries are obtained by realizing visions, developing the island, and doing certain activities on the island. Islander’s Crowries are obtained by selling materials in your aisle and inventory island inventory to the enterprising exporter in the cozy cabin. Inside the cozy cabin, you can set the orchestrion for music.
You can trade in Crowries into the horrendous hoarder. Some random items can be good, like the crafter and gathering material. There are housing items, minions, three different mounts, and more. But let me be clear, Crowries are used for a lot more.
They can also be used to expand the amount of land you can build on, so they’re instrumental aside from just getting items. But that comes far, far later in the island tutorials. And then obviously, the exporter is just where you trade in the various items for the other Crowries.
Farming
After obtaining some farmland, you can activate the sow and water modes. Sow mode is for putting down the seeds, or instead, sowing the seeds, I should say. Water is for watering them, similar to before.
You won’t see the nose to work with unless the mode is activated. There will be different modes where you must select the item to sew, plant, and water them. These are also going to be watered.
But thankfully, rain on the island does count towards that. Finally, if you want to remove the crops, you can just swap to the cull mode and remove the crops.
Catching Pokemon
Yes, you read that right.
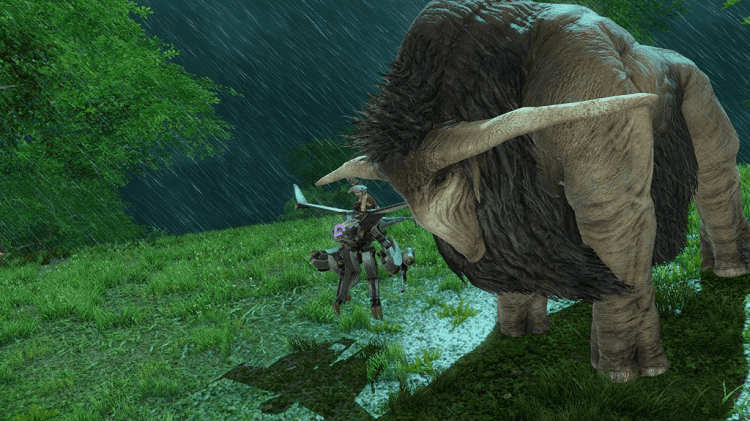
Lastly, let’s move on to Pokemon and farming, where you now have a pasture for all the Pokemon. To get Pokemon, you are given a set of Pokeballs, which you can use to capture the Pokemon.
With the basic Pokeballs, you can only capture small things like the Opo-Opo. When I tried it on Chocobos or that giant ox, it didn’t work, sadly. Darn.
You must get all the balls or great balls to catch those Pokemon. But there will also be a feed mode activated now where you can select an item to feed the animals in the pasture. And this is very relevant because it helps the animals love you, and the animals when they love you, leave what is called leavings or gifts for you.
And you can get these by using the gathering mode on the animals. I need to use the gathering mode on my Christmas presents. Wait, what?
You can also interact with the animals, with the pet and the back of the mouth, which I think is an excellent flavor. And then, you can review the status of your pasture animals in the pasture management user interface, where you can see how they’re doing, rename them, and so much more.
Workshopping
This leads to the last activity, a workshop where you can make island handiworks, or instead, you are telling the mammets to make the handiworks. Speaking with the taxable taskmaster will open up a whole set of user interfaces.
The core point is that you can set the mammets to work on a craft at a set period. You must have all the materials ready for use by that period. Otherwise, they cannot make it.
If you do, when the scheduled time comes, like you have the materials ready, they can make the craft and export it, and then you get the Crowries from it. It’s like a bonus for handing in the gathered materials. At least, that’s how I view it.
But there are many more intricacies to the system and a strategy to double the rewards called efficiency bonuses, which can double the rewards you get from this. No extra gathering supplies are needed or time.
These efficiency bonuses are chained to scheduling an item from the same category, as far as I can understand, only from that after an item.
But the trick is that if you have the same item made, like item A and then item A again; you will not be getting that bonus. So be wary of just making a lot of item X, like item X, item X, and item X; you won’t like XY, XY, or XYZ. You want to change it up.
You can review the materials that you have on hand to craft with. You can set rest cycles that the mammets get off because you got to give them weekends. You also can review supply and demand with a ton of filters and clear the entire board, of course.
But what this allows you to do, in effect, is for you to gather a ton of items and have them be processed a ton. It’s kind of like a more hands-off retainer system.
It’s like where you can send off rather than chaining the retainers off and needing to log on every hour or so and send them out or every day; you just can chain them out for like four or six-hour segments of time without needing to check out and reset them all the time.
I kind of actually love that feature of it. Now you have multiple workshops going in parallel as well when you build that air island. And so this is an elegant system.
There’s also this earnings menu where you can see the earnings of them making stuff optimizing. This, I can see as a great source of Gil because some of those things you could buy were huge items.
Those crafter and gathering materials are notorious for being expensive and highlighted desirable. So I see this as being super desirable to get good at. And if you have no intention to craft, gather well.
Ranking Up
Ranking can be misleading if you’re not careful. Look at this route map guide of each rank, up to level 5, when the new content ceases, and you’ll just have to carry on at your own pace until 10.
Rank 1
Rank one is pretty straightforward, as you’ll be doing the tutorial. The tutorial will show you how to gather, craft, and expand your pasture and crops. The base function of Island Sanctuary at these levels will be gathering, which you’ll be doing a lot of.
During rank one, you’ll make your cozy cabin which will be your home base once you complete this objective. Congrats, you’re ranked two!
Before we go on, you’ll always want to prioritize building things since it gives you a crap ton of XP. So make sure you’re constantly checking your buildings or hideaway management box to see if anything can be upgraded, as that will give you vast experience.
Rank 2
When you hit rank two, you’ll see another marker or continuation of the tutorial, which is where you’re going to expand your land for your garden. This will allow you to plant crops that are limited at this point, and you’ll be able to water them.
You’ll want to plant these pretty early on. It seems to take quite a while for you to be able to collect these. You will have to water these if they dry out, but they also get water from the rain on your island, which seems to be pretty often. So check them daily and water them, so they don’t dry out.
After getting the cropland open, you’ll see another question marker. This will be your pasture, and it will teach you how to capture enemies, or, I should say, monsters’ pets; what are we calling them? An island sanctuary. Locking the pastures will allow you to collect monsters out in the wild.
At this time, you have a makeshift net, so you’ll be able to capture the Opo-opo, Lost Lamb, Coblyn, and the penguin at the back of the beach areas.
When you capture them, you want to make sure you go back and feed them to increase their mood, which you can feed by using the apples that you probably have harvested each day. These will give you things you can use in your workshop and the items you gathered, which is w, why you want to fill the pasture up quickly.
This will allow for a broader range of items for the workshop, and no petting does anything for the pets or monsters other than make you happy. The things they give you can not only be used for the workshop but also be turned in for blue currency.
So, this can pay out in the long run. And it seems blue currency is hard to come by at lower levels. So I wouldn’t turn any of the stuff into blue currency; I would use it for the workshop, as it seems to have more bang for your buck.
Now, another big tip here is that every time you rank up, ensure you’re checking your crafting and gathering log because you might miss some stuff that you’ll be able to access so that they don’t point out too quickly.
The better mimic tools are always for expanding, so you want to make sure to make those whenever you have the chance, which is rank three, five, and seven.
Rank 3
Once you are ranked three, you’ll be able to make the stone hammer which will allow you to collect new materials from rock nodes, mainly the iron copper ore that will need for much different stuff.
You will want to prioritize building these two workshops that you can put up and get them running because this will give you many experience points in the long run. Now, this is where things start moving and grooving, no pun intended.
You’ll get a tutorial about the workshop and how to use it. You can think of this as retainer ventures, except for fewer hours, giving you blue currency in return.
They can be a little complicated, but basically, you’ll have an entire season, a.k.a. a week in real-time, and a cycle, a.k.a. a day in real-time. Each cycle or day, you can schedule different crafts to start. Each craft takes up a different number of hours of that day, starting at four and six at the very beginning.
The primary strategy here is to craft as many items as possible without repeating the items and get the efficiency bonus, which comes from crafting from the same category. For this example, let’s take iron, fire, sand, and potions.
Both of these are categorized as concoctions. When you assign one to the schedule, the next one should be in the same category, giving you the efficiency bonus.
This efficiency bonus means that the item will make two of that item instead of one for the same number of materials. So, you’ll get more profits, which means more blue currency. The efficiency bonuses are only for that day or cycle; they do not carry over.
They will reset daily, meaning you need to plan the workshop the day before to maximize the earnings. The efficiency bonus doesn’t only give you bonus items, but it also increases your groove, which is this little sat here to the top right.
High groove scores will increase your profits when turning in the handicrafts, which applies to the season or the week. So efficiency bonuses are only for the day or cycle, and groove bonuses are for the entire week or season.
If you can put two and two together, you want to get your groove score up as quickly as possible at the beginning of the week. To maximize the profits for the entire week or season, you can increase the cap of your groove with more landmarks on your island.
Rank 4
![]()
You have new crafting recipes at rank four and can upgrade your main cabin to level two crops and pastures. The crop and pastures will need 1000 blue Crowries each at level two. So that’s why you should not spend them in the beginning, or you’ll be behind on updating your island, and you’ll have to wait to get more blue currency from the workshop.
After doing everything above, you’ll probably be half or a little more to level five. This is where the grind comes in, and you’ll gather for the rest of those levels. It doesn’t take as long as it looks, maybe an hour or so of straight gathering. Or you can wait for your workshop items to finish, giving you some experience.
Every day, if you’re taking things slow, you’ll probably just rank up from the workshops after they finish every few hours from your animal leaving. That gives you 50 XP from each, which is why you want to feel that pasture immediately.
Rank 5
Now that you are at rank five, you have much to do an upgrade. You get a new shovel tool, new mammet tools for expansion, two more facility slots, and another landmark spot. I want to say that you can build a bathhouse that needs clams for those new landmark spots. You can get those by diving underwater on the sides or tops of the island.
Many people are having trouble with this, but it’s A and B on the controller and space or control on the keyboard. With this, you’ll have a lot to do in a lock, so you’ll just need to keep gathering to level up and get your workshops going.
Rare Spawns
How do you find the rare spawns across the island sanctuary? Every animal you find has its unique version that spawns at a specific time of day or during a specific weather effect. A few rare spawns have nothing to do with the existing animals, such as an alligator and a beachcomb.
All animals share a drop table with their non-rare version, which is inverse. So, for example, it’s common for sheep to drop their fleece, but it’s quite rare for them to drop milk. The white sheep will drop the fleece daily with a chance of dropping the milk.
Here’s a handy chart that will help you out:
| Creature | Area | Time | Weather condition |
| Apkallu of Paradise | Pirate Bay
|
12 a.m. to 3 p.m. | None |
| Dodo of Paradise | 3 p.m. to 6 p.m. | None | |
| Black Chocobo | None | Clear skies | |
| Beachcomb | None | Rain | |
| Grand Buffalo | Gentle Slope | None | Clouds |
| Start Marmot | 9 a.m. to 12 a.m. | None | |
| Stag | Small Spring | 6 p.m. to 9 p.m. | None |
| Glyptodon | Rocky Reef | 12 a.m. to 3 a.m. | None |
| Coblyn Rare | Sunrise Lookout | None | Fog |
| Alligator | Pristine Pond | None | Showers |
| Ornery Karaku | The Wilds | None | Fair Skies |
| Island Billy | Coral Sands | 3 a.m. to 6 a.m. | None |
| Lemur | Eastward Stream | 6 a.m. to 9 a.m. | None |
| Gold Back | Peak Point | None | Rain |
Remember that weather changes occur at 12:00 a.m., 08:00 a.m. and 04:00 p.m.
FAQs
Question: How Do I Get Past Rank Four on Island Sanctuary?
Answer: When the tutorial is over, you’ll find that there is no guide around this rank at this point. All you have to do is just gather and wait for construction or workshops to finish to give you an island experience.
This will be just relaxing, gathering, and grinding content, which I love. Always check your crafting log for new tools if you get stuck. Sometimes they show up there, and you can miss them or buildings if they can be upgraded. You get new expansion tools around rank seven.
Question: Why Can’t I Catch Any Creatures on Island Sanctuary?
Answer: Nothing is 100% catch rate. You’ll have three tiers of tools for catching monsters. The makeshift net will give you access to tiny monsters like a lamb, Opo-opo, penguins, and Coblyn.
The mid-tier rope will give you access to chocobos, dodos, and glyn. The last tier of the item will give you access to the buffalo nanny and that dinosaur-looking thing. You will be using these a lot.
Question: Are Workshops Important on Island Sanctuary?
Answer: Workshops are the best way to get blue currency, which is used for all the vendors’ mounts, glamors, and important stuff. So, you want to get those workshops working right away.
Question: Should I Choose Any Landmarks in Particular on Island Sanctuary?
Answer: No, at this point, you’ll have access to two, and then you get access to the third type of bath house, and each one has the same effect on the workshop, which will increase the groove gauge. Feel free to customize to your heart’s content with landmark buildings and make the islands of your dream.
Question: How Do I Change My Island’s Appearance?
Answer: Once you get to the second cozy cabin at rank four, you can change your island’s appearance, but it’s minimal. You can go to your main cabin and choose Change Hideaway’s Appearance.
You’ll need an island prism which you can buy off the market board, or you can craft yourself with any eight crafters from the mainland game. They are located under Master Recipes Nine at the bottom of the screen, so you can change and adjust to your heart’s content.
Parting Words
Island Sanctuary is more than just a beautiful island zone with fantastic ambient music and a collection of exciting mammets, Pokemon, and crops. It’s also a place where you can very quickly build a path of Gil streams and have the joys of automating.
Although more casual players don’t need to worry, and I need to stress this, you don’t need to worry about falling behind because it’s not a competition. You don’t need to dive deep. That’s what I’m trying to stress out in this last section.
Island Sanctuary is an absolute win in terms of content. I don’t regret investing all of my time into exploring and setting up for a second, and I am very much looking forward to fully exploiting it.
Continue reading related FFXIV Island Sanctuary Guides: