

- Hermes FFXIV Guide - February 2, 2023
- Every Final Fantasy Game Ranked - January 28, 2023
- Hydaelyn FFXIV Guide: Facing your Maker - January 22, 2023
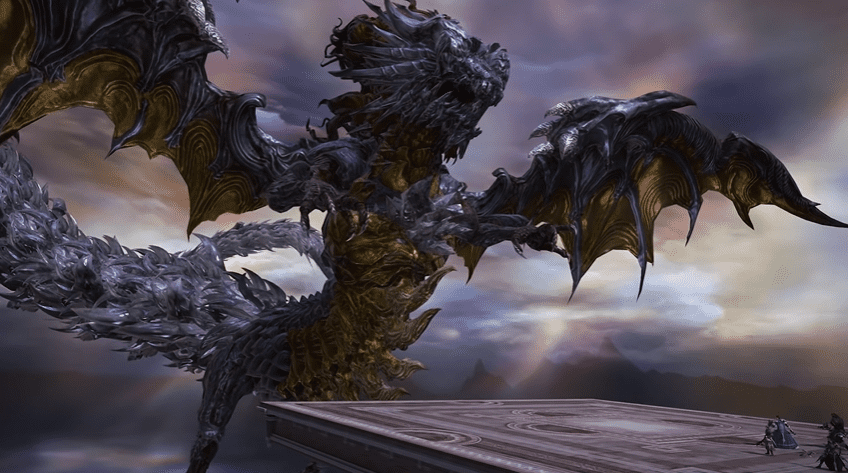
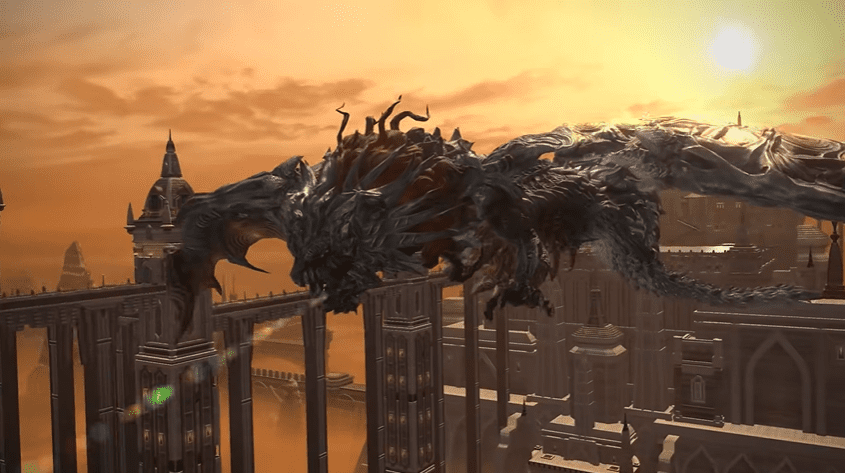
In all of Final Fantasy XIV, you will not encounter a primal more ferocious than Shinryu. This legendary beast picks up all the other primal’s skills and throws them at you in one single battle.
The design and cinematics of the final battle of the Stormblood are unmatched by any other -both extreme and normal mode- fight in the entire game. The stakes keep getting higher with each phase, making for an excruciatingly thrilling encounter.
I mean, the dude literally pops out a few eggs mid-battle and sends his offsprings to wipe your entire party right away. Need I say more?
If you dare go into battle with Shinryu, or if his trial just came up on the trial roulette just now, you unexpectedly got wiped out and would like to recover some dignity next time, then this Shinryu guide is for you. In it, I will cover the most critical aspect of his backstory, his entire moveset, and a carefully-crafted strategy to beat him.
My Bottom Line Up Front: Shinryu is a very tough fight that will put what you have learned from other Stormblood fights thus far into play with little room for error.
Lore
How to Meet Your Dragon
Shinryu is a recurring enemy in the Final Fantasy series who often appears as a super boss in the games. While he may not be as frequently recurring as the ever-popular weapons bosses, such as Omega and Ultima, he is still one of the strongest foes of the series.
His name is how the Japanese refer to Shen Long, the Chinese spirit dragon in this mythos. He is the master of storms and bringer of rain. He’s one of the many dragons that controls the elements essential for agriculture, and the Chinese made sure to never disrespect these dragons out of fear of poor crop conditions, such as flooding or drought.
The Final Fantasy Bit
In Final Fantasy, Shinryu is a dragon made of crystals. He is also capable of interdimensional travel, as he is associated with the void, which is his home. Strangely enough, he is found in treasure chests in some of the older FF titles, suggesting that he either hid in there or that treasure chest has some odd connection to the void.
When disturbed, he unleashes overwhelming power that can easily topple unsuspecting and unprepared players. However, if defeated, he commonly rewards some of the most powerful items in the game, including the weapon Ragnarok.
His First (Sneaky And Unwelcome) Appearance
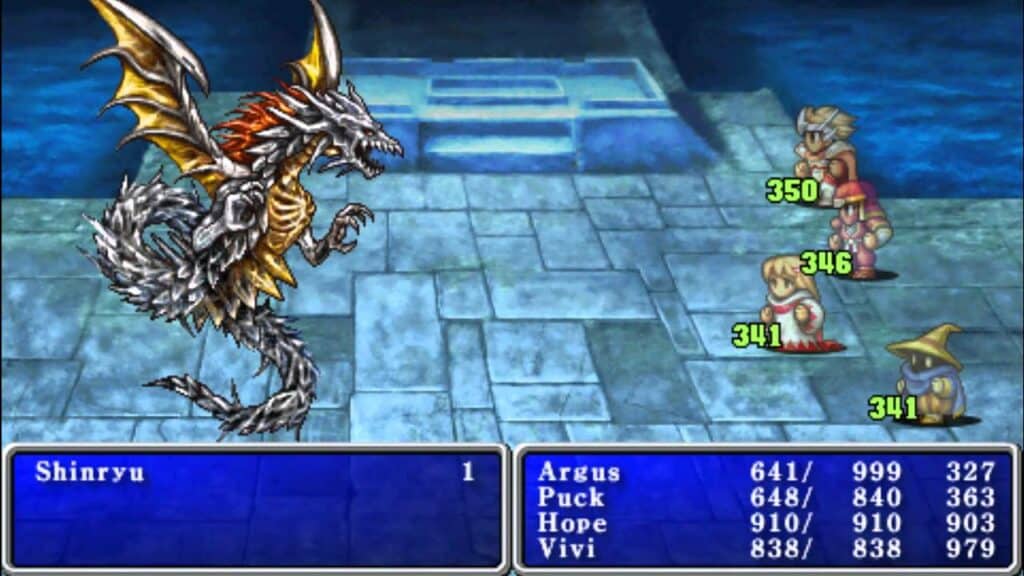
His first ever appearance wasn’t until Final Fantasy 5, hidden away in a treasure chest. While most monster-in-a-box enemies in classic final fancy games are usually more dangerous than ordinary, Shinryu is a super boss equal to Omega in strength, which can completely decimate the player.
Making a Name for Himself
He would not appear again until Final Fantasy 9, where he would instead be known as the Nova dragon in the English version, though.
He was still Shinryu in the Japanese. He is the leader of an army of dragons in this game and must be defeated to enter the game’s final area. This was likely an illusion to his Final Fantasy counterpart, which rested within the game’s final dungeon.
Shinryu would appear in the immediate next title Square Enix released: Final Fantasy 10. Though his role returned to that of a super boss, FFX was home to a monster arena where enemies could be captured. If you caught enough of a specific enemy, bosses would open up with unique strengths and item drops. Shinryu was unlocked here by capturing every underwater enemy in Mount Gazette twice.
Now Shinryu did appear in remakes of older titles and several other FF titles, but it isn’t until FFXIV that he makes another appearance in his complete, super dragon boss form.
Shinryu, Normal Mode
First Phase
Moveset
| Attack | Description |
| Tidal Wave | Pushes back and deals damage to all players |
| Water puddles | Grants fire resist up buff and a Lightning Resist Down buff. |
| Hypernova | Targets a player with a stack marker |
| Akh Morn | Deals increasing damage to the tanks. |
| Spikecycles | Spawns large, alternating column AoE on the platform |
| Ice storm | Deals raid-wide damage |
| Earth Breath | Marks two players for a considerable cone AoE attack |
| Hellfire | Deals high amount of damage to players |
| Judgment Bolt | Great raid-comprehensive AoE damage |
Strategy
Firstly, we begin our fight against the boss atop a suspended pillar. Tidal Wave is his first move, which you will need to be quick to avoid. If you look around the sides of a room, you will see this one waterspout. You’ll need to stand next to it as close as possible. After the cast finishes, it will knock people across a room further, depending on how close you are to the pillar of water.
Periodic damage will spike onto the tanks in your party from Shinryu’s claws. As a result, they do light damage throughout the fight.
His second ability is this stack marker on a player. Stack and keep everyone tucked up if you are the healer.
Then, his third ability is to target a player in your party and pulls purple explosions onto them. This is unavoidable. You get to know this will happen by the text box that pops up, mentioning that Shinryu’s right-wing emits an ominous glow.
Straight after this, the text box will tell you his left wing is now emitting an ominous glow. This means his fourth ability, an ice line attack, will happen. Move out of the line that’s down, wait for it to disappear, and then move back to where it was to avoid damage to the following line.
Some players will get marks above their heads, and Shinryu will begin to cast an earth breath ability. These marked players must go to one side of a room and move over before it finishes casting. The boss will place awe cones a few seconds later to avoid where those players stood.
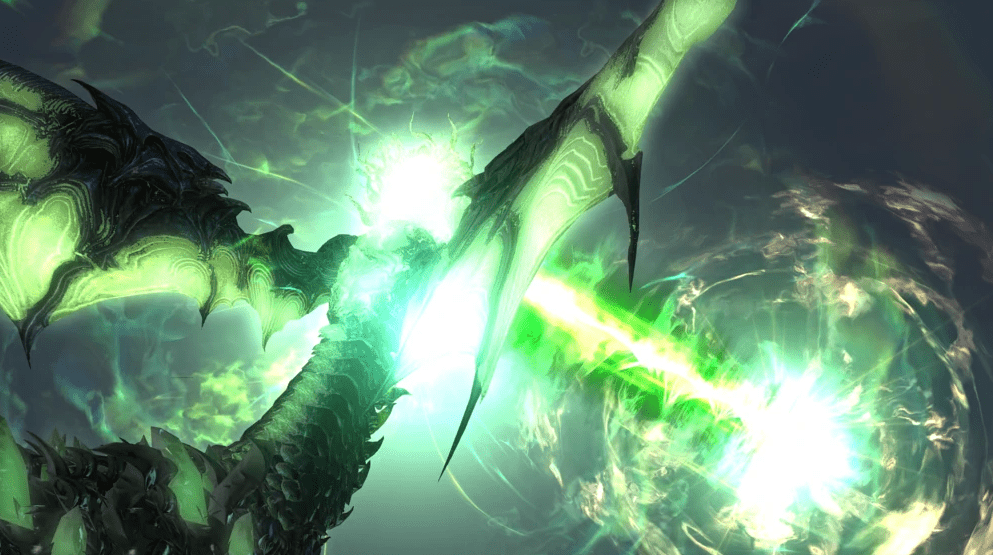
You will see a Corrupted Aether bar on your screen. Once this is filled, this allows Shinryu to use a powerful ability to strike the platform with lightning. This dramatically damages people who need to be topped up before surviving. He then takes to the sky to transition the fight into phase two.
Phase Two – Add Phase
Strategy
This phase begins with AoE proximity circles, which you’ll need to stand away from as much as possible to limit the damage.
Quick decisions need to be made and stuck within the direction you deem most safe. The corners of a room are usually the best bet to look at, and once these go off, eggs will spawn on the platform as well as some damage. These quickly hatch into three dragons: two Ginryu and one Hakkinryu. Kill the Hakkinryu first and then the other two, making sure to avoid the next volume of AoE proximity circles as they come down.
Next, another Hakkinryu and another two Ginryu will spawn. Your tanks need to try their best here to pick them up, and the DPS needs to be quick to kill the ads and not get overwhelmed. The third set of AoE proximity circles will now land with another set of ads. This time you’ll get five Ginryu and Hakkinryus. Again, a good DPS is required to keep up with the number of ads that could be up in front of you.
At this point, each of the ads on this Wave can do line AoEs that you need to avoid as best. A lot of the monsters will die before they get to use them.
Once the ads dead, the boss will begin counting down to a new ability called Protostar Realization. This massive AoE needs to be healed and marks the beginning of a transition into the third phase.
However, you must perform an active time maneuver to get to the third phase. Spam the button that appears on the screen until it’s filled to survive. Failure to do so kills you before you even enter phase three.
Phase Three
Moveset
| Attack | Description |
| Tail Slam | Slams his tail on two tiles, cracking them in the process |
| Burning Chains | Marks player with a chain that deals burning damage |
| Levin Bolt | Casts purple markers that deal damage |
| Dragonfist | Puts a large AoE circle in the center |
| Diamond Dust | Deals an ice-aspected aether attack |
| Earthern Fury | Deals an earth-aspected aether attack |
| Aerial Blast | Deals a wind-aspected aether attack |
Strategy
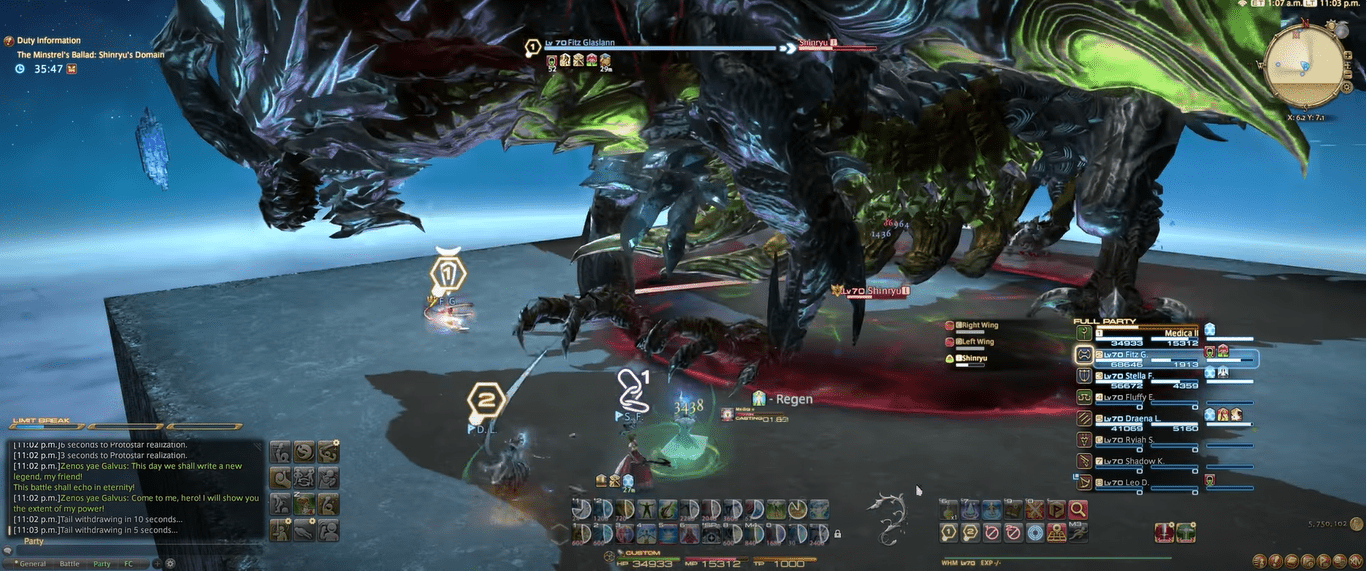
Phase three is where the fight gets interesting. Again, you’ll find yourself on this nine-by-nine square-grided platform in the valleys below Ala Mhigo. Again, this phase is filled with movement abilities.
The first you’ll see is not too long after your landing. You’ll see a massive dragon charge attack attempting to knock you off a platform. Move as soon as possible to avoid this.
As soon as you are down on your feet. Shinryu will start by putting green damage spikes on whoever has first and second Enmity on the fret table.
Not long after the dragon charge, Shinryu returns to be attacked. Again, two of the squares on the platform will change color. You’ll need to move from these squares as his tail is about to smash into them full. DPS should now switch to his tail’s priority to kill it. Every time the tail is destroyed, it does incredible chunk damage to Shinryu’s main health bar.
Another ability is aspected ice magic in the form of an ice storm. This is an unavoidable AoE that does damage party-wide for your healers to heal through. As the fight progresses, more tail attacks will happen. Killing the tails is also the only natural way of killing Shinryu outright, as the tail deaths do huge percentages of Shinryu’s health when they die. This also encourages you to kill the tails as soon as possible, forming a kind of enrage where you would have nowhere to stand at the end of a fight.
A large sand-colored circle will appear in the center of a room. You all need to move away from this as soon as possible to avoid a dragon stomp ability and then move back into the center.
Shinryu will then charge up an ability called Aerial Blast. This is essentially a tornado in the center of a room you must keep running towards. Failure to do so keeps knocking you back and, eventually, a large knockback as the tornado fades. Unfortunately, this also does considerable AE damage to the group, which you will need to heal.
Next, you’ll see the ice lines again from phase one, stepping out of them and stepping back in to avoid the next step. The tail will come back down soon, and remember, if any of the platforms it lands on were cracked, they would now be destroyed, and anyone who stood on one will also be killed. So do not move to a cracked square to avoid the tail.
A stack AoE marker will be placed on a player again like in phase one, so stack up to soak this.
This last part of the fight is about killing the tail as soon as they’re up and avoiding standing near platforms that could fall apart.
At around 30%, the boss will start employing another ability: fire chains. These need to be broken by running away from a player you were chained to.
At this point, Shinryu will be at a hundred corrupted Aether again, and a text box will pop up saying, “The powers of the gods are mine to command.” This is an ice attack called diamond dust and then thin ice. This will make the whole room slippery and does AoE damage to your group. Do not move at all. The ice propels any movement you do, like, 200% more. You’ll likely be skidded off the platform and dead before you realize you have even moved.
At this point, the boss will fly around and do another dragon charge across the room. Sprint over to the safe zone as soon as possible to avoid it.
Once he lands again, this marks the final burn phase of the fight. Again, there are fire chains to avoid ice storms to heal through, another dragon punch to run from, and purple markers placed on players’ heads which must be spread out because they do AoE damage to those nearby that you do not want to stack.
Finally, you should see the last full corrupted Aether bar and a Judgement Bolt attack that does lightning damage to the entire room. Heal through this and deal as much damage as you can muster. Kill the tail if it comes up to kill the boss instantly. If not, focus on that boss’s health; it should die.
Shinryu, Extreme Mode
A lot of his abilities do not have AE markers or apparent indicators. So watching him or his wings, casting abilities on the agro bar makes the fight much. Shin also auto attacks with each wing, one on the top aro target and the other automatically attacking a tank most likely or off tank since your main tank should have the most aggro.
Phase 1
Shinryu’s first phase highly resembles his second phase from normal mode.
Right off the bat, one new addition to this fight is the addition of a new target: the worm’s heart. The heart itself is located on Shinryu’s and has no abilities, though it does gradually recover health while it’s alive. However, if Shinryu casts one of its ultimate abilities while the heart is alive, it will wipe the group. So, make sure to kill it every time. It respawns with more and more max HP, and Shinryu takes damage when it dies.
At the start of the battle, Shinryu will spawn with a worm’s heart and by casting Fury. Kill the heart and avoid standing on the two awe-marked platforms during Fury, as they will permanently be destroyed. Fury will also damage three of the remaining seven platforms, breaking if his tail slams into them later in the fight.
I highly recommend ensuring that all three platforms closest to Shrinryu remain intact for the entirety of phase one, primarily for future mechanics.
At under 45%, Shinryu will become untargettable and cast dark matter, stunning everyone in the party.
Then, he’ll do his active time event from normal mode, where all you have to do is spam press buttons.
Phase 2
To ensure you survive the phase transition, smash your keyboard and controller buttons to get through it quickly.
He’ll carry the party up to the platforms. You’ll be fighting and finishing this fight when he drops you off. He’ll drop you off on a large gray platform, and he’s immediately going to do a proximity AoE in the center.
This AoE will knock you off the platform, but there’s another platform to the north that you can land on. Have the knockback land you on the nearby blue platform on this platform.
You’ll enter a moderately intense ad phase where you’ll have to kill three waves of ads before Shinryu finishes accumulating Aether.
Phase 3
You can jump off when there is a platform under you. Be careful with the lasers he’s shooting along his back. They hit for some damage, but more importantly, they stun you to slow you down before you get to his platform. It’s not too hard. Once you’ve gotten onto his platform, you’ll enter the final phase.
Under Shinryu is a giant AoE that will inflict doom on anyone who steps inside. Stay in that circle too long, and that doom will kill you. So don’t pass through.
Shinryu has no cleaves, though he does have an AoE breath, which you’ll be able to move out of.
Generally, he will start the phase with a new tank buster: terror slash. This severely damages a single target and places a physical vulnerability debuff on the tank. You’ll want a tank swap during the cast bar.
Keep in mind both of his wings are still auto-attacking both tanks here. So, it’s easy for a wing to kill the tank after the tank buster if you don’t mitigate it or heal quickly enough.
After Terror Slash, Shinryu will use Atomic Ray. This will place a stack marker on each of the four DPS, which deals about 50000 damage.
FAQ
Question: Is Shinryu stronger than Bahamut?
Answer: This question has been a source of inspiration for endless fanart and online discussion. The fact that Shinryu has been categorized as a “Superboss” has led many to believe that he could easily take on Bahamut, who is a regular boss or summon.
Question: How do you unlock Shinryu’s battle?
Answer: To unlock this trial, you must get to the end of the Stormblood main storyline. Once you have defeated him in story mode, he’ll become available in trial mode.
Question: What rewards do you get for defeating Shinryu?
Answer: After killing Shinryu, you’ll receive a Shinryu Totem, a Shinryu Card, and level 335 gear.
Parting Words
Shinryu embodies the ultimate culmination of everything that has transpired in all previous Final Fantasy XIV expansions, making for the very climax of the story up to this point.
At its worst, Shinryu’s encounter is the grown-up version of the board game Don’t Break the Ice. At its best, it’s a grueling battle that will challenge you to prevent a platform from breaking down, avoid incoming waves of ads, and work with teammates you have been chained up to.