

- Hermes FFXIV Guide - February 2, 2023
- Every Final Fantasy Game Ranked - January 28, 2023
- Hydaelyn FFXIV Guide: Facing your Maker - January 22, 2023
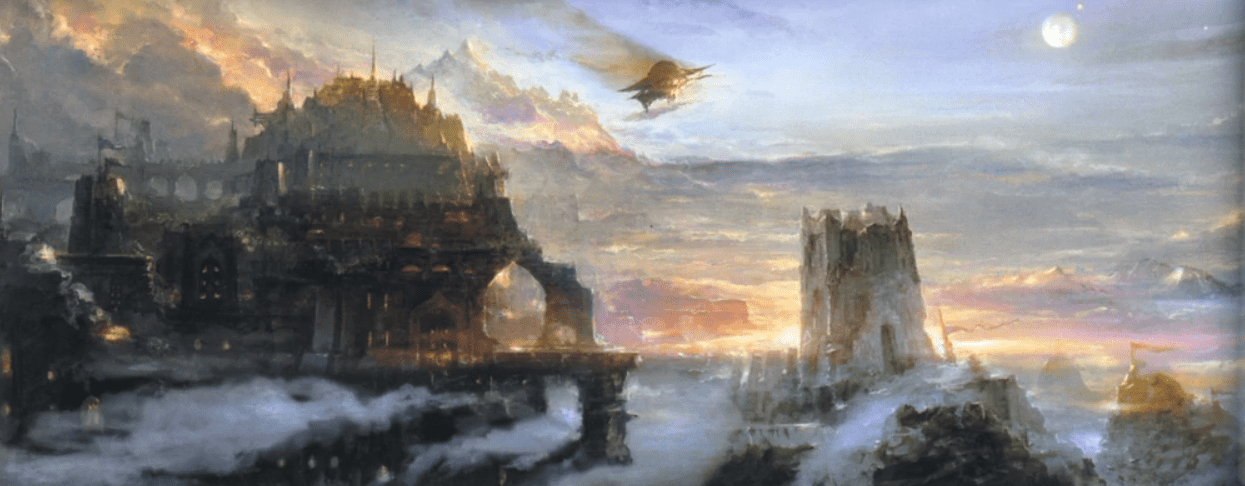
Since 2.0 was released, Final Fantasy XIV’s storyline started talking up Ala Mhigo to every player. Ever since the beginning of the game, I was amazed by the tales of this militaristic city-state, the war with Gridania, the Mad King that depleted the city’s military power, and the exploited refugees. Plus, if you ever get the chance to look at the concept art, this place is just absolutely gorgeous.
Thus, when Stormblood was announced, I was thrilled to hear I would finally be able to visit the city of Ala Mhigo, only to find out it was turned into a reasonably small dungeon. However, even if the plot foreshadowing didn’t come to fruition with a big city reveal, it was still fun to go over this mecha-dungeon with a new leveling system and huge rewards potential.
Ala Mhigo is the final dungeon accessed as part of the Stormblood main scenario quest in patch 4.0. I believe this dungeon goes for quantity over quality, as it’s pretty much all the mobs you’ve already encountered in the other Final Fantasy XIV dungeons, but just a lot more.
If you are interested in going to Ala Mhigo, you will want to check out this Ala Mhigo guide that goes over the lore, the rewards, the enemies, bosses, and strategies to beat it.
My Bottom Line Up Front
Ala Mhigo is Final Fantasy XIV’s most plot-heavy dungeon, where you will encounter the 12TH Legion Squad, returning bosses from Final Fantasy 7, and mouthwatering loot that will keep you grinding it over and over it. Its independent, entertaining leveling system and epic bosses make it a fun ride.
Everything you Need to Know About Ala Mhigo
Lore
Ala Mhigo is a town in Gyr Abania, the easternmost portion of Aldenard. That is a very mountainous area, and the inhabitants got used to living in the higher parts. Ala Mhigo had formed at the beginning of the sixth threshold era about 1500 years ago when the people of Eorzea fled the water attracted by the flood caused by this calamity. The people who founded Ala Mhigo were people of all races and beliefs; therefore, various groups and fights soon arose among them to survive such difficult situations. Such situations generated a very warlike nation.
Thus many years passed with fights between different groups and alliances and betrayals among themselves until 1100 when a man named Alshelm Cotter managed to defeat all the clans of Gyr Abania and unify them.
Realizing that Gyr Abania was the passage to Aldenard for anyone who wanted to enter, he decided in 1135 to build capital with high and wide walls. They offered mercenary services and established an extensive network of roads and trade, thus ensuring a viable economy. But in 1190, Ul’Dah gained complete control over Thanalan and trade began to take place by sea instead of by land.
In 1313, Sharlayan asked Ala Mhigo to help secure a working space and establish their colony. However, trade and mercenary work was collapsing, so in 1468 Ala Mhigo declared war against the Gridania to seize the Forest of 12. This conflict would become known as the Autumn War and would be a devastating defeat for Ala Mhigo. Ala Mhigo started the battle well, securing a strong presence in the forests near Gridania. But one entry into the war, Ala Mhigo suffered a definitive defeat when Ul’dah, Limsa Lominsa, and Ishgard came to Gridania’s aid, and the war was lost.
With this loss, Ala Mhigo entered a period of austerity, and the King began to lose power. The fist of Rhalgr and the monks entered the political arena. The monarchy allowed the cult of Rhalgr to enter as an official religion. However, in 1546 King Theodoric first ascended the throne and established his cult, Nymeia, as official and ordered the destruction of the Rhalgr temple and the extermination of the monks. But the massacre did not end there. He went mad and began to suspect that there were those in his kingdom who wished to usurp his throne. Many died from real and false threats, including his wife.
In 1557 the people would finally rise against Theodoric. His very guards would help the people and thus ended the reign of the King of Ruin, as he was known. Ala Mhigo had finally won his freedom from this reign of terror. However, the troops of the empire stationed just north of Ala Mhigo were waiting for the death of the King to attack the city. Thus became this nation a territory of the Garlean Empire.
Rewards
This dungeon rewards item level 300 weapons, armor, and accessories. It also drops several grade-five and grade-six materia from particular mobs. Oh, and the final boss drops a minion! Most rewards drop from mobs or bosses, so you don’t need to worry about missing them. You should, however, look out for the following treasure coffers for additional loot:
| Treasure Coffer # | Coordinates | Rewards |
| Treasure Coffer 1 | X: 11.3 Y: 15.1 |
|
| Treasure Coffer 2 | X: 11.8 Y: 13.3 |
|
| Treasure Coffer 3 | X: 8.9 Y: 9.5 |
|
| Treasure Coffer 4 | X: 11.8 Y: 8.5 |
|
Enemies
| Enemy | Profession/Race | Level |
| 12th Legion Laquearius | Marauder | 60 |
| 12th Legion Princeps | Thaumaturge | 60 |
| 12th Legion Reaper | Magitek Armor | 60 |
| 12th Legion Secutor | Pugilist | 60 |
| 12th Legion Signifer | Thaumaturge | 60 |
| 12th Legion Hastatus | Gladiator | 60 |
| 12th Legion Vanguard | Monster | 69 |
| 12th Legion Canis Pugnax | Cagnis Pugnax | 69 |
| 12th Legion Hoplomachus | Gladiator | 69 |
| 12th Legion Hexadrone | Hexadrone | 69 |
| 12th Legion Slasher | Magitek Slasher | 60 |
| 12th Legion Gunship | Magitek Gunship | 69 |
Bosses
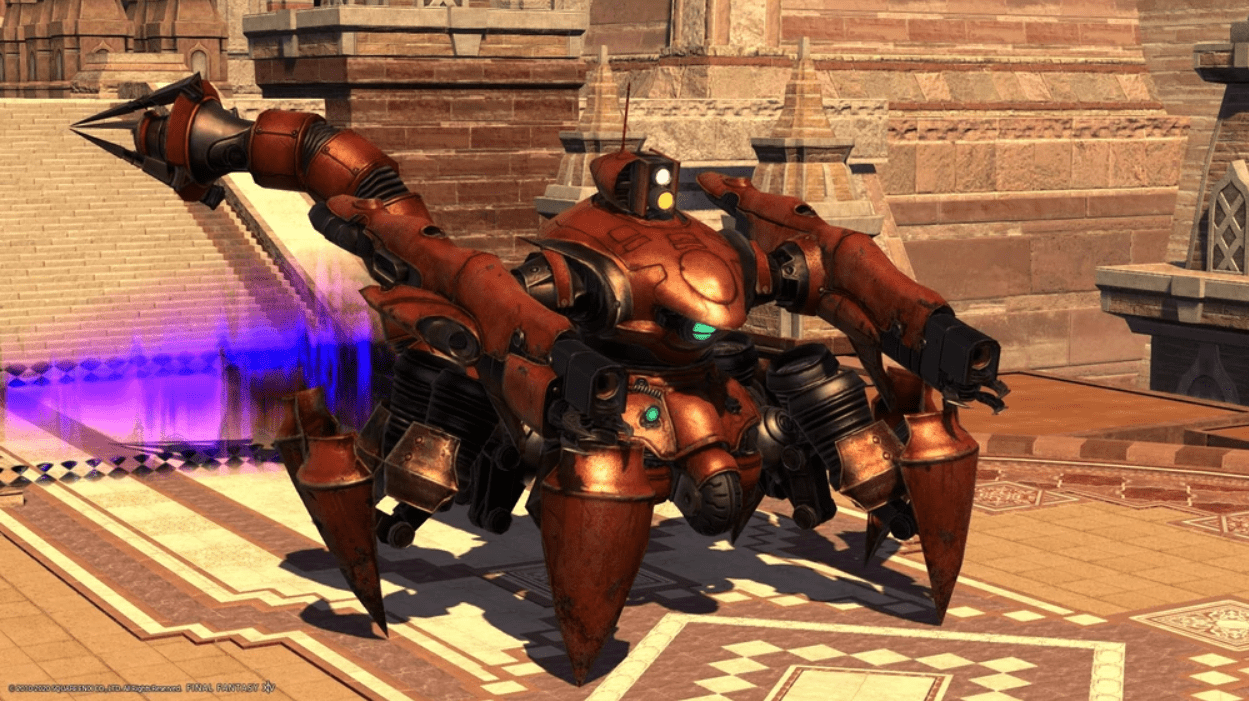
Boss 1 – Magitek Scorpion
Strategy
The first boss is the Magitek Scorpion. And yes, this is the first boss from Final Fantasy 7. He is a room-wide AOE with an electromagnetic field but otherwise has two primary mechanics.
The first is target search and unleash an AoE attack that gradually tracks the players it is marking. After several seconds it will arm and attack the marked area, dealing severe damage and leaving a puddle that deals damage. Over time, you can lure these away from the boss, but as long as you aren’t hit by it, it doesn’t matter exactly where you drop it.
The other mechanic is the tail laser. The boss fires two AoE in front and behind itself. These AoE initially deal significant damage and a channel for several seconds. Do not step back into the marked areas until you see all the AOEs coming from the tail laser. Then, ensure you dissipate, or it’ll take severe damage per second.
The second set of target searches will also do two of them back to back and two tail lasers back to back. So, be ready to place these, not be hit by them, and don’t step in the tail lasers. Once you’ve mastered these two mechanics, the fight goes pretty quickly.
Moveset
| Attack | Description |
| Electromagnetic Field | Deals group-wide AoE damage |
| Target-search | Follows players with an AoE marker and blasts the area |
| Tail Laser | Unleashes a long-column AoE |
Boss 2 – Aulus mal Asina

Strategy
The second boss is Aulus mal Asina. He is a primarily simple fight. First, he makes a room-wide AOE attack and summoning Magicite claws, which do several targeted and donut AOEs. Then, after a few AOEs, he will use a magic disruptor to stun players and pull them to sure sides around him before mind-jacking all the party members. This will separate your soul from your body, with the primary goal being for you to slowly run back to your body so you can gain control again.
The magic claws that spawn will hunt down each player during this, stunning you if it reaches you. After a short delay, it will knock you back before stunning you, so at least it doesn’t deal damage. It would help to avoid the AoEs to ensure you don’t die. Just run slightly to the side, past the claw chasing you, and towards your body. If you get stunned, don’t panic.
It doesn’t mean you’ve died. Sometimes even knocks you back out of the AOE after you’ve been stunned. Just keep running forward to your body, and you can kill the remaining Magicite claws when you’re freed if they’re still chasing your teammates, which will help them out. After this, the boss keeps doing more AOEs. Easy peasy.
Moveset
| Attack | Description |
| Mana burst | Deals group-wide AoE damage |
| Order to charge | Spawns Magitek Bits around the room |
| Order to fire | Compels Magitek Bits to cast AoE attacks |
| Magitek disruptor | Stuns players and pulls them towards the boss |
| Mindjack | Knocks all players out of their bodies |
| Demimagicks | Marks players with an AoE circle |
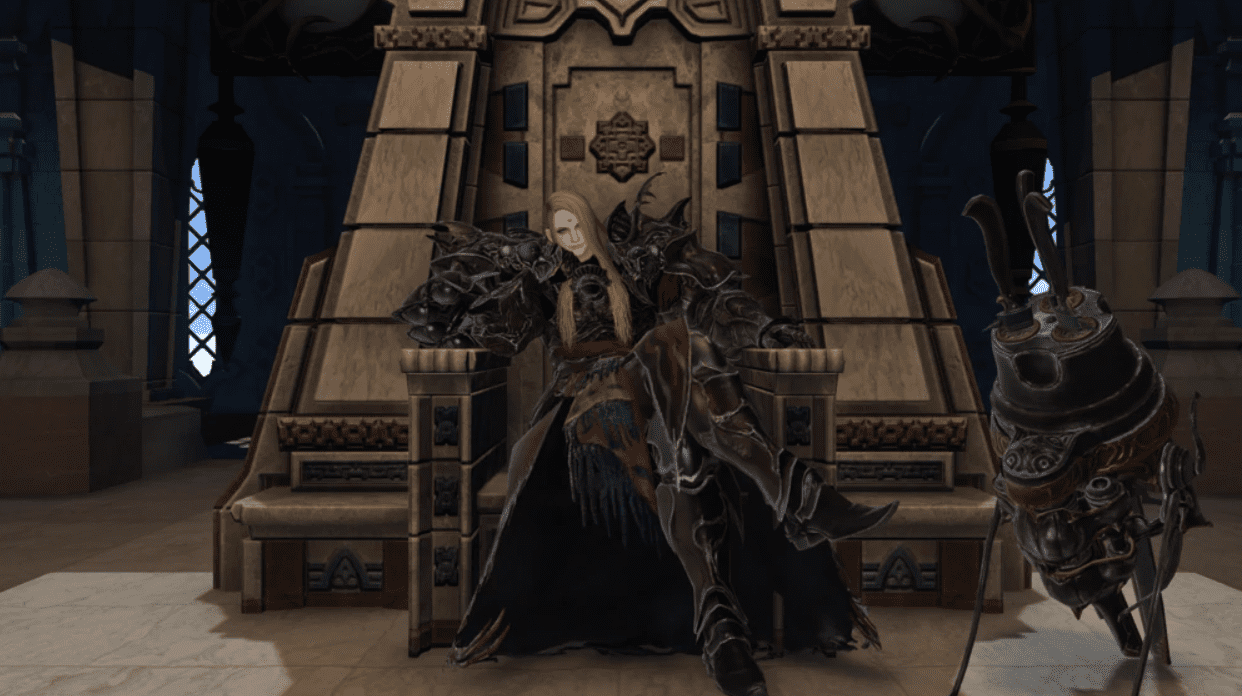
Boss 3 – Zenos yae Galvus
Strategy
The final boss here is Zenos yae Galvus. Early in the fight, he will put a dark AOE in a circle around the room. Touching this will deal heavy damage over time and cause you to deal minor damage for some time.
When Zenos says “Kill” in the little text bubble next to him, he will do a hard-hitting tank leave, so be aware of that damage. Besides this, he has an unavoidable AOE that he’ll use later in the fight.
The primary mechanic here involves Zenos 3 swords. When he does the art of the storm, he does a powerful point-blank AOE that paralyzes. So, move away from him when you see this. When he does the art of the swell, he will do a large knockback, so get close to him, so you don’t hit the wall. Finally, when he does the art of the sword, he will do AOE under the direction of each player. Being too close to him can cause you to be hit multiple times even if you’re spread out, so I’d recommend just backing up a bit and spreading away from other players.
Other than these, he sometimes jumps in the middle of the room and summons several clones. First, he’ll do an AOE around him, then each of his clones will. After those AOE, he’ll tether to a player before shortly doing a large cone along which the tethered player can aim in whatever direction they stand.
When Zenos gets low on HP, he will say, “Show me your all,” before going unforgettable in the middle of the room. You can LB him just before this if he’s low enough and skip the last phase altogether. In this phase, he will slowly build up his ether transfer gauge dealing more damage with this attack the higher it gets. The gauge stops when all three of his swords have been destroyed.
While you’re killing the swords, Zenos will send out clones of himself to use the three art abilities from the first phase. Same rules as before: run away from the art of the storm, run towards the art of the swell, and spread out for the art of the sword. Once all three swords are dead, survive his final attack and finish him off.
Moveset
| Attack | Description |
| Art of the storm | Point blank AoE attack that deals damage and paralyzes |
| Art of the swell | Knock all players back |
| Art of the sword | Targets all players with a column AoE attack |
| Unmoving Troika | Performs a multihit attack on the tank |
| Vein Splitter | Unleashes a significant circle AoE attack |
| Lightless spark | Tethers the player and casts a significant cone AoE attack |
| Concentrativity | Performs a group-wide AoE blast |
FAQ
Question: Can you solo Ala Mhigo?
Answer: It is possible to run Ala Mhigo solo and unsynched. It’s highly recommended to be over level 70 and get comfortable with classes like Blue Mage, Machinist, or Warrior.
Question: How do you unlock Ala Mhigo?
Answer: Though Ala Mhigo is an entire nation in FFXIV, you can only access a Magitek-heavy dungeon in the Stormblood expansion. However, the content is unmissable as part of the main storyline.
Question: How do you beat Zenos Yae Galvus?
Answer: If you’re having trouble beating Zenos, that’s fine. You are supposed to feel weak in comparison to him. However, you need to beat him to progress in the story, so make sure you keep track of his “Art of the…” attacks and react accordingly.
Conclusion
The Stormblood expansion resolves the long-awaited and much-teased storyline for the Ala Mhigo nation. Finally, you get to explore this Magitek-infused dungeon and walk out with a couple of sweet rewards in your hands.
The bosses from this dungeon will take you down a nostalgia trip, mindblowing your creative tactics and reduce you to tears with their power. Plus, they look awesomely cool while they do it.
Though it did feel rushed story-wise, it is still an enjoyable time to fight through this challenging area.