

- Hermes FFXIV Guide - February 2, 2023
- Every Final Fantasy Game Ranked - January 28, 2023
- Hydaelyn FFXIV Guide: Facing your Maker - January 22, 2023
Eureka is easily the hardest in-game area to master. Its independent leveling system and exclusive game mechanics make it a mean beast to tame.
One of the most frustrating things about Final Fantasy XIV is the need for more simplified information on how to get some things up and running in the game. “A Realm Reborn” is a great tutorial.
Still, I often see friends having trouble unlocking simple things like Extreme Trials, Beast Tribes, Duties outside the Main Scenario, and sometimes even unlocking the ability to use mounts in the game.
I could sit here and write about how tedious completing Eureka is. But, after recalling my compulsive disorder to get every last elemental armor this area can provide, it seemed a bit hypocritical.
Instead, in this Eureka FFXIV guide, I’m going to simplify something I needed help piecing together. Of course, we are talking about Eureka!
Eureka, in Short
Eureka is a mysterious, unexplored, and untamed region with ever-changing elements. You will be challenged by new combat mechanics that you must master to get and upgrade new and powerful weapons.
Yes, it can be annoying. But you are going to complete it for the loot anyway.
The Complete Eureka Walkthrough – Why do Eureka?

There are many reasons why people do Eureka: to complete the story, create a Stormblood relic, or for the shiny loot. But the truth is that everyone starts Eureka for two main reasons:
Elemental Armor
At some point in the game, you have seen a tank in Limsa Lominsa outshining Dancer’s skills or 24 people with the skill charts maxed out in an Alliance Raid.
This golden armor that looks like it came straight out of a Tokusatsu is an Elemental Armor. To put it plainly, an object of desire for many people. I started doing Eureka only and only to have my Dragoon elemental armor.
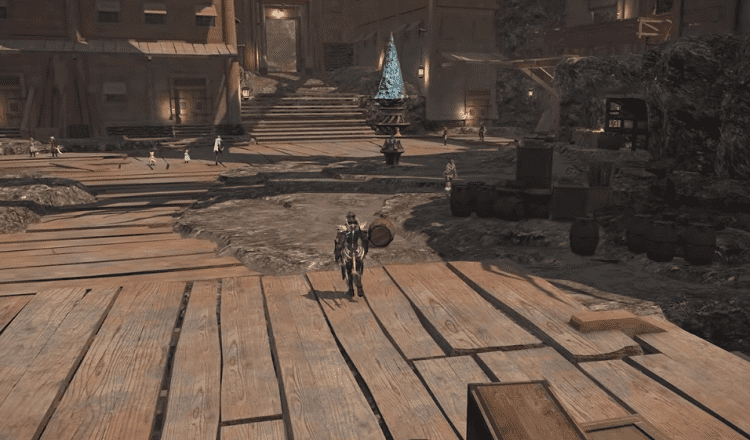
Demi-Ozma
Many people I know started Eureka with the sole purpose of getting the mount in the above photo for two factors. The first one is the nostalgia factor: Ozma was an optional “ultimate boss” in Final Fantasy IX.
The second is the visual: Demi-Ozma shapeshifts based on the environment. For example, on land, it is a sphere; while flying, it’s a cube; underwater, it takes the form of a triangle.
Other collectible and valuable items.
All Eureka Islands have unique rewards. You can get them through many activities, and chests received in the instances.
Make no mistake: items exclusive to Eureka are VERY sought after. Several players are willing to pay 20 million Gil for a Cassie Earring!
Eureka Quests
To progress through the story, you must complete Kryle’s quests as you explore Eureka.
Eureka has four arenas: Anemos, Pagos, Pyros, and Hydatos.
Anemos: The First Island
Anemos is the starting area for Eureka, so it feels right to explain some mechanics first.
Magia Melder
Don’t be alarmed by the interface! You will only use this Melder once or if you constantly switch jobs. Also, don’t worry about point allocation because every enemy on the island is of only one element.
Any Magicite you pick up will usually be used in only one element. We will change it as needed via the magic board.
Even if you put all the points in a single element, you can change them during combat using the Magic Board.
Magic Board
The concept of the Magic Board is simple enough. Each enemy in Eureka is ‘bound’ to a specific element, and each is weak against another. This is represented on the Magia Board with an arrow. So while your magicite points are in lightning, you will do more elemental damage to a water enemy.
Left-click the number to rotate counterclockwise, and right-click it to rotate counterclockwise. Then, when you reach the desired element, stop clicking.
Notorious Monsters
Notorious Monsters are bosses that spawn in fixed locations on the Islands of Eureka. Each of them has a proper spawn condition. For example, some can appear only at night, while others need a specific climate.
- Notorious Monsters of Eureka Anemos
Notorious Monsters of Eureka Anemos, courtesy of Eureka Tracker
With this map in hand, you can see the location of mobs and the exact location of each Notorious Monster.
Independent Leveling System
I’m not going to lie; entering Anemos for the first time and seeing that you need to level up again can discourage you.
It doesn’t matter who you are outside. In Eureka, you will be set to level 70, so skills above this level will not work. Meet the Elemental level in Eureka. It increases as you defeat enemies and do objectives on the island.
Also, unlike the average level, the elemental level and experience are the same for all jobs. So if you have more than one job leveled up, they can all be used within the same elemental level.
Protean and Anemos Crystals
Each Eureka has its currency, and Anemos’ is the Protean and Anemos Crystals.
Protean Crystals can be obtained by defeating enemies. Each time one is defeated, you get a sequence bonus that increases the gain of Protean Crystals.
Anemos Crystals can be obtained by defeating Normal Monsters that spawn on the map. These are mainly used to upgrade the Eureka Gear, but they can be exchanged for Protean Crystals.
Anemos Crystal Exchange
Farming Protean Crystals is complex and discouraged. They are necessary to upgrade the weapon, though. The best way to get them is to ‘break’ Anemos Crystals with Gerolt.
Just talk to him, select the Exchange Anemos Crystals option, and select the option you prefer. The first option exchanges every 1 to 1 Anemos Crystal, the second every 10 to 10, and the last every 50.
Anemos Elemental
The Anemos fairy is an entity found in some parts of the island. When you stand near her, you receive an elemental experience bonus.
Be careful getting close to the fairy too! If you are close to an enemy and he does area damage, he can hit the poor little fairy and kill her too.
Anemos Gear and Weapon
As I mentioned, you will work on your level 70 relic in Eureka.
They are not as relevant for combat these days. But that doesn’t stop people from looking to get their prominent relics in all expansions.
To this end, we will interact with the now-familiar partner-in-crime who makes relics and armor Gerolt at X: 18.0, Y: 32.2.
You will need the following items to progress:
- 1300 Protean Crystals and 3 Pazuzu Feathers for the final stage of the Anemos weapon.
- 3000 Protean Crystals and 750 Anemos Crystals to complete an Artifact Armor set.
Pagos: The Ice Island
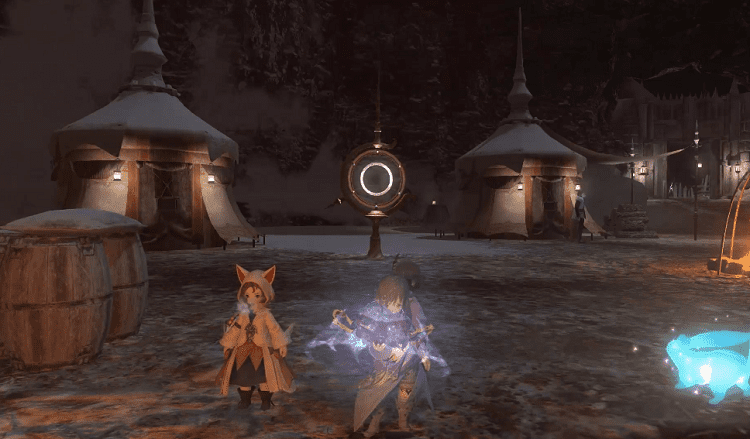
Time to talk about Pagos, the island of salt ice! On the second island of Eureka, you will raise your elemental level a bit and learn how to use a kettle. Yes, I’m serious.
To unlock Pagos, you must reach level 20 elemental and complete all the quests in Anemos. Then, Kryle will send you back to Kugane.
A new mission will be available with Rodney in Kugane at coordinates X: 8.5, Y: 14.2. This unlocks the second island, Eureka Pagos.
Navigating Pagos and Sleeping Dragons
The first scare you usually get in Eureka Pagos comes from the Void Dragons. They can be found sleeping at strategic points on the island. Even if you are at the instance level cap, I recommend walking rather than running near them. This will keep you from waking them up. In case they do wake, you will get slapped and die. Guaranteed.
Whenever you see a Frozen Void Dragon, walk, don’t run!
Pagos’ Quests
You could ignore the quests in Anemos before reaching level 20. But I recommend picking up and completing each quest at its proper level.
You won’t get magicites for your magic board, but they help you reach elemental level 25.
So, keep an eye on the quests and try to complete them as quickly as possible. Take advantage of all the upgrade materials from FATEs and by defeating enemies!
- Level 21: The Depleted Aetherial Stream is located at the top of the hill in The Cones, coordinates X: 16.5, Y: 28.8. To reach this location, leave Icepoint towards the south of the map and start climbing to the top of the hill. After interacting with the object, return to Krile in Icepoint.
- Level 23: The Depleted Aetherial Stream is located in a gap at coordinates X: 26.3, Y: 30.6 south of Val River Belly. After interacting with the object, return to Krile in Icepoint.
- Level 25: Go to Eastern Edge at X: 30.9, Y: 20.7, and interact with the target point. After the pause, interact with the following nearby point at coordinates X: 30.7, Y: 21.0, and return to Kryle.
- Level 29: Use Aetheryte for Geothermal Studies, go to The Western Edge and jump from coordinates X: 9.9 and Y: 21.3. After talking to Ejika, return to Kryle.
- Level 35: Go to coordinates X: 21.8, Y: 12.4 at The Fumarole and interact with the target point. Then return to Kryle.
Once you have reached this point, all Pagos missions are complete! You can return to Kugane and unlock access to the next island, Eureka Pyros.
Mutation and Adaptation
A new system for island enemies is introduced in Pagos. Mutation and Adaptation are transformations undergone by an enemy when a time and weather rule is met. Not all mobs in Pagos undergo these transformations.
- Mutation modifies the enemy’s element and appearance and can change their abilities.
- Adaptation increases the size and damage of an enemy and sometimes their abilities.
Pagos Weapon
Before moving on to the next island of Eureka, I recommend working on your Pagos Weapon.
Remember when I said to get to elemental level 25 and complete the same level’s mission as soon as possible?
When you talk to Gerolt after this level, he will tell you about the famous Kettle Power. He also mentions, “to progress with your weapon. You will need a reagent obtained only by collecting Vitiated Aether Crystal.” But let’s go bit by bit.
What the hell is Kettle Power?
Eureka’s “light farm” comes in the form of what we call the Vitiated Aether. To begin accumulating it, reach level 25, complete Kryle’s quest, and talk to Gerolt.
From now on, you can collect Vitiated Aether Crystals with the kettle. It can be exchanged for Frosted Protean Crystals. See the new indicator in the Duty information next to the remaining time? It states the accumulation of Vitiated Aether.
Vitiated Aether Crystals are accumulated by defeating Notorious Monster. They can also be obtained by defeating enemies above the character’s elemental level. Or even by defeating enemies in Mutation or Adaptation. Completing any activity in Pagos can grant Vitiated Aether Crystals up to a limit of 9.
So, keep an eye out to turn them into Frosted Protean Crystals when you are near 9!
From Light to Protean Crystals
To turn this gauge into Frosted Protean Crystals, go to the Crystal Forge in Test Cavern 1-P at coordinates X: 6.1, Y: 21.5.
This conversion happens in a 1:1 ratio.
Let’s say you have six complete Vitiated Aether Crystals and some progress on the seventh. In that case, you will receive 6 Frosted Protean Crystals and keep your progress.
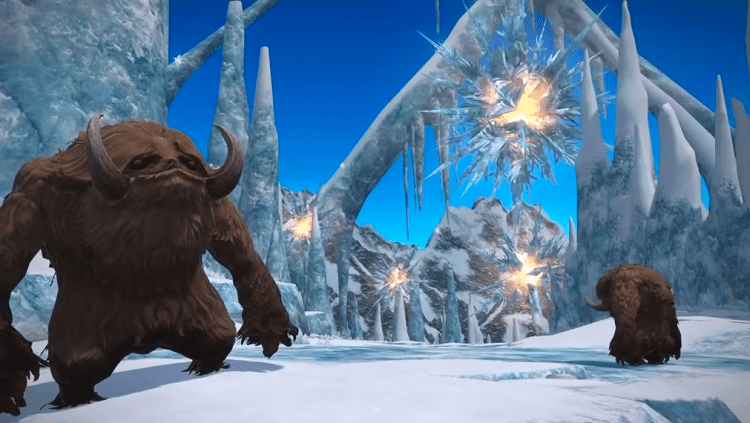
Pyros: The Fire Island
To access Eureka Pyros, you must be at elemental level 35 and have completed all the missions in Pagos.
When you leave the instance, a new quest will be available with Rodney in Kugane at coordinates X: 8.5 and Y: 14.2. This unlocks the third island, Eureka Pyros.
Despite the name Pyros, you will find more ice around here. Hey, some hot lava-filled areas are in the northern part of the map, too! Of all the islands in Eureka, Pyros is the biggest. Still, it is less punishing for general traffic than Pagos.
Pyros’ Quests
Level 35: Once you arrive in Pyros, talk to Krile in the camp and then to The Living Foundry (X: 13.7, Y: 20.9) inside the camp. After some walking and talking, the quest will be over.
Level 38: Talk to Krile and then to Drake. He will then ask you to go to coordinates X: 18.6, Y: 30.6 to get a Promissing Scrap. Return this item to Drake to unlock the Umbral Array from your Logos Manipulator.
Level 40: Speak to Krile again and then go to West Flamerock at coordinates X: 17.2, Y: 11.7. Interact with the Confluence and return to Krile in Northpoint to complete the quest.
Level 45: Speak to Krile again in Northpoint. A few cutscenes will occur in The Living Foundry (X: 13.7, Y: 20.9). After that, talk to Krile again.
Level 50: Be very careful, as both areas you must visit in this mission are plagued with monsters.
After reaching level 50 and completing all missions, you will unlock Eureka Hydatos.
Logos Manipulator and Logos Actions
In Pyros, we are introduced to a new combat enhancement system called Logos Actions.
Their primary purpose is to add more ability to your character’s kit, but they work only in Eureka.
Your job doesn’t matter anymore. With logos actions, you can resurrect another player, increase your tank life, or grant a permanent damage bonus.
The possibilities are endless!
Logograms
Logograms are items you can get in several ways from Pyros. Some are easy to farm because they can be looted from specific mobs. Others are difficult because you need a group to farm or defeat Notorious Monsters.
The logograms themselves are everyday items with no function. Once you receive one or more logograms, you must go to Drake to turn them into Mnemes and Logos Actions.
There are a total of 9 different logograms, with each type of logogram opening into two or more mnemes:
- Conceptual Logogram
- Fundamental Logogram
- Offensive Logogram
- Protective Logogram
- Curative Logogram
- Tactical Logogram
- Inimical Logogram
- Mitigative Logogram
- Obscure Logogram
Besides farming, it is also possible to buy and sell Logograms directly on the Market Board. Some are cheap, while others can be expensive, up to 20k a unit.
Mnemes
Once a logogram is evaluated, it is transformed into one of the mnemes that it can result in. A Conceptual Logogram, for example, can be evaluated into seven different mnemes:
- Wisdom of Aetherweaver
- Wisdom of the Martialist
- Wisdom of Platebearer
- Incense L
- Cure L
- Backstep L
- Paralyze L
Once turned, mnemes will be available in the Logos Manipulator to create Logos Actions.
Logos Actions
With several mnemes in the left panel of your Logos Manipulator, it makes you wonder: what the heck does it all do?
Some logos are created by dragging a single mneme into the Astral Array. Or you can combine two or three mnemes to form a Logos Action. Some Logos Actions also have more than one combination.
To, for example, create a Wisdom of the Ordained, you can combine the following mnemes:
- Wisdom of the Ordained
- Wisdom of the Aetherweaver + Esuna L
- Wisdom of the Aetherweaver + Cure L + Cure L
- Cure L II + Cure L II + Cure L II
Once these combinations are made in the Astral Array, Wisdom of the Ordained will be available in your Logos Actions list.
Elemental Gear and Weapon
Continuing our saga for the level 70 relic, we enter the Pyros relic part. From this point on, you should have your relic in hand and be ready to farm the Pyros-specific items.
After unlocking your Elemental +1 weapon, Gerolt will talk about how you can add secondary attributes to your relic.
As in Pagos, we will convert these Vitiated Aether to a forge, located at coordinates X: 22.3, Y: 6.1 in The Partisan Proof. But you do not need the Smoldering Protean Crystals generated there to complete your Pyros weapon stages.
Hydatos: The Water Island

Remember that to access Eureka Hydatos, you must be at elemental level 50 and have completed all the missions in Pyros that I detailed in the previous post.
When you leave the instance, a new quest will be available with Rodney in Kugane at coordinates X: 8.5 and Y: 14.2, enabling the fourth and final island, Eureka Hydatos.
Hydatos, as the name suggests, is completely covered in water. What is odd is that all this water flows in the opposite direction. A disturbance was caused by the back and forth of Val Island between the world and the lifestream.
Hydatos’ Quests
Hydatos is the island where there are the most quests to complete the story of Eureka. Still, they need to block proper functionality during leveling. Unlike the previous islands, I recommend doing all the quests at once after reaching level 60. Walking around the map will take a lot, and they are not initially urgent.
- Level 50: Talk to Krile when you arrive at the camp. She will then ask you to talk to Gerolt to follow up on the quests needed for the relic. Once you have done this, speak to Krile again.
- Level 51: Speak to Krile at the camp, go to The Central Columns at coordinates X: 20.3, Y: 24.8, and speak to her again. Then go to coordinates X: 25.7, Y: 30.7 and interact with the Pooled Aether. Finally, return to Krile at coordinates X: 20.3, Y: 24.8.
- Level 54: Speak to Krile at coordinates X: 10.6, Y: 29.6 in The Western Columns, then go to coordinates X: 6.5, Y: 15.7 at the top of the large column and interact with the Pooled Aether. Return to Krile at coordinates X: 10.6, Y: 29.6.
- Level 57: Find Krile again at coordinates X: 31.3, Y: 27.2. She will ask you to go to The Eastern Columns at coordinates X: 31.3, Y: 29.6 to speak to her again. She will then ask you to collect another Pooled Aether, this time at coordinates X: 30.8, Y: 14.4. Return to her again at coordinates X: 31.3, Y: 29.6.
- Level 60: To start the last quest, go back to coordinates X: 31.3, Y: 29.6 in The Eastern Columns, and then go to The Aetherbridge Foundation at coordinates X: 24.0, Y: 30.6 and talk to her again.
After completing all missions in Eureka, a blue mission will appear in the Expedition Scholar at Central Point. Upon completing it, you will receive a series of warnings about the risks of venturing there and a prompt to confirm that you are aware.
Once confirmed, you will be able to defeat Ovni and receive the Aetherically Primed buff necessary to access one of the portals to the Baldesion Arsenal.
Aethertight Flask
Here in Hydatos, you can increase the number of Logos Action trays from 3 to up to 6, which allows you to carry more valuable combinations of Logos Actions and change as needed. This is particularly useful for the Baldesion Arsenal, where some jobs and roles typically change the sets of Actions in use as you progress through the raid.
Increasing this limit is simple: FATE the rabbit of Hydatos and hope for Silver Chests as a reward! The Aethertight Flask can then be delivered to the Expedition Alchemist at coordinates X: 20.8, Y: 13.4. Only 3 Flasks are required for all upgrades. Any extra Flask can be discarded.
Elemental Gear +1 and Eureka Weapon
Continuing our saga for the level 70 relic, we enter the Eureka relic part.
We do not collect any extra currency here and only need Hydatos Crystals. Yet, this can be time-consuming, considering the crystal drop here is sufferable compared to the other Eurekas.
Technically this is the last stage of the Stormblood relics. Each Eureka weapon grants an individual achievement, and it is possible to stop here. But I suggest that you go further. In that case, you can ‘upgrade’ the Eureka weapons and turn them into Physeos weapons with an elemental bonus.
Elemental Gear +1
Remember when I did the first Eureka post talking about Anemos? In it, I mentioned that elemental armor is one of the main reasons someone ventures through this whole process. The wait is over, and if you want the final look at Eureka’s equipment, your time has come!
To do this, I assume that you have already spent 200 Pyros Crystals on buying the five pieces of the job set of your choice and that you have unlocked all 56 Logos Actions. True, you only need 50 actions for the first stage of armor.
But in Hydatos, the NPC that exchanges the essential piece for a +1 elemental piece will only give you this option if you have unlocked all Logos Actions. Remember to visit the post about Eureka Pyros to review how to do this.
To upgrade an Elemental piece of equipment to Elemental +1, you need to talk to the Expedition Artisan at coordinates X: 20.5 and Y: 13.3 and select the option Augment Eureka Armor. In all, you need 160 Hydatos Crystals to upgrade all five pieces.
FAQs
Question: When Can I Unlock Eureka?
Answer: To unlock Eureka, you must be over level 70 and complete the main Stormblood story quests.
Question: How Can I Access Eureka?
Answer: To access Eureka, take the following steps:
1. Speak with Galiena at Rhalgr’s Reach near the Chakra Falls.
2. Begin “And We Shall Call it Eureka” as your quest.
3. Go to Kugane and meet Krile.
4. To spawn in Eureka, speak to Expedition Ferryman Rodney.
Question: How Can I Level Up Fast in Eureka?
Answer: If you want to level up fast in Eureka while in a party, keep in mind the level disparity.
The best way for a solo player to earn the most experience is to take on a single monster two to three levels above you.
In either case, complete FATES and Challenge Logs, and keep a watch on Sprites and Mutations. Chaining EXP is super important, too!
Parting Words
This guide sums up how to get through all of Eureka. In this journey, you have dipped your toes into a new leveling system and game mechanics. Without a doubt, you have also defeated many notorious badass monsters on the way. Way to go, you!
It took a while to get here. But after sneaking past sleeping dragons, battling gigantic bosses, and talking to Gerolt like an obsessive girlfriend, you finally got your hands on your relic pieces. What are you waiting for to show them off?