

- Hermes FFXIV Guide - February 2, 2023
- Every Final Fantasy Game Ranked - January 28, 2023
- Hydaelyn FFXIV Guide: Facing your Maker - January 22, 2023
Blue Mages are in for a treat with Final Fantasy XIV’s Masked Carnival. Once your Blue Mage is level 50, you get access to this set of trials to put your skills to the test. There are also some rewards to earn while you’re at it.
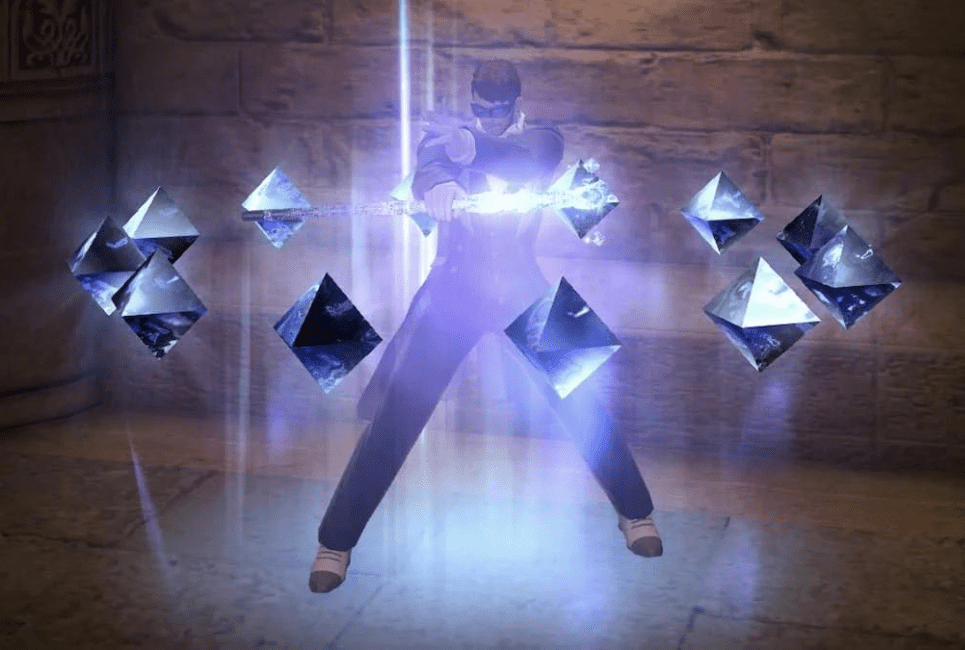
My Blue Mage walked in with trembling legs but flaunted her way out with an Azulmagia staff and her pockets full of poetics.
In this Masked Carnivale FFXIV guide, we’re going to cover the strategy for each of the Masked Carnival stages. There are 25 of them to complete the main quest, mind you.
TIP: I recommend you try them out on your own without help. It can be pretty fun figuring out what to do, and isn’t really all that difficult.
The TL;DR
The Masked Carnival is a full-fledged celebration. Cameos from previous franchises, exclusive magic spells, and suicide – all in one place! I found this arena-based challenge to be stupidly fun. It’s a fun piece of in-depth content that gives Blue Mages a well-earned break from all the criticism.
Masked Carnival Guide
Stage Selection Menu
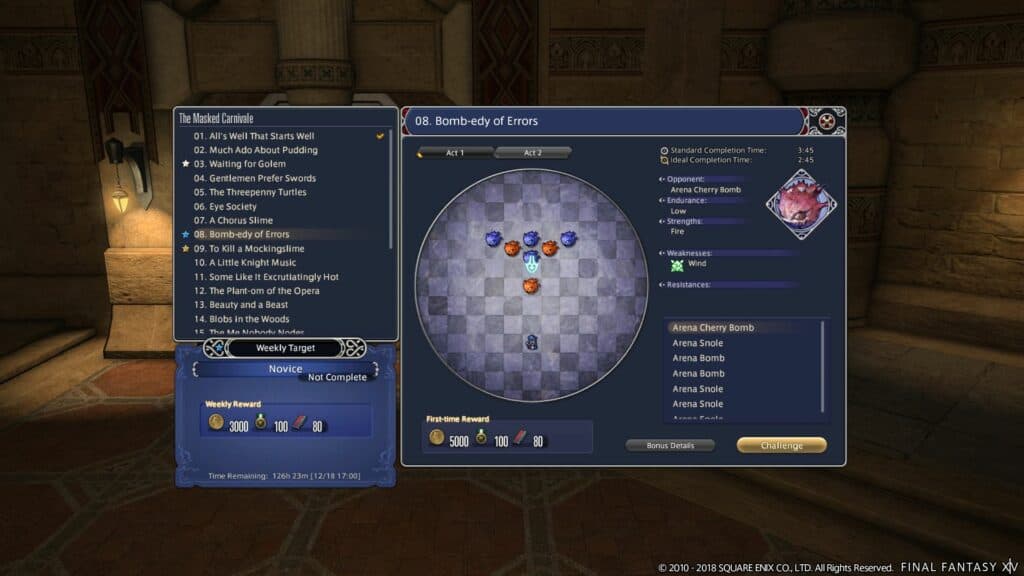
In the Masked Carnival’s stage selection menu, you will find information about your opponent. However, it still leaves up to the imagination. The gimmicks are going to be explained to someone else.
This menu lists the damage types they resist, their strengths, their elemental weaknesses, and their status resistances. There are also standard and ideal completion times alongside the number of acts on a stage.
When you complete one act, the battle arena will reset. The new monster will spawn as part of the next act cooldowns won’t be reset. So bear that in mind when you finish off any previous acts.
There can be up to three top acts that you must clear to finish a stage. There are also bonus details towards the bottom of the menu. They list optional objectives for you to overcome
General Strategy
Before we talk about stage one, I do want to address that there is a popular strategy for almost all stages.
Simply put, you use all your buffs. Then you self-destruct or final sting.
This strategy can kill quite a few battles in this entire Masked Carnival. Even though you die after using the skill, as long as you kill every opponent with your final attack, that takes priority over determining your victory. You can actually get completions using these suicide abilities.
We will discuss the intended way of doing these stages, only using the strategy and a couple of the tougher ones. Keep in mind that if you can blow stuff up, boom.
Stage by Stage Guide
Stages 1 to 9: Easy Peasy
| Stage | General | Act | Strategy |
| 1 | Stage one is super basic. It puts you up against two Dullahan. | 1 | They have no elemental weaknesses and little resistance to debuffs. So, grab any AOE spammable spell and go to town. |
| 2 | Stage two is made up of two acts. Each consists of three flan enemies; each a strong against one element and weak against another while being all resistant to physical skills.
|
1 | Wave 1: Fire-Resistant Flan
No self-destruct here. Bring Mind Blast and spam it while staying alive with the White Wind for a slow yet effective battle. Bring multiple spammable AOE of different elements for a quick battle to speed up some of the kills. Of course, if you have any primal skills, those will also speed the battle along. |
| 2 | Wave 2: Water-Resistant Flan
Blast your way out of this one. |
||
| 3 | Stage three is a battle against the Golem named Zipacha. | He’s weak to water, resists Earth, and resists most debuffs, but you’re gonna want to bring a silence for this fight. Zipacha is mostly a standard golem, except for his obliterate spell. You should silence it with Flying Sardine or Bad breath.
Just spam Water cannon, apply Aqua Breath, and you’ll be done in no time. |
|
| 4 | Stage four has two acts | 1 | The first act puts you up against two bats and a wolf.
They have two different weaknesses. First, the mobs don’t have much health, so you can proceed to perform your boom act. |
| 2 | Act two puts you up against Kreios, an iron giant.
You need to manually dodge the line he keeps spamming back to back. Use Tech Field. It deals with a large amount of damage resistance for a short time. Unfortunately, many beetle ads will also spawn. You should just spam your spell of choice. |
||
| 5 | Stage five is against three turtles. Again, they don’t attack; they don’t move.
|
1 | The turtles have resistance to almost all debuffs and massive damage reduction.
Fortunately, they do not resist any death spell, so Missile, Tail screw, and Doom all work. 1000 needles are your go-to move for this otherwise TIP: if you only use one action to win, you lose 30k points and get a hidden bonus detail called “Smarter, not harder.” It’s irrelevant because points don’t matter, but it’s funny. |
| 6 | Stage six is made up of two acts. Both acts use the same gimmick.
|
1 | In front of you are two Mandragora. They inflict blind on the player if you stand in the telegraphed area. |
| 2 | Act Two is more similar, but there are some Catoblepas now, so long as you’re not blinded, nothing here is a threat.
|
||
| 7 | Stage seven is entirely a gimmick. The encounter is made up of three acts.
When you kill one of the Lava Slimes in stage seven, it explodes in a big AoE around it, killing you or any enemies in range. You should push the slime to the proper locations, then detonate them with a spell from a distance.
|
1 | Just kill the slime where it stands. It’s as simple as that. |
| 2 | Pull each slime near the nearest sprite before getting a safe distance away and killing it. Then, just repeat that four times. | ||
| 3 | For Act Three, you’ll need to drag all the slimes close enough to the towers on the other side of the wall they are near. It takes three slime explosions to kill each tower, and you got three signs each. While the towers are alive, they span a large AoE that do a few thousand damage. When they die, it’ll instantly kill anything in its line of sight.
You want to get the slimes next to it and then detonate them. Make sure you stay safely behind the other side of the wall to make sure you don’t get instantly killed.
|
||
| 8 | Stage eight is mostly a gimmick encounter, but you can ignore it.
Make sure you bring a stun other than Sticky Tongue. Something like Bomb Toss will do. |
1 | Act one explains what the gimmick is supposed to be. First, arena cherry bombs blow up other nearby bombs. Then, when mobs are killed, they do a high-damage explosion that freezes nearby enemies.
Make sure you’re out of range and all the explosions. There’s no reason to get hit by any of them. |
| 2 | You’ll want to run around the bombs to the back without agro-ing any of them. Engage the enemies in battle and then immediately kill one of the cherry bombs along the outside. This will chain the snowball explosion into the device, which deals massive damage.
|
||
| 9 | Stage nine is a mix of stage two plus a boss.
|
1 | Again, bring Mind Blast, Glow or Flame Thrower to cover as many different elements as possible.
You occasionally summon ads with different elemental strengths and weaknesses when you kill the main boss. Kill them as they come, and silence Golden tongue when the boss casts it. Depending on your damage, you can kill the boss long before all six ads appear. |
Stage 10 to 19: Toughen Up
| Stage | General | Act | Strategy |
| 10 | You face up against a chromed-up small iron giant. | 1 | You face up against a chromed-up small iron giant. Unfortunately, his gimmick occasionally attempts to cast Kings well, which increases his damage.
TIP: this boss gives you one of the three achievements for the carnival. If you defeat him by allowing him to grow to full size, that is, three stacks. He stops trying to grow if you push them below 40%. The goal is to get him to just above 40% and wait for him to start casting Kings well for the third time. |
| 11 | Stage eleven has two acts, both of which are nearly identical.
|
1 | Act One pits you against two Gas Bombs. They both slowly cast abomination. If they succeed, you die.
Luckily, they get knocked back every time you hit them, interrupting their cast, so they have to start over. I use a Sticky tongue or start to drag or push them together near a wall. This keeps them grouped and prevents you from knocking them all over the place with your spells.. |
| 2 | Act Two has four of these Gas Bombs, which are spread out with some pillars between them. It takes a bit longer to set up, but I still drag them all to the same wall. | ||
| 12 | Stage twelve is a two-act one.
|
1 | Act 1 mostly makes you defeat tons of Roselet ads.
They’re very fragile and will fall over with almost any spell. However, if you have Ice spikes and Veils of the World, you can bring those and let them kill themselves as they hit you. You can also bring dragons voice and use its insane range just a tear them all down from a distance. Either way, act one has for them spread out, so kill them however you want. |
| 2 | Act two has a Hydnora boss. Be sure to bring a Bomb toss to stun Inflammable fumes. It won’t kill you, but you certainly don’t want it.
At around 80%, He’ll use force AK, which summons a bunch of Roselets. Use ice spikes to deal with them. At 40%, he’ll do that twice a row, summoning a lot more Roselets, but the same strategy applies. So again, watch your health with the damage they deal with and kill the boss. |
||
| 13 | Stage thirteen has another two-act performance prepared.
|
Act one is relatively straightforward. Just spam Glory to kill him and the two gargoyles near him.
The gargoyle starts petrified, which means Drill cannons will do a ton of damage to them right off the bat. It does free them up to actually start attacking you, though.
|
|
| 1 | |||
| 2 | Act two puts you up against a mini version of Carmilla.
If she lives long enough to summon ads, just make sure you kill them ASAP. She eventually will absorb the ad and do unavoidable damage based on their remaining health. But, of course, if you’re fast, you can kill her without even bothering with the ads. |
||
| 14 | n/a | 1 | For act one, all you need to do is kill each slime.
|
| 2 | In act two, however, the slime spams 99% movement slow. So slow that it might be 100, basically binding you in place. If you have Moon flute or Sprint, you can move a bit for the duration of those buffs. But otherwise, you need to use a Loom or Flying frenzy to get around.
Diamondback will save you from the explosions, but the exposure silences you for a long time. |
||
| 15 | Stage fifteen is a single act against a Bestial Node that you might recognize from the Binding Coils. | 1 | Again, I’d recommend bringing Flying sardine or Bad breath, as you’ll want the enemy asleep and silenced.
The fight starts against just the Node. When he uses summon, it brings out different ads depending on the point of the fight. The first ad is a Shabti. This thing has a 15-second damage buff which will almost instantly kill you in a single auto attack. Make sure you put the Shabti to sleep until the damage buff has worn off. If not killed within about a minute or so, it starts raging, spamming its actions on you for increased damage. The Node does eventually summon again, bringing out two snakes. When these snakes die, they delay their death by about two seconds without following you and then explode. The explosion places vulnerability stacks on nearby allies and enemies. Kill them close to the Node and each other, and then run away. |
| 16 | Stage sixteen has two acts again.
|
1 | The first one puts you against two very slow-moving Cyclops. You’ll want to nuke them down as they slowly chase you staying out of melee range. If they reach you in the swing, it’s going to hurt.
Basically, you just need to make sure you keep your distance while you kill them. |
| Act 2 involves killing a boss while you deal with the Cyclops spawning occasionally. Again, the same strategy applies: keep your distance and nuke down the Cyclops.
The boss uses Zoom in, and it knocks you back pretty far. The most significant ability here is when he pulls you in and does an 1111-ton swing. It hits a massive part of the arena. Now, if you run to the edge, you can dodge it without touching the bad lightning. |
|||
| 17 | Stage seventeen is also two acts. | 1 | Act one has a Left Claw and a Right Claw. The Left Claw counters magical attacks and the Right Claw counters physical attacks.
They still damage when you do this, but you will take damage back if you use the wrong skill. |
| 2 | In Act 2, you will fight Kratos once again. Be sure to bring the sardine. He now also summons left and right claws, which you can kill like before. | ||
| 18 | Stage eighteen is another gimmick fight. | 1 | Act One has you up against a Manticore that slowly makes many telegraphed attacks with no AoEs around the arena.
Your goal is to bait the Manticore attacks into the kegs while he’s near them so he gets hurt by them. In the meantime, DPS in him down. Then, you can kill him and ignore the kegs, though he will eventually manually detonate them. The kegs must be dead to complete either of the acts, so let him explode them. |
| 2 | Act Two is just two Manticores. Not only do the kegs damage the Manticores. The Manticores damage themselves too. So, if you hit them with the weapon the other one is using, they’ll die faster. Rinse and repeat over and over until you’re done. | ||
| 19 | Stage nineteen is another gimmick fight. This two-act stage is against a Malborough. Again, stick to physical skills like Sharpened knife and Mountain Buster here. | 1 | Act One doesn’t do much else other than Malborough weapon skills. Note that you can silence awful breath if you want to.
The fight intends for you to reflect the Inject ability off of Rebbekah and back onto yourself. This will blind you and render you immune to the stun. You can also just not do that and stand between two of the hips right on the edge of the safe part of the arena and look directly between them. |
Stage 20 to 25: Blood, Sweat, and (Blue) Tears
| Stage | General | Act | Strategy |
| 20 | n/a | 1 | Stage twenty is the only one in which you should self-destruct. Mainly because there’s an achievement that is really easy to get with self-destruct.
This one is three acts. The first one is against Typhon, the second is against Ultros, and the third is against both. |
| 21 | Stage twenty-one is a reasonably simple two-act fight.
|
1 | Act one has two Imps that are weak to fire. Just bring a Flame Thrower for this. Be sure to bring a stun or silence to stop them from casting Void Blizzard. |
| 2 | Act two has you facing an Apademak, a Chimera. But, again, this is something you’ve done plenty of before.
Occasionally, Imps are summoned and you’ll need to kill them while watching the silence or stun Void Blizzard. |
||
| 22 | Stage twenty-two is another bomb stage. | 1 | Act one has four sleeping grenades around the arena. If they’re woken up, they explode and instantly kill you.
You just need to kill them in a single hit because, if they’re dead, they won’t wake up. They have low HP, so any potency filler spells should be enough to move them over. You can also use Doom, but this will be less effective. |
| 2 | In Act two, you’ll fight The Forefather, a lot like the device from earlier but with a few new tricks. He summons ads with bombshell drops. This can be Grenades, which must be killed before he manually ignites them. If he gets to the ignition, they will wipe you. Nuke them down in one hit.
The Forefather also summons Gas bombs. They must be brought next to The Forefather and explode to stun him out of his burst cast. |
||
| 23 | This stage is against the Behemoth. | 1 | He makes standard attacks. Make sure to avoid standing too close to those who rip this tornado spawns and dodge all other AoEs.
The big thing here is Ecliptic Meteor. Simply put, Diamondback this attack. |
| 24 | This stage is broken up into three acts.
|
1 | The first is against a Viking and a Magnus.
Kill the melee Viking with magic, and then kill the Magnus with physical spells. That was a tricky sentence. Keep an eye out for Lightning Spark from the Magnus, and be sure to silence that. |
| 2 | Act two puts you up against a Scribe.
He will try to silence you, but you can just silence him. The first silence will be followed up by Libra and a Triple hit. It will kill you if you aren’t in Mighty guard or Diamondback. |
||
| 3 | Act three is up against Epilogi.
Dodge AoE spell telegraphs to avoid getting knocked away. But first, kill the ads as they appear. Then, use drill cannons to deal with them. |
||
| 25 | This is it. The final stage and the only one you technically need for the Blue Job quests.
Stage fifteen puts you up against Azulmagia, who uses a bunch of Blue Magic against you. You’ll need a good mix of physical and magical attacks. Azulmagia will always counter one or the other. |
1 | In this act, he will use ice spikes. Refrain from using any physical spells here. Avoid accidentally auto-attacking.
Other than that, it casts Ram’s and Dragon’s Voice. Make sure you spam Glower and Bristle. I also like to go boom near the end. |
| 2 | He’ll start with Repelling Spray, which counters attacks if you use any sort of magic spells.
I like to start this activity with Off-Guard before he casts Rippling Spray and Swiftcast and then uses any magical primal spells I have. It makes for a pretty good initial burst after that Sharpened Knife, and it’s probably the one you’ll want to go with Azulmagia mainly uses the same skills as Act One, but he’ll occasionally throw Blazing and Guns into the ground. If left alive long enough, he’ll spam burn, which gives you a stacking fire. When his health gets low, thoroughly buff your blue mage and finish him off. You can use self-destruction. |
||
| 3 | Act three is a mix of Act One and Two with some new mechanics. He’ll start with Repelling Spray and then swap over to Ice Spikes later. Keep an eye out for him casting either ability.
The arena is made smaller here, which comes into play with the mechanics. Shortly into the fight, he will reduce your movement speed by about 99%. Then, he will cast 4 AoE circles. So, space and visibility are limited here. Just do your best to dodge everything. Once he’s low enough, you can either do self-destruct. |
You can earn a remarkable achievement and title from stage 25 called Perfect Blue. To obtain it, you need to meet these requirements:
– Beat the mission using at least one spell of every element and one spell of each physical type of sharp piercing and slashing.
– Avoid getting hit by any attacks
– Get everything done within the ideal completion time.
FAQs
Question: How to Unlock Mask Carnival in Final Fantasy XIV?
Answer: This content is unlocked by completing the first level 50 job quest for Blue Mage.
Question: Where Can I Start Mask Carnival in Final Fantasy XIV?
Answer: It’s located to the West of the Blue Job trainer. It comprises 25 different stages. Each stage has challenges and gimmicks for you to overcome.
Question: What are the Rewards for Each Challenge in the Mask Carnival in Final Fantasy XIV?
Answer: Rewards: Gil, Allied seals, and Tombstones of poetics. There are also weekly challenges to get additional Gil allied seals and poetics.
Parting Words
Final Fantasy XIV has a little stack of content for Blue Mages as of right now. However, the Masked Carnival proves to be one of the most entertaining content opportunities Square Enix has offered us so far.
In your journey, you’ll curse and jinx your enemies as you please. But you’ll also have to keep your feet moving to avoid sudden death as the arena encounters get harder.
All in all, it’s a quest any Blue Mage capable of completing should proudly wear as a badge of honor.