
- Final Fantasy Best Buster Sword Replicas - January 30, 2023
- Final Fantasy Tifa Lockhart Guide: Inner Strength - December 31, 2022
- Omega Ruins FFX Guide - April 16, 2022
The Omega Ruins in Final Fantasy X is a location where you can only travel once you’ve unlocked the airship and put in the correct coordinates.
It’s home to Ultima and Omega Weapon, two of the most challenging bosses in the game not found in the Monster Arena. Well, one really, but some of the most brutal random encounters.
It boasts several great treasures, like rare Spheres, such as Teleport or Warp Spheres and even Lv.4 Key Spheres. The last Al Bhed Primer(XXVI) is also sitting in the depths of this location.
Traversing these halls is a brave endeavor, but it pays off if you’re willing to take it. In this Omega Ruins FFX guide, we are going to do our best to help you navigate its wonders and survive its horrors.
Key Info
- Required: Airship and coordinates.
- Mini-Games: Treasure or Mimic?
- Difficulty: High
- Content: Extra (not needed for game completion)
- Treasures: Excellent
- Important Finds: An Al Bhed Primer and Kimahri’s skill: Nova
Finding the Coordinates
While on The Fahrenheit, go to the search coordinates and enter X:69-75 / Y:33-38. This will locate the Omega Ruins.
The only suggestion I can give for anyone outright is don’t put these coordinates in first. Find the other places available via the airship, such as Zanarkand and where Anima is. Suppose you explore all the other locations successfully. In that case, you should be strong enough and have the equipment needed to handle these ruins.
The Story of Omega Ruins
Lulu will give you the history once you arrive. She’ll tell you how 700 years ago it is said there was a traitor to Yu Yevon named Omega. He was executed for treason, and his lingering spirit didn’t turn into any ordinary fiend. He turned into Omega Weapon.
Over time his hatred for Yevon even spawned a lesser version of itself, lesser being a loose word. That version is Ultima Weapon, and you’ll have to defeat both of them if you want to perform the Sending on the tortured soul of Omega.
Wakka adds how he liked it underground, out of the light. This sounds like foreshadowing that it will be weak to Holy, but it’s not. It’s not vulnerable to anything. Be ready for this.
Prepping for Combat

Things you are going to need, not just want, but need in these ruins, are armors with Stoneproof on multiple party members. You won’t require celestial weapons or break HP limit armor here, but it never hurts. Deathproof is really also kind of important. An Auto-Life spell or armor skill can work, but Deathproof is advised.
Browsing the internet to fact-check myself, I noticed no other guides suggesting Confuseproof. Let me say that is not good. Characters like Wakka, if you’ve played to his strengths, or Auron, if you’ve increased his accuracy, can wipe your own team when confused. In fact, any character with high damage and piercing will leave a confused party having your game come to a quick end.
You should have more than one character that can cast Haste, Shell, Protect, and Life. Lulu won’t be much use against Omega Weapon if you haven’t taught her non-elemental magic like Flare or Ultima. Giving her Lancet(to easily regain MP) and healing magic will keep her valid in the fight. Let me break down a quick-tip list of things that will serve you here.
- Survivable Armor Boosts: Confuseproof, Deathproof, and Stoneproof. Auto-Haste and Auto-Med and Auto-Phoenix will also be good.
- Helpful Armor Boosts: No Encounters, Break HP Limit, and Master thief.
- Survivable Weapon Boosts: First Strike(to help with Malboro Ambush).
- Helpful Weapon Boosts: Break Damage Limit, Gillionaire, Silencestrike, Evade and Counter, Magic Counter. Double/Triple Overdrive.
- Survivable Items: Remedy(x50 or more) and plenty of Ethers.
- Helpful Items: Any of Rikku’s overdrive items, dozens of Mega-Phoenix(especially if you have Auto-Phoenix on), and X-Potions(never hurt to have).
- Sphere Grid Level: At the very least, each physical attacking character should be able to do between 4-7 thousand damage a turn. If not, you could be in some serious trouble.
If you somehow already have Ribbon on your armor at this point, that is the optimal armor strat. It is also likely this will be an easy dungeon for you, so I didn’t list it.
There is never anything wrong with having Defense or Attack bonuses on your equipment in addition to these skills. Yet, having no party member with First Strike and no one with protection to statuses really could end up killing your party no matter how strong they are.
Navigating the Ruins

The map of the Omega Ruins is hidden with fog. As you traverse it, the fog will fall back, and slowly, more of the map will become clear. There are two areas to these Ruins and the only save point is at the entrance near the start, don’t forget to save.
The first area holds some treasures and Ultima Weapon. No Encounters works here if you want to avoid fighting. Ultima Weapon isn’t as hard as Omega at all and can even be bribed. More on that later. For now, just know that once he is defeated, you’ll have access to the second, more challenging area.
The second area is crawling with harder fiends, and No Encounter does not work here until you defeat Omega Weapon. Omega is a much more challenging foe than Ultima. If you die, it may be good to do some grinding on the first area for items and AP before trying the battle again.
If you were able to defeat Omega Weapon, capturing all the monsters in the Omega Ruins for the Monster Arena should be a breeze. Once Omega is defeated, the No Encounters skill will work on the second area. For some reason, the Adamantoise and Wraith encounters will be replaced with Puroboros, but only on the second floor.
The most dangerous random encounters in the Omega Ruins are still deadly. If you don’t have protection against the Great Malboro’s Bad Breath (which it will cast on you in an ambush as soon as the fight starts), you will likely lose even if you are a powerful team.
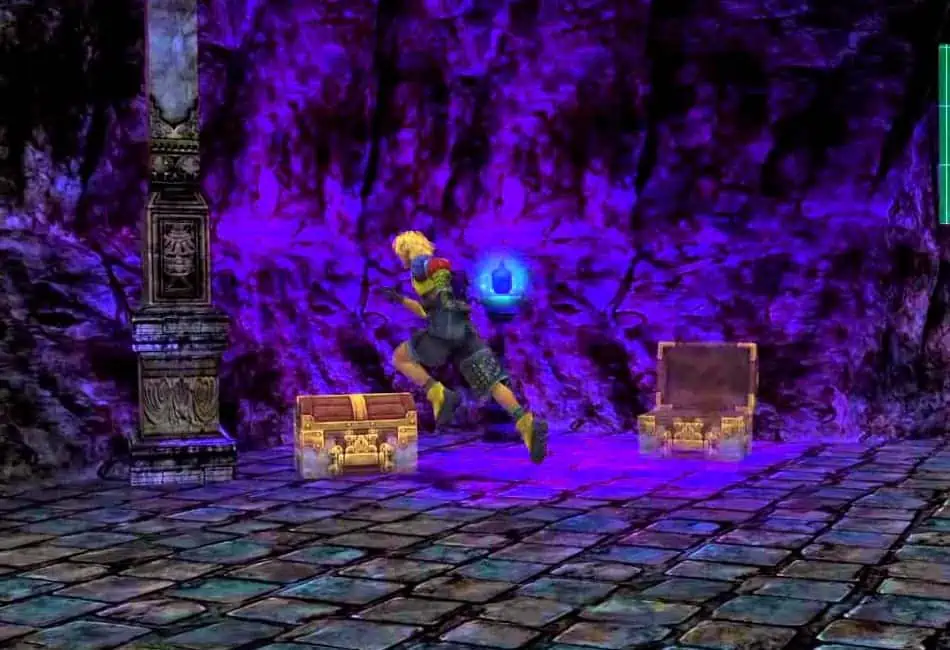
Sometimes you’ll encounter a treasure chest in a fight. Make sure to steal from it. It may yield nothing or turn into a Mimic, though this seems annoying because a Mimic gives no AP and drops no item. Even more so because a Mimic transforms into one of four random types. Also, they don’t count as a capture for the area. BUT a Mimic does drop 50,000 Gil. With Gillionaire on, that’s 100k a pop. Getting about 2.5 million Gil before you fight Ultima Weapon is a good idea for the Bribe.
Sure, it is a grind, but if you’re doing the Omega Ruins, you likely don’t mind some grinding.
Important Treasure Location
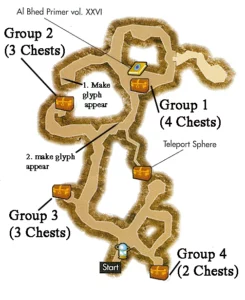
Make sure to head towards the back of the first level (as shown on the map) to pick up that Al Bhed Primer. If you got all of these (we have an Al Bhed Primer Guide to help if you need it), you could leave after getting this to go get a lovely gift from Rin on the airship. Why? Because this is the last Primer to unlock the language.
There are other fabulous treasures here, of course. A Teleport Sphere, a Friend Sphere, and a Magic Sphere.
To get the Teleport Sphere, you must first activate the two glyphs you find on the map.
To get the Magic Sphere, you have to go back to where you fought Omega Weapon after killing it. It should be on the floor.
The Friend Sphere is on the second level. The path to the right will lead to Omega Weapon when you go up there. The way on the left will bring you to the Friend Sphere.
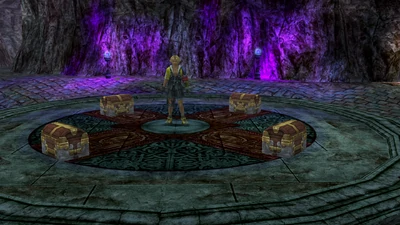
Those four treasure boxes, don’t open them yet; they are the mini-game. Beat Ultima Weapon, leave and save and then begin your attempt at trying to get the wonderful gifts they offer.
Treasure Mini-Game
The chests show on the map there will either be one of the treasures listed below or a Mimic. If you open up one and it’s a Mimic, the other chests will disappear. If you open a chest but leave the area where they are, the rest of the chests will still disappear.
So, you have to risk opening all the good chests and getting no Mimic.
There are a total of 12 magnificent treasure grabs from these chests. If you get to number 12, it will contain a considerable reward.
- 1. Lv. 4 Key Sphere
- 2. Defending Bracer
- 3. Turnover
- 4. Lv. 3 Key Sphere x2
- 5. Defending Armlet
- 6. Friend Sphere x2
- 7. Lv. 4 Key Sphere
- 8. Phantom Ring
- 9. Cactuar Wizard
- 10. Warmonger
- 11. Teleport Sphere x2
- 12. Warp Sphere x99
Now, do you need this? No, play more Blitzball and grind for the money. You can still finish your Sphere Grid. Do you want this? Yeah, come on, freaking 99 Warp Spheres! Just hop around that Sphere Grid and get whatever you want. Anyways, it is hard. I usually just quit trying and didn’t get them until I learned this trick to help. With it, I finally got those Warp Spheres.
The Treasure Trick
It turns out there is a 1/240 chance none of the chests will contain a Mimic. This comes from the fact that all groups have the same chance of having a Mimic or no Mimic, and it means hoping for luck will not be beneficial. However, it also turns out the configuration of where the mimics are, is based on an RNG(random number generator) that rolls as soon as you enter the Omega Ruins.
Once inside, save at the one save point. Put No Encounters on someone in your main party, and start at the chests. Remember which one is a treasure and which is a Mimic. Do a soft reload when you encounter a Mimic and go at it again.
Do not save and load after opening a chest. This will reset the prize counter. It does seem you can get away with saving and loading after finishing one group of treasure chests.
You have to finish each group, one after the other until you get those Warp Spheres. It can be a little time-consuming, but with this method, it didn’t take me terribly long at all, and those Lv.4 Key Spheres and Warp Spheres were very nice to grab.
I went ahead and grabbed them as soon as I got the Fahrenheit(airship)in my current run using the No Encounter skill and Bribing Ultima Weapon so as not to worry about that fight.
Ultima Weapon(Boss Fight)
- HP: 99,999(13,560 Overkill)
- MP: 99
- Strength: 50
- Magic: 45
- Abilities: Break, Confuse, Core Energy, Holy, Shimmering Rain, Silence, and Sleep.
- Defense: 60
- Magic Defense: 60
- Agility: 32
- Elemental Affinity: No strengths or weaknesses.
- Status Immunity: Immune to All except Silence and Darkness. You can use Doom on it, but it takes 99 turns to kill it.
- Other: Immune to Demi, Scan, Delay, and Capture. The enemy is Tough(requires a Piercing weapon), and you can not escape. Physical and Magical Breaks should still work.
- Steal: Door to Tomorrow(x10 or x20).
- AP: 40,000 (50,000 for Overkill).
- Gil: 20,000.
- Drop: Lv.3 Key Spheres and Equipment with Double Overdrive and/or Break MP Limit.
- Bribe: 2,500,000 will yield x99 Pendulums.
Ultima Weapon’s strength may not seem much, but a secret score as if each enemy has a weapon takes effect when they make their Physical Attacks. So Ultima Weapon does a bit more than two-thousand damage when it hits. You can reflect its status attacks, but the Core Energy attack can damage anywhere from 3,000 to 9,999.
Ultima Weapon is far easier than Omega, but that doesn’t make it a push-over. Ensure you’re doing good damage and have the proper health and status resistance to handle the fight.
Using an Aeon against Ultima weapon will lead it to use Core Energy more often. Casting Shell and/or using a shield will help lower Core Energies damage.
An interesting side note, Ifrit’s Hellfire and Ixion’s Thor’s Hammer have unique animations against him.
Random Encounters
The following monsters will attack you on the first floor of Omega Ruins. I’ve put a note next to those I thought needed information most. If you followed the preparation above, you should do okay here. If you’re dying a lot, the only real thing you can do is grind to upgrade your stats and skills.
First Floor
- Zaurus and a Treasure Chest
- Zaurus, and one of four random types of Mimics
- Zaurus x2, Floating Death
- Master Coeurl x2, Floating Death. Bribing a Master Coeurl for 300,000 Gil gives you a Warp Sphere.
- Black Element x2, spirit
- Halma x2, spirit
- Machea x2
- Puroboros x3. Like all Bomb-type enemies, watch out for Self-Destruct.
- Defender Z x2
- Adamantoise. Bribe for 1.5 million to receive Special Spheres.
- Wraith. Can cast Death.
- Demonolith x2. Also causes serious status ailments along with Death. It’s good to Silence it.
- Varuna. Weak to Holy. Casts Haste on itself and have severe magic damage and resistances.
- Great Malboro
- Master Tonberry
Of these enemies, as stated before, be most wary of the Master Tonberry and Great Malboro. The Bad Breath of the Great Malboro can cause poison even if you resist it. It also causes confusion, berserk, and petrification; it’s just the worst. Many gamers have seen the Game Over screen at this enemy’s hands, and it is no slouch in the damage department either.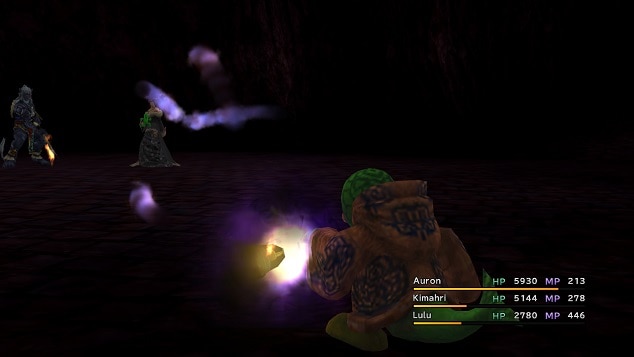
The Master Tonberry can kill you quickly by counterattacking with Karma, and you can do nothing about it. It does 10x the number of enemies you’ve killed indirect damage. Trying to put it to sleep before fighting it is wise or making sure you can quickly bring party members back to life.
It’s worth fighting for its rare drops, but usually better to run if you can’t do plenty of damage. Use Haste on your healer and make sure they are not attacking so they live long enough to get their job done.
Second Floor
The enemies on the second floor are generally the same, with a few new fiends that are upgraded versions of the Iron Giant. Here’s the list.
Before you defeat Omega Weapon
- Defender Z x2
- Adamantoise
- Demonolith x2
- Varuna
- Great Malboro
- Master Tonberry
- Wraith x2, a Treasure Chest
- Gemini (sword), Gemini (club)
After defeating Omega Weapon
- Puroboros x3
- Defender Z x2
- Demonolith x2
- Varuna
- Great Malboro
- Master Tonberry
- Gemini (sword), Gemini (club)
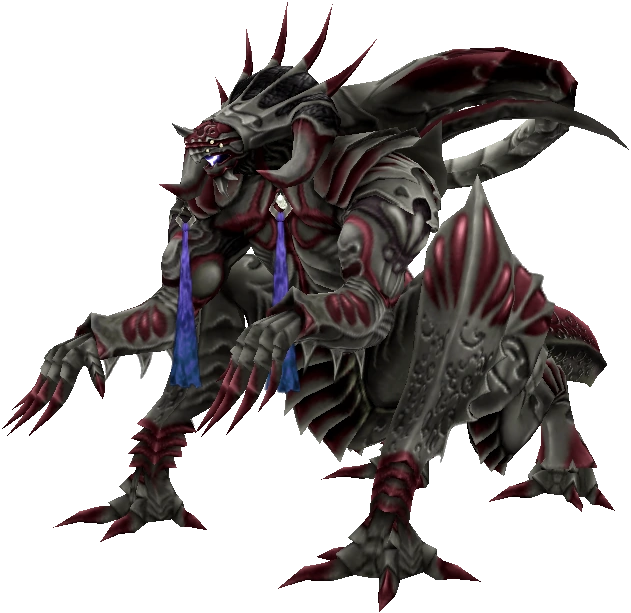
Omega Weapon(Boss Fight)

- HP: 999,999(66,666 Overkill)
- MP: 999
- Strength: 64
- Magic: 57
- Abilities: Break, Confuse, Core Energy, Demi, Nova, Shimmering Rain, and Ultima.
- Defense: 90
- Magic Defense: 80
- Agility: 38
- Elemental Affinity: Absorbs all elements.
- Status Immunity: Immune to All. You can use Doom on it, but it takes 222 turns die.
- Other: Immune to Demi, Scan, Delay, and Capture. The enemy is Tough(requires a Piercing weapon), and you can not escape. Physical and Magical Breaks should still work.
- Steal: Gambler’s Spirit(x30).
- AP: 50,000 (60,000 for Overkill).
- Gil: 20,000.
- Drop: Lv.4 Key Spheres and Equipment with Triple Overdrive and/or Break HP Limit.
- Bribe: Immune
Very similar to Ultima Weapon except for being a heavier hitter and a few upgraded attacks. Shimmering Rain hits the whole party with a significant damage margin. Nova, its most potent attack, will deal 7000 damage to the entire party when its counter reaches 30. Hellfire and Thor’s Hammer still do unique animations.
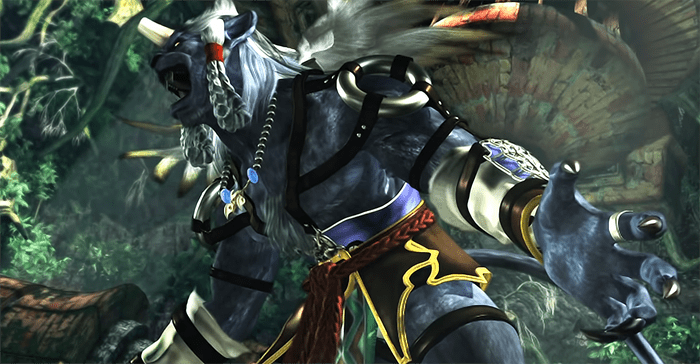
Though Omega is much more challenging, and the fight can be quite long due to the high HP, there is something essential you must do when fighting this Weapon. Have Kimahri use Lancet on it. This will give Kimahri his most powerful Ronso Skill, Nova.
This fight is taxing. Coming in without an excellent healing plan and items or skills for a long-term battle will cost you. Having Lancet and Osmose on your magic users to regain MP, so you never run out of healing is a great strategy. Learning a spell like Auto-Life will be beneficial.
Fighting Omega Weapon without the Break Damage Limit ability is possible because of its simple attack pattern and your ability to heal and defend against the attacks. Using Haste and Quick Attack will speed the fight up, but don’t ever expect it to be short.
Any Tips?
- While it may be time-consuming, the save trick should help you complete the treasure mini-game, and the x99 Warp Spheres is one of the best grabs you can possibly get.
- If you are playing on a Playstation 3, the save trick does not work. You’ll have to pay attention to music beats and anything that seems off on those chests to make it through.
- Don’t get over-confident when farming in here. Many enemies have instant-kill and nasty status effects that may ignore your resistance.
- This is a great place to max out your characters and gather lots of Gil.
- Yuna and her Aeons will be a great boon to you if you have been leveling her up.
- Once you feel strong enough, this is one of the better places to farm for items.
- Yojimbo’s Zanmato will kill both Weapons in one hit.
- Have someone with Silence Buster on to keep certain enemies danger to a minimum in the Ruins.
Trivia
- The words “Omega Weapon” are scribed in Spiran on Omega Weapon’s tail.
- Ultima Weapon is a usual additional or late-game boss throughout the Final Fantasy Franchise.
- Lord Ochu in the Kilika Jungle is the only other boss that can be bribed in FFX besides Ultima Weapon.
- It’s cheaper to bribe Ultima Weapon in the game’s original release because it only has 70,000 HP.
- Omega Weapon is also much easier in the Original release with only 99,999 HP. A lot easier.
FAQs
Question: Can I get to the Omega Ruins without the airship?
AnsweAnswer: No, the airship is a necessity for this.r: No, the airship is a necessity for this.
Question: Is Omega Weapon Hard?
Answer: Due to its large HP and high damage attacks and status effects, it can be a brutal fight.
Question: Why do I need to go to the Omega Ruins?
Answer: You technically don’t, but it is the only way to complete the Al Bhed quest.
Question: What does a Warp Sphere do?
Answer: It allows you to move to any node on the Sphere Grid.
Question: Can I fight Omega Weapon more than once?
Answer: No, the fight with Omega Weapon is a one-time deal.
Overall
The Omega Ruins are much like other final dungeons often found in RPG games, especially in the Final Fantasy Franchise. They are full of strong enemies and give a lot of Gil and AP(usually experience) to increase your party’s strength. Use the Omega Ruins in FFX to help you prepare for the more deadly fights you may face at the Monster Arena.
Visiting the Omega Ruins is a must for any completionist and a valuable item-grabbing location for anyone wanting a little bit more of an edge before entering the end-game dungeon and facing the final boss.
Good luck and good gaming.