

- Sadu FFXIV Guide – The Azim Feminist - February 6, 2023
- Deidar FFXIV Guide - February 1, 2023
- Alisaie FFXIV Guide – More than Alphinaud’s Sister - January 30, 2023
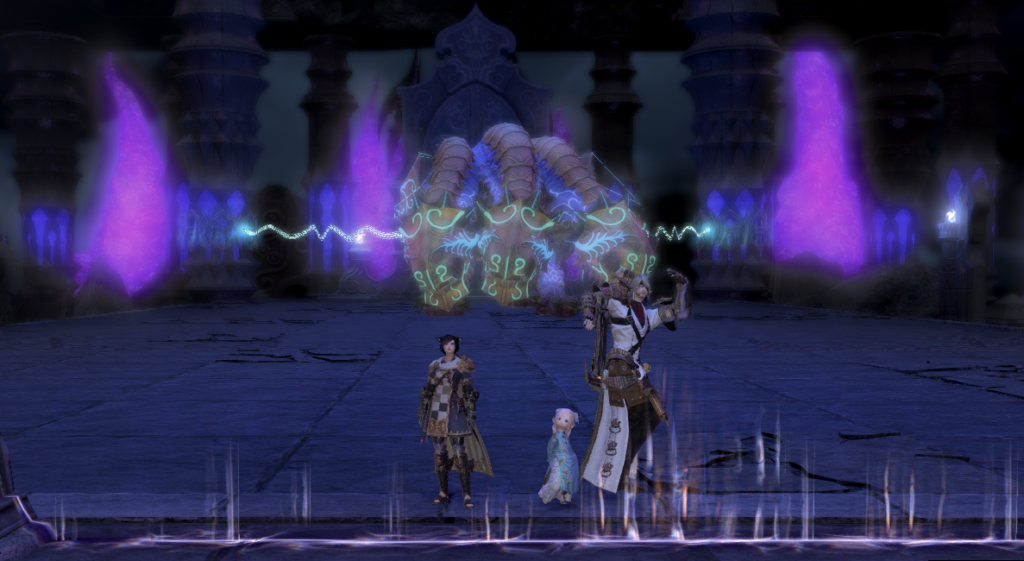
The World of Darkness is the final Alliance Raid in Final Fantasy XIV: A Realm Reborn. It is one of three Alliance Raids in that first expansion. The World of Darkness is considered the most difficult of the three with four iconic bosses that you need to defeat.
Now, some people love Alliance Raids while others find them long and boring. I enjoy them the first time and am okay with the daily Alliance Raid Roulette, but they are not something I tend to farm unless I’m looking for specific drops. However, I am quite comfortable with every Alliance Raid in the game, especially those in the first few Final Fantasy expansions.
If this is your first time running The World of Darkness, then you may struggle with the mechanics as they are much different than what you’ve faced in the game thus far. But if all goes well, you will be able to breeze through it and even direct your entire Alliance after reading this World of Darkness guide.
What is The World of Darkness?
- Level 50
- Item Level 90
- 24-Man Alliance Raid
- 120-Minute Time Limit
- Patch 2.5
If you have reached The World of Darkness in FFXIV, that means you’ve already completed the other two Alliance Raids in A Realm Reborn. So, you should be familiar with how Alliance Raids work.
There are twenty-four players – three tanks, six healers, and fifteen DPS. However, these twenty-four players will be in three separate parties. Each party will get one tank, two healers, and five DPS.
While all players work together, your priority is your party. In some FFXIV raids, this isn’t important and never comes up, but in The World of Darkness, you need to prioritize if the three parties are to be cohesive.
After each boss, there are also three chests and you can only open the chest belonging to your party. The loot is rolled on just like in dungeons, but you can only roll on the chest items belonging to your party.
How To Unlock The World of Darkness
- Required Blue Quest: The World of Darkness
- Required MSQ: The Ultimate Weapon
In order to unlock The World of Darkness, you need to complete A Realm Reborn. After you do, you can continue on a line of blue quests that will unlock the Alliance Raids from A Realm Reborn for you. These are the blue quests that you need to run through after you complete The Ultimate Weapon MSQ.
Note: A blue quest is a side quest that unlocks something.
Related read: Comprehensive Final Fantasy Quest Guide
Legacy of Allag

- Quest Giver: Outlandish Man
- Location: Mor Dhona – Fogfens – The Seventh Heaven (x:21.9, y:8.2)
- Description: An oddly garbed man visiting Revenant’s Toll has some information which might be of interest to an experienced adventurer.
- Item Reward: 3 Grade 5 Dark Matter
- Gil Reward: 1,220
After you complete The Ultimate Weapon, a whole lot of blue quests and other activities will unlock. If your eye is on Alliance Raids, then you will need to find a quest called Legacy of Allag.
The man that gives you the quest is Outlandish Man who you can find in Mor Dhona. Try not to get distracted by the plentiful blue quests in the area, but feel free to pick them up.
After you receive the quest, you can begin by talking to Rammbroes. He will take you on the journey through surveying land for crystals. You will survey twice and deliver two times. Then, the quest wraps up and you can unlock the next quest.
Sanding It Down
- Quest Giver: Rammbroes
- Location: Mor Dhona – North Silvertear – Saint Coinach’s Find (x:30.4, y:12.2)
- Description: Rammbroes wishes to proceed with the shaping of the flawless crystals.
- Item Reward: Materia IV (choice) and Allagan Silver Piece
- Gil Reward: 1,220
This isn’t a long quest but it does require some traveling. After speaking to Rammbroes, you have to travel to Ul’dah to move on and eventually talk to Biggs who will lead you through the steps you need for this quest. This is a rescue quest which does delay it a bit but you can move on to the next quite quickly.
A Performance for the Ages
- Quest Giver: Rammbroes
- Location: Mor Dhona – North Silvertear – Saint Coinach’s Find (x:30.4, y:12.2)
- Description: Rammbroes wishes to discuss the procurement of the outstanding varieties of aethersand.
- Item Reward: Potions (choice) and Allagan Silver Piece
- Gil Reward: 1,220
This gather quest is quick if you have flying in the area. You travel to Gridania to speak to Parsemontret. After a small trip to Urth’s Gift, you visit the Ixali to gather aethersand. The rest is history.
Labyrinth of the Ancients
- Quest Giver: G’raha Tia
- Location: Mor Dhona – North Silvertear – Saint Coinach’s Find (x:30.5, y:12.1)
- Description: G’raha Tia is eager to begin the expedition to the Crystal Tower.
- Item Reward: Daily Alliance Raid Roulette
- Gil Reward: 3,752
This is where things get interesting. Not only do you get to go on your first Alliance Raid, but you also get to speak to G’raha Tia. The first three Alliance Raids take place in the Crystal Tower, which you unlock during this quest.
All you have to do is talk to G’raha Tia and he’ll unlock The Labyrinth of the Ancients. This is the first Alliance Raid. But I’m not going to do a walkthrough of it today.
For Prosperity
- Quest Giver: G’raha Tia
- Location: Mor Dhona – North Silvertear – Saint Coinach’s Find (x:30.5, y:12.1)
- Description: G’raha Tia is ready to address the assembled fellowship of NOAH.
- Item Reward: Materia IV (choice) and Allagan Silver Piece
- Gil Reward: 3,752
After you complete The Labyrinth of the Ancients, you can unlock For Prosperity. The quest is short and as far as I can remember, all you have to do is watch cutscenes or skip them and move on.
Syrcus Tower
- Quest Giver: Rammbroes
- Location: Mor Dhona – North Silvertear – Saint Coinach’s Find (x:30.4, y:12.2)
- Description: Rammbroes is frustrated over NOAH’s lack of progress on the Crystal Tower.
- Gil Reward: 3,752
Now it’s time to visit the second Alliance Raid, which I find more interesting, though more time-consuming than the first.
After speaking to a few NPCs, you can hop right into the Syrcus Tower. Again, today is not the day to discuss any raid other than The World of Darkness in detail.
The World of Darkness
- Quest Giver: Rammbroes
- Location: Mor Dhona – North Silvertear – Saint Coinach’s Find (x:30.4, y:12.2)
- Description: Rammbroes has a furrowed brow and the look of one with ill tidings.
- Gil Reward: 3,752
Finally, the quest that will unlock The World of Darkness, aptly named. Though this isn’t the end of the trail of blue quests that started with Legacy of Allag, it is where I will end today as it is time to talk about the raid.
How To Complete World of Darkness
The World of Darkness is the first Alliance Raid that I consider difficult the first run through. The new mechanics and higher-tier bosses make this frustrating if you don’t know what you’re doing.
Objective 1: Clear the Eye
The first step is to beat up any small enemies that stand in your way. This is typical dungeon clearing and it doesn’t last long. It is used to flesh out dungeons and give players a break between bosses.
Objective 2: Angra Mainyu
In my opinion, this is the most frustrating boss you’ll face for a long time. This is taking my own experience, and those of other players I’ve talked to, into account.
The best generic advice I can give you is to pay attention to what he is casting and stay behind him when possible unless you’re the tank.
For more help, which I recommend, memorize his abilities and the typical protocol for each.
Double Vision
- White Debuff: Brand of The Sullen, a sad face by your health bar
- Red Debuff: Brand of the Ireful, angry face by your health bar
Double Vision is an unavoidable attack. However, when he casts it, half of the room will turn white and the other half will turn red. Each side gives a different status effect.
The effect isn’t important as far as debuffs go but it is crucial that you alternate the color you stand on each time he casts it.
For example, if you are in red the first time he casts it, run to white the second time then red again the third time.
Stare
Stare is a line AoE that affects the area directly in front of Angra Mainyu. If you’re not a tank, there’s a good chance this will kill you so stay far away from the AoE.
Avoid the need for jumping away quickly by staying behind him.
Mortal Gaze
Mortal Gaze is a Medusa-esque ability. If you see him cast it or if a magic eye appears on him then look away. If you don’t, you will receive a debuff that will kill you in ten seconds.
The only way to save yourself if you take on the debuff is to stand in a lit-up circle. I recommend not chancing it so you can devote your time to doing damage/healing rather than saving yourself.
Roulette/Hourglass
This ability can be fun and is easy to avoid. When it happens, hourglasses will appear on the map and a light will tick around the room. While this happens, you need to kill the hourglasses quickly.
After you do, the light will stop and after a few seconds, or less, everyone standing in the area will die. The faster you kill the hourglasses the more time people will have to escape the area.
Level 100 Flare
This is tricky and always causes new players to run around frantic. As confusing as it looks, it’s actually simple. One player will be bound and other players will be tethered.
This is where the math comes in but you can skip it if you all run out of the AoE quickly. You see, if the level of all of the players affected is a multiple of two (an even number), everyone will die.
Since this is a lot of cohesiveness and communication, it’s best to run away.
Level 150 Death
This is similar to Level 100 Flare. One player gets a purple orb over them and others are tethered. However, the only difference is that it works with multiples of 3.
Again, if everyone runs out, you’ll have your best chance of surviving.
Objective 3: Clear the Nape
Again, this is a simple clear mission. It’s rare that anyone will die so you can help your Alliance clear the area and then move on to the next boss.
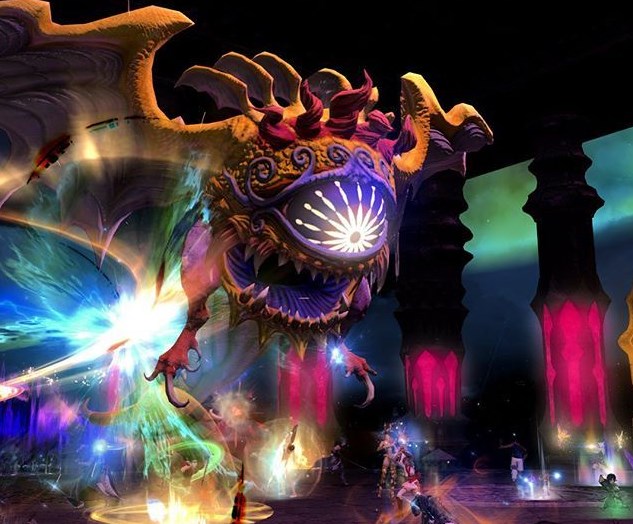
Objective 4: Five-Headed Dragon
The Five-Headed Dragon may have had early players scratching their heads, but now that the mechanics are well-known, it’s a simple pass.
If you’re familiar with hydras, then you probably already have a good notion as to how to defeat him. Still, it’s good to learn his abilities so you don’t need to be resurrected.
White Breath
White breath is super easy to dodge if you’re not a tank. Tanks can avoid it if they are close to the narrow part near him, which they likely will be anyway. This is a cone attack.
Purple Stack Marker
This is an attack that marks a random player. If you see it, go against everything you’ve been taught thus far and stand on the person with a marker to share the damage and avoid death.
This is a mechanic you will see time and time again going forward.
Yellow Separate Marker
The yellow mark marks someone just like the purple one does, only this one is flower-star-shaped. This time, it’s the opposite of the purple marker, as everyone should move away from this person. Or more importantly, the marked person should move away from everyone.
Poison
The poison will appear as Poison Slime on the ground. Again, go against what you know and stand in the slime if no one else does as if you don’t, more will appear.
If more appear, then soon, a huge slime will form and silence everyone for 10 seconds. Take one for the team if you have to and stand in that slime.
Ice
The ice attack involves falling icicles that explode and create white puddles on the floor. You do not want to get hit by this so as soon as you see the puddle begin to form, move away as it will grow for a while.
If you get stuck in it, you’ll take damage and be frozen for 20 seconds.
Firebirds
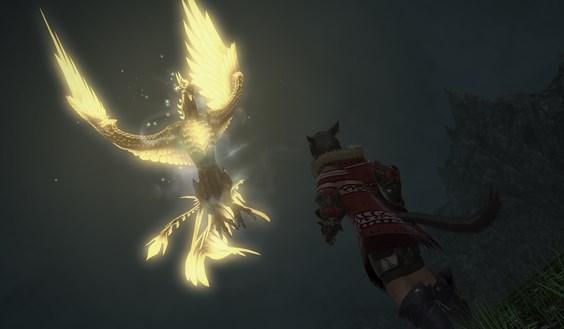
The firebirds are adds that show up and tether to random players. The player will get a debuff and take continuous damage.
Work together and take turns with the firebirds, by running over another player and passing it on, so no one dies.
Heatwave
When you see this cast, stop moving. Yes. That’s all. Sure, you can survive it even if you are moving around, but you will take damage only if you attack or move.
So sheath that weapon and wait it out for best results.
Prominence
Prominence spawns white orb adds that should be killed as soon as possible. Focus them over the boss when they appear to ensure that the least amount of damage is dealt.
Discordance
This is probably the most important step in defeating the dragon. All five heads will become individually targetable. If you know anything about hydras, then you know what to do.
Kill the heads and kill them quickly. If you can last hit them in quick successions, the likelihood of someone dying is greatly reduced as the attacks from the hydra become quicker with each loss of a head.
Objective 5: Clear the Jaws
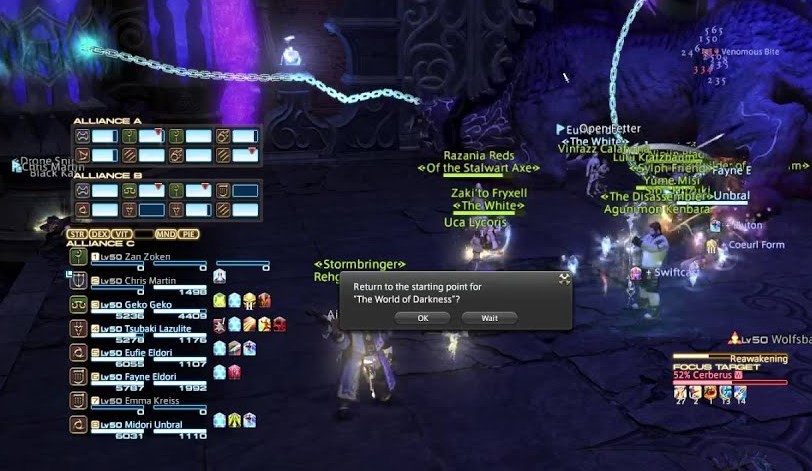
This is the first time that each party has a different job. There are three paths to choose from. Up at the top, you can see which Alliance you belong to. Once you figure this out, you’ll know where to go.
Alliance A takes the first path on the left, Alliance B takes the second in the middle, and Alliance C takes the third path on the right.
After you pass through, you will notice a double platform. The lower level has jump pads and the upper level spawns enemies.
However, the jump pads only activate if someone stands on the platform up above. So if everyone falls off, then no one can get back up.
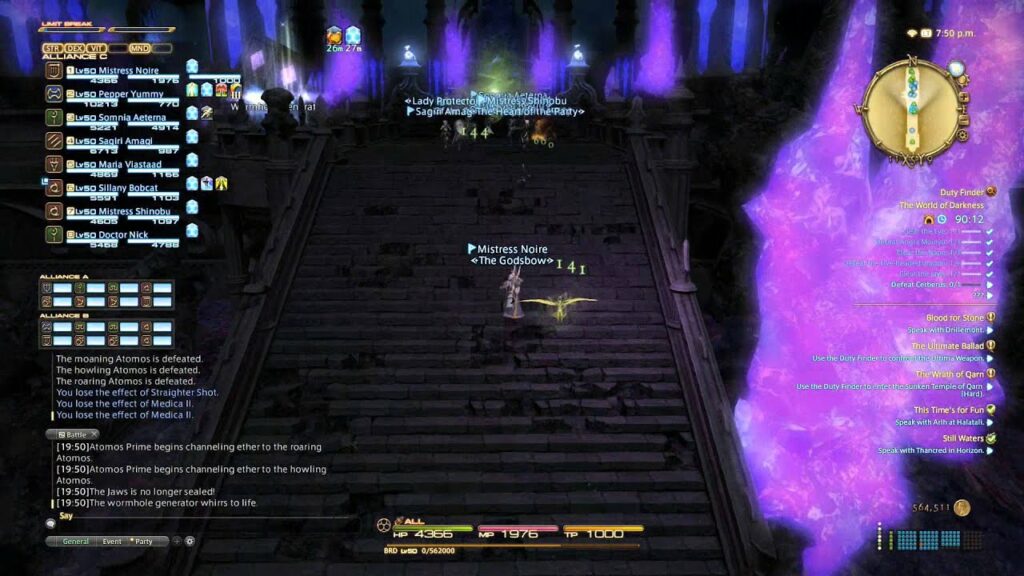
The enemy that spawns is the Atomos, and he will mark a player, and eat them, and everyone around them, Kirby-style. So avoid marked players and help them get back up via the jump pads.
Other than that, all you need to do is avoid conal attacks and stand on Shockwave when it is cast. After you deplete the Atomos’ health, he may revive.
To pass through this area, the three Alliances will need to do enough damage to the Atomos’ in their area to kill the Atomos Prime, which is tracked in the Duty List.
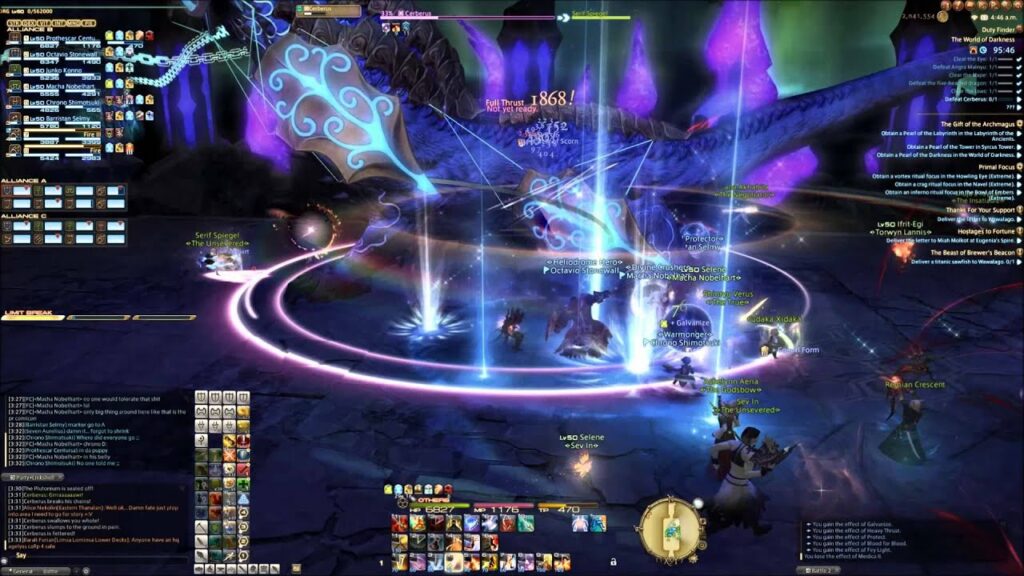
Objective 6: Cerberus
Cerberus is the boss that I look forward to the most in The World of Darkness. This isn’t the first time that each party has their own task but it’s the first time that each party has a completely different task.
Though it’s not official, there’s an unsaid rule that Alliance A has to kill the adds, Alliance B has to do the belly-mechanic, and Alliance C has to do the chain mechanic.
So, follow along with your party until you learn what you need to do on your own. General tip? Stick to his sides and avoid AoE.
Now, the names of the attacks don’t matter on Cerberus, but the execution does matter.
So, here are the steps to defeat Cerberus depending on your Alliance.
Alliance A
- Kill Adds, but not the Gastric Juice
- Keep Cerberus near the chain wall to make life easier for the chain gang
- If you’re a tank, lead the Wolfsbane away
- Sorry, this is the boring job
Alliance B
- Absorbs Gastric Juice – instead of avoiding or killing the Gastric Juice, you need to go to it. If you do, you’ll get morphed into a tiny version of yourself.
- Get Stuck In Slime Puddles – after you are tiny, find the Slime Puddles and stay put, don’t worry, you won’t have a choice.
- Go In The Belly And Attack – after you are in the slime puddles, you will get eaten by Cerberus. If you’re not tiny, you will die. When inside, attack the stomach walls and avoid adds if you’re a DPS. Your team needs you on walls.
- Get Vomited – that’s it. You get vomited and continue helping your team attack Cerberus and adds. If the chain gang doesn’t do their job, then you’ll be going for round two. Let’s hope that doesn’t happen.
Alliance C
- Help with Adds – you need to help with adds until the belly gang gets vomited out.
- Chain Him – now is your time to shine. Whenever Cerberus begins casting Reawakening, which is an obvious cast, go get the chains in front of him and attach them to him. It sounds overwhelming at first, but all you do is click on the chains then click on him. If you do your job in under a minute, then the rest is history.
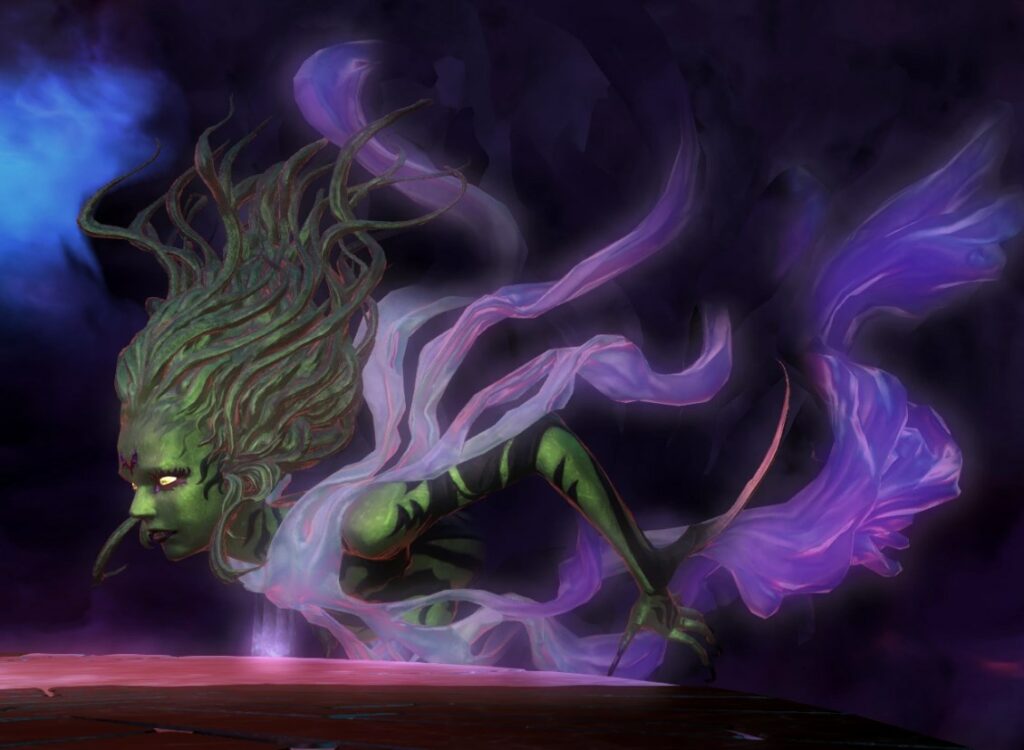
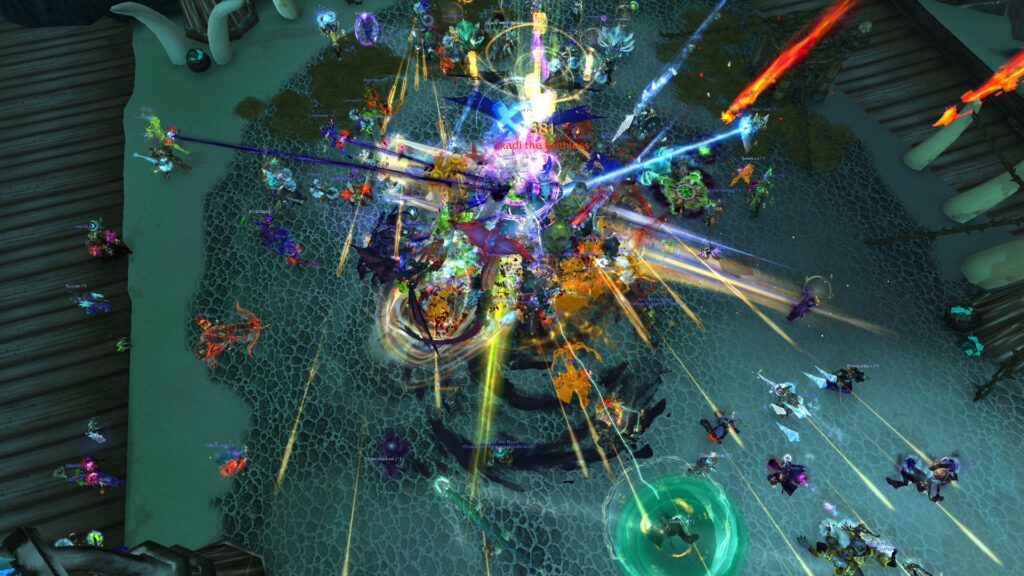
Objective 7: Cloud Of Darkness
It’s time for the main event. You’ve made it this far and I have faith you can make it to the end. During this fight, you should probably use LB3 as often as possible as a DPS as you may be able to cast it twice.
Don’t save it if you don’t have to, even if other newer players complain when you use it too early. Other than that, following the specific mechanics are crucial to your success. It is possible to wipe completely when the boss has very little health left, so don’t get lazy.
Particle Beam
Arguably the funniest and most humiliating effect in the game. If you get marked by her with a large AoE circle above your head, you have to turn around and hit the ground running until it’s gone.
Stay away from other players and don’t stop running as you will be chased by lasers until the effect is gone.
Zero-Form
This unpredictable move will keep you on your toes. The Cloud of Darkness will move to a random side of the map and cast a giant laser beam. If you’re not directly in front of her, you won’t get hit.
Comets
This takes teamwork because there will be multiple circles with comets slowly falling towards them. This happens a lot and when it does, just one player needs to step in each circle.
Make sure someone is in each circle or everyone will take damage.
Clouds and Storms
If the boss goes all Kirby (yes, another reference) and sucks in air then it’s time to kill some adds. Kill clouds that move towards her as each one that makes it to her will do more damage later on to players
. If one person stands in front of a cloud, it will slow down and give you more time. But the storms need at least three players to slow them down. But in short, just kill them.
Flood of Darkness
After the Storms and Clouds are gone and the next phase begins, you’re going to see why not letting them get to their queen mattered.
A large AoE will overcome the stadium when she menacingly says, “Darkness take you all!” The more she consumed, the more damage it will do.
Shadowlurkers
Just kill these guys as their debuff is annoying.
Hybercharged Clouds
If someone marked Alliance areas for you at the beginning of the fight, good for you. If not, then try to get your Alliance in one single hexagonal area while the other two Alliances do the same.
This isn’t crucial but it’s the best way to evenly split into three. After a few seconds, the shape becomes tangible and you are unable to escape until you kill the enemies inside of it.
If all three clouds aren’t defeated in time, then everyone dies. Yes. This is one of the last things you have to do and it’s the most important mechanic of all, which is why separating evenly is so important.
This always feels like a race to me, to find out which Alliance has the most DPS. It feels pretty fly if your Alliance is the first to break free from their prison. However, then you get to bite your nails as your own fate rests in the hands of the other two alliances.
World of Darkness FAQs
Question: What Drops From The World of Darkness?
Answer: Demon armor drops from The World of Darkness. This is strong lvl 50 armor, but people tend to use it for glamor more often than not. Cloud of Darkness also drops two Triple Triad cards and a Puff of Darkness Minion.
Question: How Long Does The World of Darkness Take?
Answer: The World of Darkness takes around 30 minutes on average. So if you don’t have at least an hour to spare, don’t attempt it as it just might take that long. Sometimes, it can be cleared in 20 minutes or less. But do not count on it.
Question: Can I Solo The World of Darkness?
Answer: No. Because it’s an Alliance Raid, you need at least three players to enter. Once upon a time, you couldn’t do it unsynched but now that you can do it unsynched, it is possible with three players, but not one.
The World of Darkness
Is there anything else to know about The World of Darkness? Not really. Every boss in this raid will likely give you trouble at least once. It may even be months after the first time you run it.
Don’t get frustrated with newbies who don’t take time to read a guide. Most people wing it the first time and only read guides after they get frustrated.
This isn’t the same as a trial, which is extremely difficult to clear without full cohesiveness and know-how. This is an early-game Alliance Raid.
So be patient and learn as you go. Listen to your Alliance and you’ll get through it in time.