

- Sadu FFXIV Guide – The Azim Feminist - February 6, 2023
- Deidar FFXIV Guide - February 1, 2023
- Alisaie FFXIV Guide – More than Alphinaud’s Sister - January 30, 2023
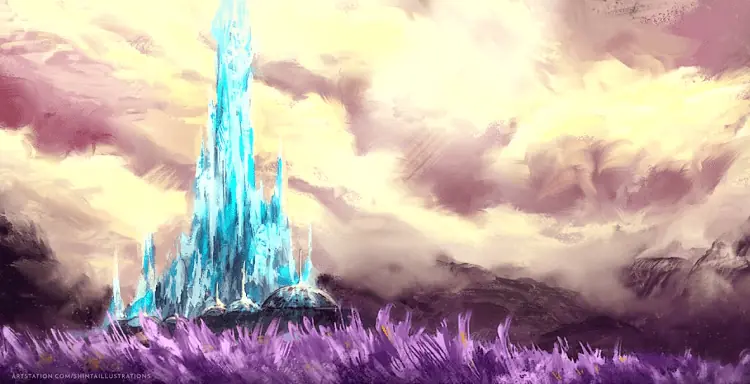
A Crystal Tower FFXIV guide refers to the first Alliance Raids in the game. They are far from my favorite Alliance Raids (NieR raids are the best,) but they do have a few great bosses and cutscenes.
The more Alliance Raids I completed, the better I understood how they worked. They’re just huge dungeons. I’m so glad the main scenario quest makes you go through some of these so that everyone gets to experience them. There are so many other fun things that are easy to miss.
These raids have been around since Patch 2.1 but have changed many times in the past. So if you haven’t done them since patch 2, you probably need a refresher. If you just started playing and have made it this far, it’s a good idea to learn the basics of the Crytal Tower.
Crystal Tower Overview
- You must complete The Ultimate Weapon to unlock Alliance Raids.
- There are three Crystal Tower Alliance Raids:
- Multiple important NPCs are introduced in the Crystal Tower questline.
- All tanks are main tanks in the Crystal Tower.
- You can enter an Alliance Raid with up to eight players but form a custom game with up to 24.
- Crystal Tower glam includes Amon’s gear and the popular Demon gear.
Quests to Crystal Tower
There is a short line of quests that unlock the first Crystal Tower raid. Then a few more to unlock each following raid. None of them are hard and are more about the cutscenes than the actions you take during the quest.
This questline is so simple that I only remember small bits and pieces. I was in a hurry to reach the Alliance Raids because I had friends waiting on me to queue up that night. So I know it only took me one evening to complete this line.
Legacy of Allag
- Location: Mor Dhona
- NPC: Rammbroes
To unlock this quest, you must finish the A Realm Reborn MSQ, The Ultimate Weapon. At one time, you had to do FATEs for this quest, but now, you just talk to people, survey destinations, and fight a few simple enemies.
I can’t decide which I prefer. It’s easier now, but it’s nice to do the FATEs if you have a party to help out. Otherwise, it can be difficult due to the level sync and spawn timers.
Sanding it Down
- Location: Mor Dhona
- NPC: Rammbroes
This is another simple quest that follows Legacy of Allag directly. All you have to do is talk to people for this quest. You have to fight a few more bad guys, but it’s worth it, as the Wedge/Biggs introduction is absolutely amazing.
A Performance of the Ages
- Location: Mor Dhona
- NPC: Rammbroes
This may be the simplest quest of all. It requires more fighting, but there’s nothing confusing to take care of. This is the first quest that G’raha Tia is involved in (unseen this time), another exciting addition to the MSQ.
At the time, I had no idea how important G’raha Tia would be later in the MSQ. I may go back and rewatch these cutscenes so I can connect again to the way he was initially portrayed.
Labyrinth of the Ancients
- Location: Mor Dhona
- NPC: G’raha Tia
This is the quest that unlocks the first Crystal Tower raid. Just go to the southeast gate and enter. Alternatively, you can use Duty Finder to enter. Feel free to enter as soon as possible, but I recommend not being a tank unless you’re comfortable being main tank.
For Prosperity
- Location: Mor Dhona
- NPC: G’raha Tia
This is the easiest and simplest quest in the Crystal Tower Line. You just have to watch a cutscene, which is fun for those who love the story and easy to skip through for those who don’t.
Syrcus Tower
- Location: Mor Dhona
- NPC: Rammbroes
This is the quest that unlocks the second alliance raid. It involves more cutscenes that lead you to the second phase. These are interesting to watch but are quite long-winded, especially since there’s a lot of running around in between.
The World of Darkness
- Location: Mor Dhona
- NPC: Rammbroes
There’s no quest in-between the second and third Crystal Tower unlock quests. So you just have to finish Syrcus Tower then you do this quest to unlock the last in the line. It’s also quite easy and primarily involves cutscenes.
The Light of Hope
- Location: Mor Dhona
- NPC: Rammbroes
You have to complete this to unlock the next main quests. You get a title and don’t have the quest clogging up your journal. It’s also super simple, so I would go ahead and wrap it up.
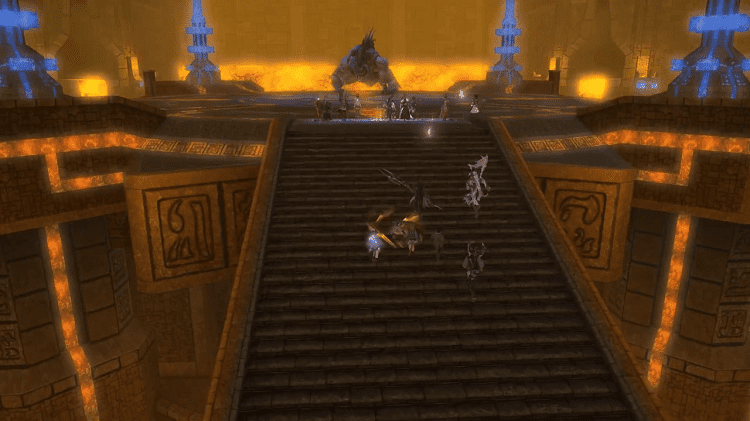
Labyrinth of the Ancients Boss Guide
Labyrinth of the Ancients is the easiest Alliance Raid in the game. You can easily go in blind if you’re alone, even with a full party of blind players. Just follow the other alliances.
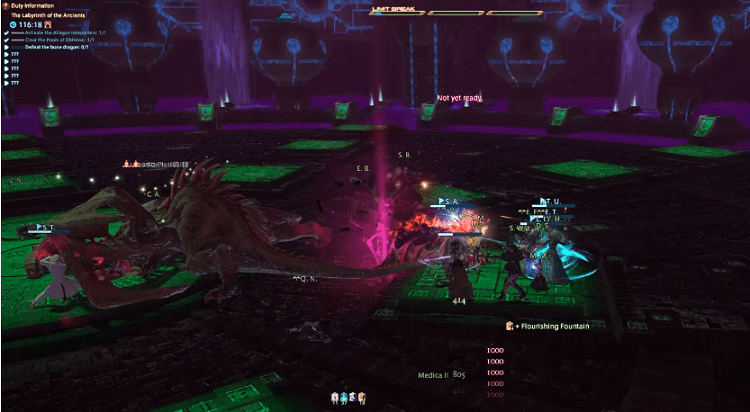
Bone Dragon
Start the raid by following the alliances to the left to meet Bone Dragon. There will be a few small enemies before that you can ignore the mechanics for, but Bone Dragon is the first real boss.
It’s best if one tank holds the dragon while others pull adds and have DPS AoE them. During this fight, Bone Dragon dies three times and comes back to life. Make sure not to let the skeletons reach the boss.
If the skeletons reach the boss, they will do damage to everyone. The more skeletons, the more damage. On the third death, focus the dragon instead of the adds to end things quickly.
Of course, you can skip the mechanics, which I find most alliances end up doing. But it slows things down, so I always try to get at least my alliance to focus the adds.
Atomos
This is a mini-boss, but it’s worth going over the mechanics. The Alliances will split up for this fight. Alliance A should go left, B should go to the center, and C should go right. Wait for everyone to start the fight.
When you’re on your platform, make sure at least four players are standing on the glowing circle, and the rest are fighting the boss. There are best ways to do this, but it’s hard to mess up as long as you do this. Even if your boss dies, stay on the platform till all three die.
Thanatos
Everyone fights Thanatos together. However, only one Alliance will be able to attack at a time. If you are ghost-like, attack the boss. If you’re not a ghost, then attack the adds instead.
There’s also a Magic Pot ally that healers should keep healed up to keep the buff for boss attackers. That’s all there is to this fight, so it’s kind of a chill boss.
Vassago
Vassago is another mini-boss. There are three Vassage, so one tank should take one Vassage and their party/Alliance should attack it. Keep the bosses separate to avoid huge damage.
Attack your boss unless adds spawn, then quickly kill them or else suffer raid-wide damage. Finally, a bomb guy will spawn in the center at the fight’s end. Take him out.
King Behemoth

King Behemoth is a simple fight. If you get targeted, take the comet away from the boss. Avoid meteor storms by hiding behind the comet that has fallen. If you don’t hide, you will die.
Focus adds when they spawn because they destroy the comets you need to hide behind. I don’t know how many times I have zoned out here and failed to hide behind the fallen comet.
Phlegethon
Before you begin the fight, look at the circles on the outside of the arena. These are safe zones. Alliance A’s safe zone is to the left, Alliance B’s the center, and Alliance C the right. Phlegethon should stay toward the center of the room. The add mechanics and AoEs are simple. Kill adds and avoid AoEs.
However, when he casts Ancient Flare, head to your safe zone. If you don’t you will die. I’ve only seen one survival, which is so rare that I believe it could have been a glitch. When you get to your safe zone, kill the adds then go back to the boss. That’s all there is to it.
Syrcus Tower Boss Guide
The Syrcus Tower isn’t bad once you play it a time or two. I find it simpler than Labyrinth of the Ancients, but maybe that’s because I seem to get this one in daily Alliance Raids every time.
One thing I think about the “easier” raids is that they are also more boring. This is my least favorite Alliance Raid, which is why I zone out for half of it. Turns out, you can autopilot FFXIV sometimes.
Scylla
Scylla has a lot of mechanics to learn, but you can get by without knowing most of them as long as someone knows what they’re doing. Just pay attention to your surroundings.
For example, pillars of lightning appear that each Alliance will stack at later. Element balls will attack random players, with each element having a purpose. Lighting should be taken to the pillars. Ice should be thawed with those that have fireballs.
If Scylla casts Daybreak and the entire team is petrified, that’s the end of Phase One. If you haven’t charged your pillars, you may wipe. Otherwise, you’ll be fine as long as you stack in the pillars correctly.
The only new thing added to this phase is that you will need to stand in puddles when she casts Ancient Flare.
Glasya Labolas
Take this boss to the center and kill adds as fast as possible. Dodge AoEs and focus adds to make it through the first half of this fight. If you have a huge damage output, you can skip this phase.
If not, bear with it. All you have to do is hop to the smaller platforms to avoid dying at the beginning of this phase. You can split up how you like, but generally, alliances stick together to kill adds in this phase.
Then jump back to the center and take out the boss. Make sure not to stand on platforms that have electrical currents running through them.
Amon
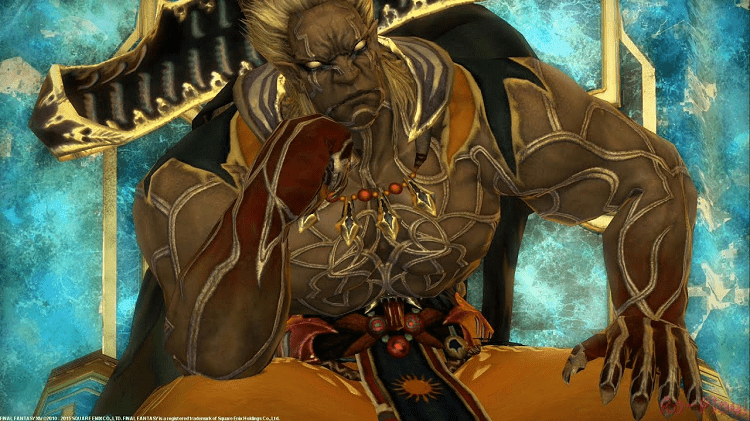
For Amon, dodge AoEs, and if you get Thunder Forte cast on you, don’t let it overlap with others. Unless you’re main tanking, stay behind Amon at all times to avoid extra damage.
Make sure you focus on adds, and if you get purple orbs tethered to you, run them through Kum Kums to make them easier to kill. If you turn into a fire frog, find someone to unfreeze.
Finally, if three people are turned to ice during Curtain Call, hide behind them to avoid the damage. Choose ones that aren’t too close to him. That’s the end of that fight, the easiest one in Syrcus Tower, in my opinion.
Xande
Take Xande to the center of the arena and avoid his AoEs. If there are yellow orbs, have one person stand in each but make sure no more than that because the more people, the more damage.
After this phase, Xande goes to his throne, and three attractors adds appear that you should kill. Then a big one appears; kill it fast. When Xande comes back, he marks people from each party. Stack with your party to share the damage.
Stack close to him, but don’t overlap the circles. This will raise you up. As soon as you are brought back down, leave the area. Then for the final phase, the previous mechanics are repeated.
The World of Darkness Boss Guide
The World of Darkness can trip up most first-timers and some that have played through it many times. My first experience was torture, but if most of you know what you’re doing, it’s not tough to learn.
I am ashamed that I nearly ran out of time during the final boss the first time I did this. Others said there were new mechanics, and that’s why, but I’ll never forget the horrors of that day.
Angra Mainyu
I hate this guy because it’s the first time I saw these mechanics, and it confused me. He splits the room into red and white. Pick one to stand in, then the next time he casts it, stand on the opposite color.
This is so simple, but I had no idea what the point was the first time. The second one that got me was Mortal Gaze, which means you have to look away from him, or you will die unless you quickly stand on the glowing platform.
When the hourglasses appear, kill them. But make sure you’re not in the area the last hourglass is destroyed (the floor will be white.) If you get tethered to someone in red or purple, run away from them.
There’s math involved in this, but it’s necessary if you just make sure only one player is in the circle. If some people aren’t running out, you can do the math, but I just shout to run out if no one is doing so.
Five-Headed Dragon
This hydra isn’t a tough one if you follow the mechanics at all. Don’t stand on ice swirls and kill the adds for the first part of the fight. When his heads get their own health bars, kill all of the heads with AoEs.
If someone is marked, make sure a few people stack with them, or they will die. If a player is tethered with Red Bird Tether, then they should take it to someone else. That should be all you need to know.
Howling Atomos

I hate this one for some reason. For this, each Alliance gets its own boss. Stack on one side of the boss and wait to see who gets marked. When someone gets marked, they go to the other side, are sucked in, and spit off the platform.
When this happens, someone must stand in the lighted circle to let them back up. Finally, when the boss casts Shockwave, stand under him, or you’ll get knocked off the platform.
Cerberus
This is my favorite Crystal Tower boss. There are so many mechanics, and everyone has to work together. Alliance A must kill the adds that spawn. B must get small and get eaten. C must chain the dog up.
But let me break that down. Alliance A has the easiest and most boring job. They take care of the Wolfsbane adds. Then Alliance B must stand next to Gastric Orbs so they become tiny.
When you are tiny, you should stand in the Purple Goo so you will get eaten and can attack the inside of the dog’s belly. Finally, when the dog falls to the grown, Alliance C must take the chains at the end of the arena and attach them to the boss.
If you can do this, things will run smoothly. Avoid attacks by staying on his side when attacking him and near your teammates when he roars.
Cloud of Darkness
Cloud of Darkness is simple if everyone works together. The funniest ability is when someone gets targeted with crosshairs because they must run away from everyone on the other side of the area to avoid dealing damage to the team.
If the boss moves, pay attention to where she moves because she will shoot a laser. So don’t stand in front of her. When yellow circles appear, at least one person should stand in each of them.
If there are clouds, kill them before they reach her to avoid heavy damage. Then, if there are three stationary clouds, split up (usually by alliance) to fight them. These mechanics are all repeated, with more adds spawning if you take longer to defeat the boss.
FAQs
Question: Where is the Crystal Tower?
Answer: The Crystal Tower is in Mor Dhona. You can see it by heading to the entrance to one of the dungeons (particularly Labyrinth fo the Ancients), which you can see on the map.
Question: Why is the Daily Alliance Raid Always Crystal Tower?
Answer: You keep getting Crystal Tower raids because they are the ones the most people have unlocked. So it’s a quick match find. Since there are 24 players, it’s likely someone doesn’t have any other Alliance Raids unlocked.
Question: Do You Have to Do the Crystal Tower?
Answer: Yes. To start the level 50 quest A Time to Every Purpose, you must complete all three of these Alliance Raids and the last blue quest in the Crytal Tower quest line.
Crystal Tower Learning Curve
The Crystal Tower becomes easy once you learn it. However, each boss in The World of Darkness requires at least a few players to know exactly what they are doing, or else your entire 24-man, a three-alliance pool of players will fail.
The first two were pieces of cake while the last one left me struggling. But now, with daily Alliance Raids forcing all three of them so often, it’s become second nature to breeze through the Crystal Tower.
While the Crystal Tower raids will never make me excited about the game, every Alliance Raid in FFXIV is good. I love the concept of 24 people working together and that all began with the Crystal Tower.